fedora 35 server + openbox いまさら [fedora系]
fedora 35 server + openbox いまさら
あいもかわらずlinuxであそんでいます。
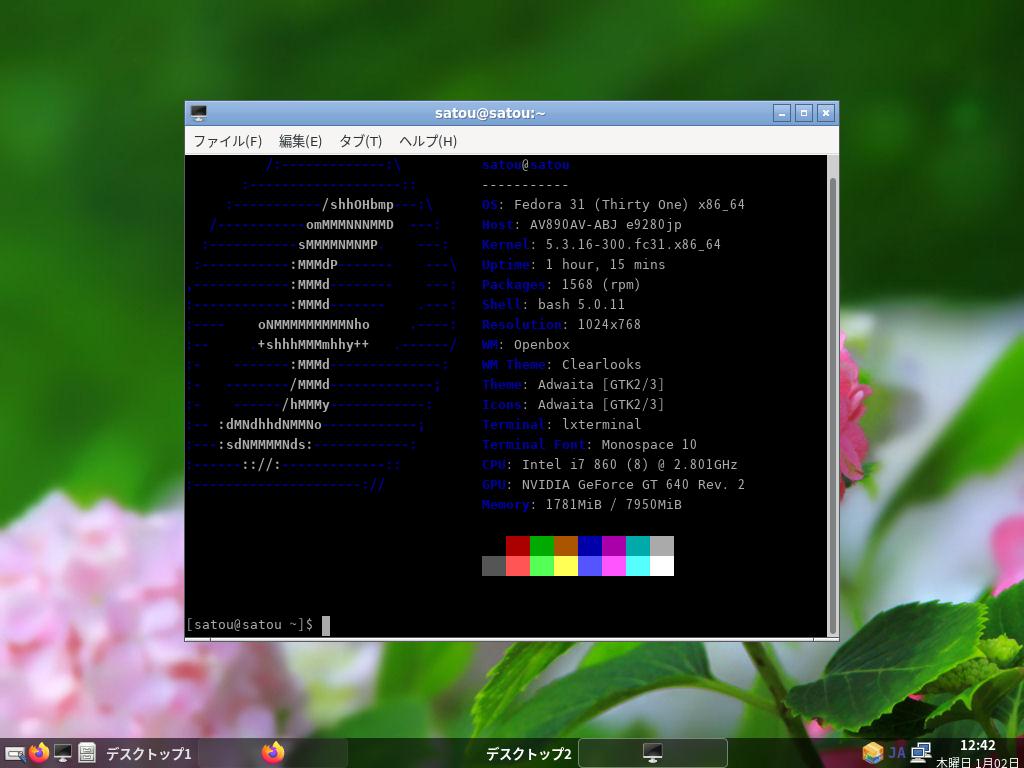
今回の私のパソコン環境は os fedora 35 server openbox
CPU: AMD Ryzen 7 5700G with Radeon Gra
GPU: AMD ATI 08:00.0 Cezanne
Monitor: HDMI接続
Fedora-Server-dvd-x86_64-35-1.2.iso
Fedora-Server-dvd-x86_64-35-1.2.isoをgnome-disksでusbメモリーに書き込み起動させた。
Fedora-Server のインストールは他のosにくらべてなれが必要でしょう。
私の場合gpt形式のssdを使っています。
あらかじめssdの未割り当ての領域を66GiBを用意した。
インストール画面でパーティションの項目で、カスタムを選択。
次の画面で、プラスアイコンをクリック
マウントポイントを/boot/efi
容量を1GiB
さらに、プラスアイコンをクリック
マウントポイントを/
容量を65GiB
以上でパーティションの設定終了。
あとはネットが接続されているか・・・、rootの設定、ユーザーの設定、地域の設定をして終了。
インストール終了して、再起動。
Fedora-Serverなので、ログイン画面はテキスト形式。
login: ユーザー
passwd: 〇〇〇〇
sudo dnf update
passwd: 〇〇〇〇
sudo dnf group install "Basic Desktop"
sudo dnf install nano leafpad lxterminal pcmanfm firefox
sudo systemctl set-default graphical.target
sudo reboot
これより普通のopenboxの画面で作業。
rpmfusionのインストール
sudo dnf install https://mirrors.rpmfusion.org/free/fedora/rpmfusion-free-release-35.noarch.rpm https://mirrors.rpmfusion.org/nonfree/fedora/rpmfusion-nonfree-release-35.noarch.rpm
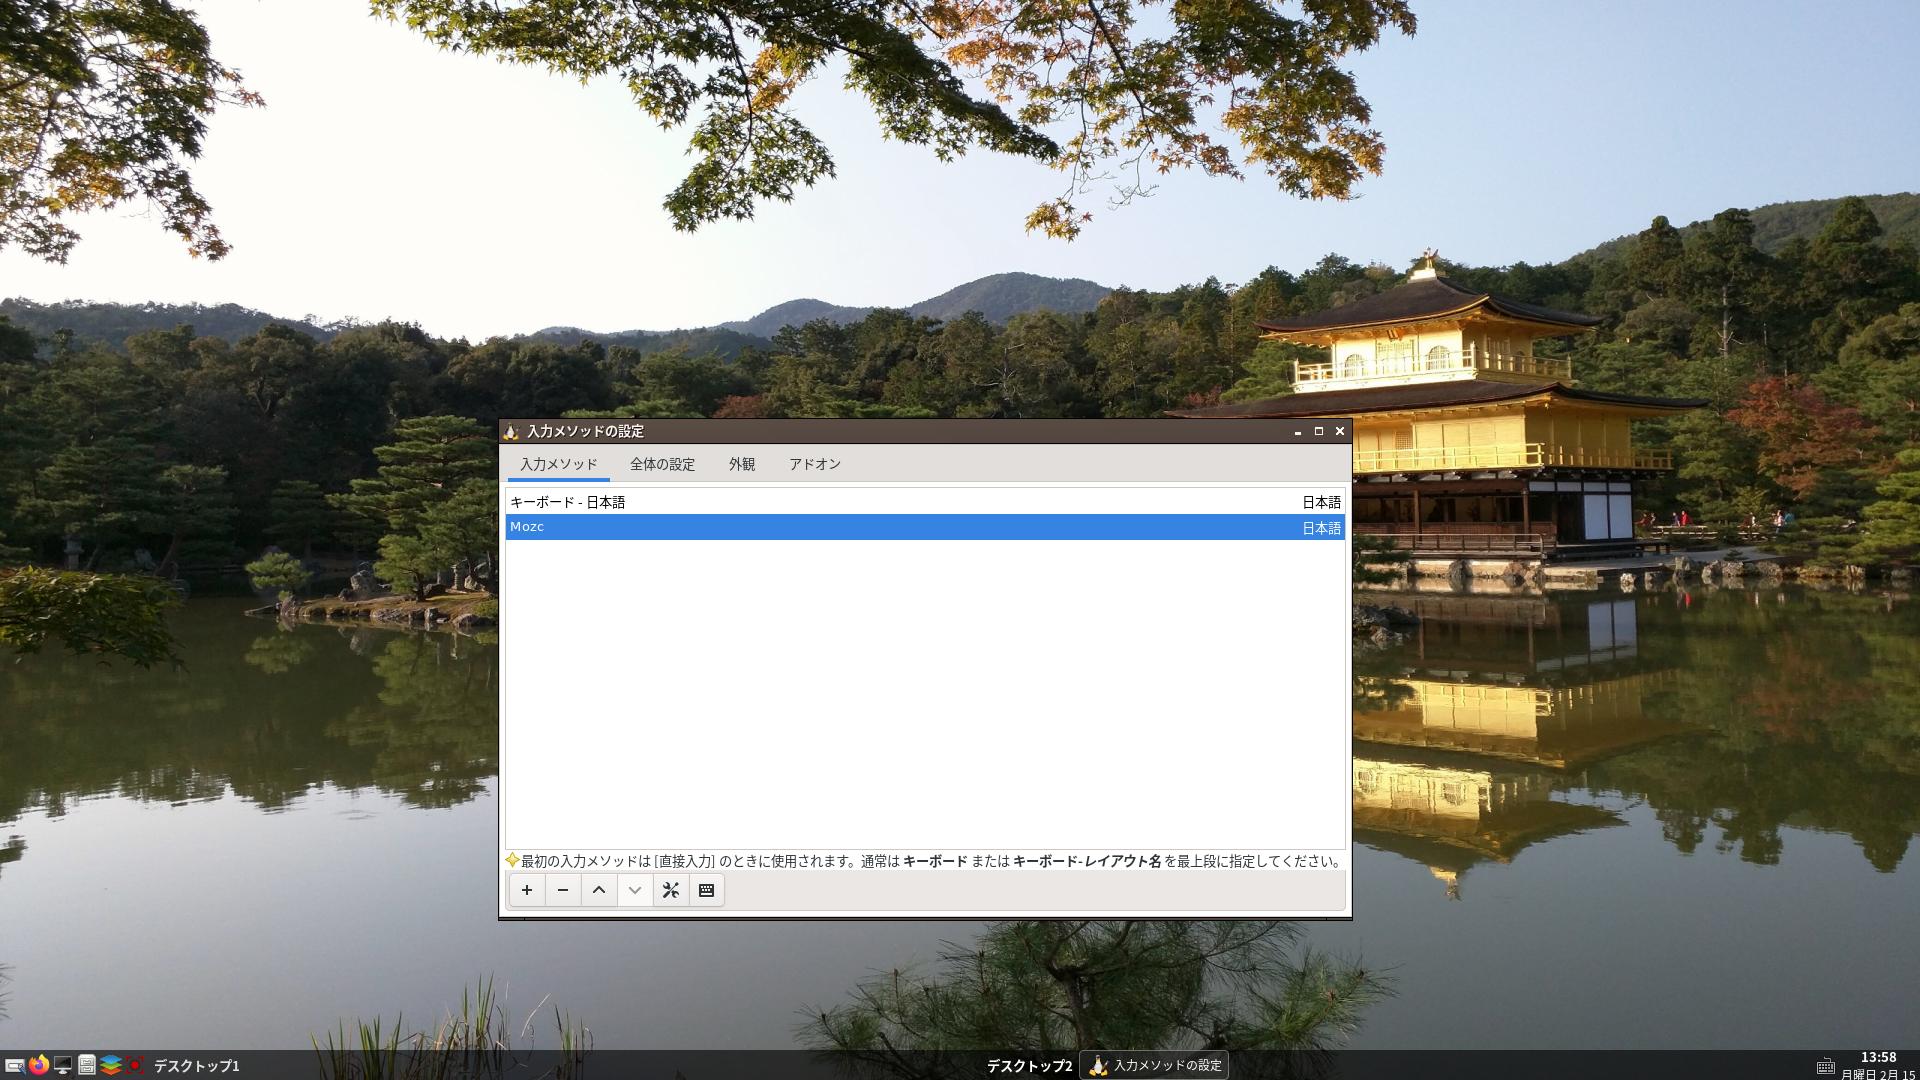
日本語化 参考サイト様
sudo dnf install fcitx5 fcitx5-mozc fcitx5-autostart fcitx5-qt fcitx5-gtk fcitx5-configtool
sudo alternatives --config xinputrc
2
sudo nano /etc/profile
export GTK_IM_MODULE=fcitx5
export QT_IM_MODULE=fcitx5
export XMODIFIERS=”@im=fcitx5”
日本語化終了。
これより私好みにする。必要なものをインストール。hsetroot、obmenu-generator、oblogoutなど。
sudo dnf install gnome-disk-utility neofetch obconf tint2 volumeicon lxpolkit imlib2-devel libX11-devel libXinerama-devel make audacity-freeworld ffmpeg-libs avidemux mirage file-roller timidity++ mpd cantata celluloid volumeicon liberation-fonts git perl-Gtk3 cpanminus intltool pygtk2 easytag
あいもかわらずlinuxであそんでいます。
今回の私のパソコン環境は os fedora 35 server openbox
CPU: AMD Ryzen 7 5700G with Radeon Gra
GPU: AMD ATI 08:00.0 Cezanne
Monitor: HDMI接続
Fedora-Server-dvd-x86_64-35-1.2.iso
Fedora-Server-dvd-x86_64-35-1.2.isoをgnome-disksでusbメモリーに書き込み起動させた。
Fedora-Server のインストールは他のosにくらべてなれが必要でしょう。
私の場合gpt形式のssdを使っています。
あらかじめssdの未割り当ての領域を66GiBを用意した。
インストール画面でパーティションの項目で、カスタムを選択。
次の画面で、プラスアイコンをクリック
マウントポイントを/boot/efi
容量を1GiB
さらに、プラスアイコンをクリック
マウントポイントを/
容量を65GiB
以上でパーティションの設定終了。
あとはネットが接続されているか・・・、rootの設定、ユーザーの設定、地域の設定をして終了。
インストール終了して、再起動。
Fedora-Serverなので、ログイン画面はテキスト形式。
login: ユーザー
passwd: 〇〇〇〇
sudo dnf update
passwd: 〇〇〇〇
sudo dnf group install "Basic Desktop"
sudo dnf install nano leafpad lxterminal pcmanfm firefox
sudo systemctl set-default graphical.target
sudo reboot
これより普通のopenboxの画面で作業。
rpmfusionのインストール
sudo dnf install https://mirrors.rpmfusion.org/free/fedora/rpmfusion-free-release-35.noarch.rpm https://mirrors.rpmfusion.org/nonfree/fedora/rpmfusion-nonfree-release-35.noarch.rpm
日本語化 参考サイト様
sudo dnf install fcitx5 fcitx5-mozc fcitx5-autostart fcitx5-qt fcitx5-gtk fcitx5-configtool
sudo alternatives --config xinputrc
2
sudo nano /etc/profile
export GTK_IM_MODULE=fcitx5
export QT_IM_MODULE=fcitx5
export XMODIFIERS=”@im=fcitx5”
日本語化終了。
これより私好みにする。必要なものをインストール。hsetroot、obmenu-generator、oblogoutなど。
sudo dnf install gnome-disk-utility neofetch obconf tint2 volumeicon lxpolkit imlib2-devel libX11-devel libXinerama-devel make audacity-freeworld ffmpeg-libs avidemux mirage file-roller timidity++ mpd cantata celluloid volumeicon liberation-fonts git perl-Gtk3 cpanminus intltool pygtk2 easytag
sudo dnf group install "D Development Tools and Libraries"
sudo dnf group install "System Tools"
hsetrootのインストール
ダウンロードと解凍
cd ~/ダウンロード/hsetroot-master
make
sudo make install
obmenu-generatorのインストール
sudo cpanm Linux::DesktopFiles
sudo cpanm Data::Dump
git clone https://github.com/trizen/obmenu-generator
sudo cp obmenu-generator/obmenu-generator /usr/bin
sudo chmod +x /usr/bin/obmenu-generator
mkdir ~/.config/obmenu-generator
cp -r obmenu-generator/schema.pl ~/.config/obmenu-generator/
cp -r /etc/xdg/openbox ~/.config/
obmenu-generator -s -i
oblogoutのインストール
ダウンロードと解凍
sudo dnf install https://raw.githubusercontent.com/rpmsphere/noarch/master/p/python2-distutils-extra-2.39-17.noarch.rpm https://raw.githubusercontent.com/rpmsphere/x86_64/master/p/python2-dbus-1.2.16-3.x86_64.rpm
sudo dnf install https://download-ib01.fedoraproject.org/pub/fedora/linux/updates/33/Everything/x86_64/Packages/p/python2-pillow-6.2.2-7.fc33.x86_64.rpm https://download-ib01.fedoraproject.org/pub/fedora/linux/releases/33/Everything/x86_64/os/Packages/p/python2-olefile-0.46-12.fc33.noarch.rpm
cd /home/satou/ダウンロード/oblogout-fork-master
sudo python2 ~/ダウンロード/oblogout-fork-master/setup.py install
テスト
oblogout
ボタンのデザイン変更
sudo nano /etc/oblogout.conf
buttontheme = oxygen
onlyoffice-desktopeditorsとtakao-fontsのインストール
sudo dnf install /home/satou/ダウンロード/onlyoffice-desktopeditors.x86_64.rpm
sudo dnf install https://raw.githubusercontent.com/rpmsphere/noarch/master/t/takao-fonts-00303.01-4.1.noarch.rpm
mpdとcantataの設定
sudo nano /etc/mpd.conf
ーーーーーーーーーーーーーーーーーーーーーーーーーーーーーーーーーーー
# See: /usr/share/doc/mpd/mpdconf.example
#bind_to_address "any"
bind_to_address "127.0.0.1"
port "6600"
#bind_to_address "localhost"
#bind_to_address "127.0.0.1"
#bind_to_address "192.168.2.101"
music_directory "~/Music"
pid_file "~/.mpd/mpd.pid"
db_file "~/.mpd/mpd.db"
state_file "~/.mpd/mpd_state"
playlist_directory "~/.mpd/playlists"
audio_output {
type "alsa"
name "Audio USB Audio"
device "hw:0,0"
mixer_type "none"
dsd_usb "yes"
buffer_time "100000"
period_time "100000"
use_mmap "yes"
auto_resample "no"
auto_channels "no"
auto_format "no"
}
password "1234@read,add,control,admin"
#user "apl"
ーーーーーーーーーーーーーーーーーーーーーーーーーーーーーーーーーーーーーーーーーー
ホームに~/,mpdフォルダ作成
mkdir ~/,mpd
mkdir~/,mpd/playlists
以下空白のファイル作成、とりあえず###などを記入しておく。
leafpad ~/.mpd/mpd.pid
leafpad ~/.mpd/mpd_state
sudo mkdir /etc/timidity
cantataの設定
mkdir ~/.config/cantata
~/.config/cantata/cantata.conf 新規作成
私の記事を参照されたし。
私の前回の記事
fedora 35 server + openbox
前回の記事とあまりかわりばえしないが、fcitx5-mozcは初経験です。
fedora 35 serverはインストーラーがもうすこし扱いやすいものにしてほしい・・・・。
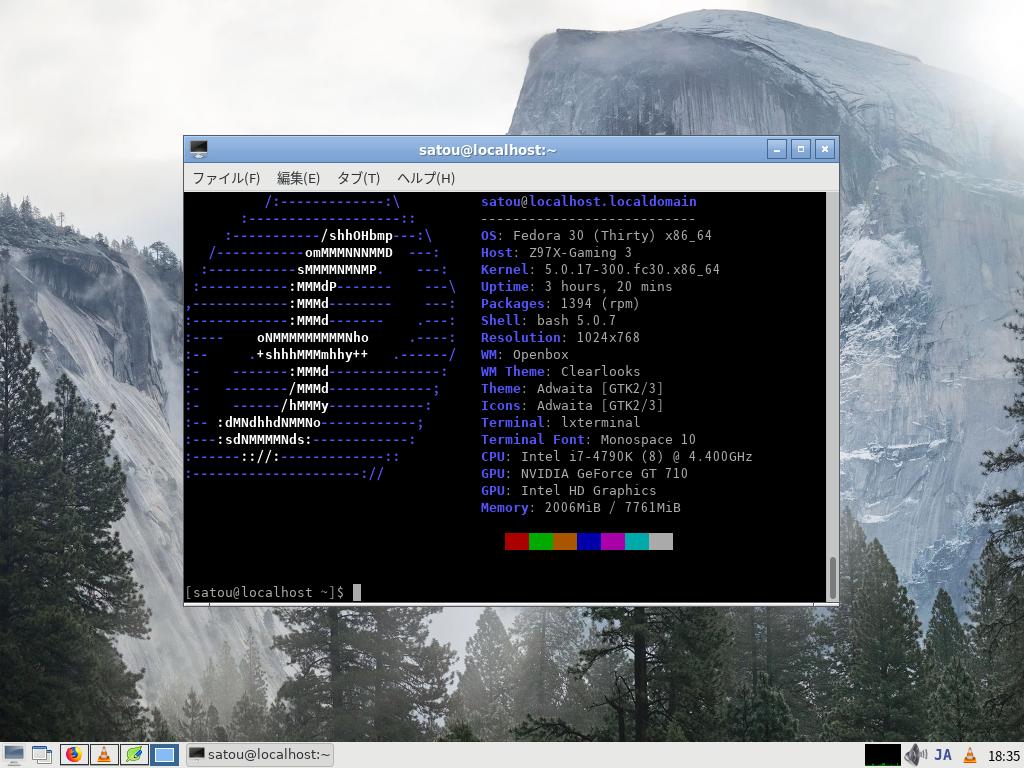
以下参考画像
sudo dnf group install "System Tools"
hsetrootのインストール
ダウンロードと解凍
cd ~/ダウンロード/hsetroot-master
make
sudo make install
obmenu-generatorのインストール
sudo cpanm Linux::DesktopFiles
sudo cpanm Data::Dump
git clone https://github.com/trizen/obmenu-generator
sudo cp obmenu-generator/obmenu-generator /usr/bin
sudo chmod +x /usr/bin/obmenu-generator
mkdir ~/.config/obmenu-generator
cp -r obmenu-generator/schema.pl ~/.config/obmenu-generator/
cp -r /etc/xdg/openbox ~/.config/
obmenu-generator -s -i
oblogoutのインストール
ダウンロードと解凍
sudo dnf install https://raw.githubusercontent.com/rpmsphere/noarch/master/p/python2-distutils-extra-2.39-17.noarch.rpm https://raw.githubusercontent.com/rpmsphere/x86_64/master/p/python2-dbus-1.2.16-3.x86_64.rpm
sudo dnf install https://download-ib01.fedoraproject.org/pub/fedora/linux/updates/33/Everything/x86_64/Packages/p/python2-pillow-6.2.2-7.fc33.x86_64.rpm https://download-ib01.fedoraproject.org/pub/fedora/linux/releases/33/Everything/x86_64/os/Packages/p/python2-olefile-0.46-12.fc33.noarch.rpm
cd /home/satou/ダウンロード/oblogout-fork-master
sudo python2 ~/ダウンロード/oblogout-fork-master/setup.py install
テスト
oblogout
ボタンのデザイン変更
sudo nano /etc/oblogout.conf
buttontheme = oxygen
onlyoffice-desktopeditorsとtakao-fontsのインストール
sudo dnf install /home/satou/ダウンロード/onlyoffice-desktopeditors.x86_64.rpm
sudo dnf install https://raw.githubusercontent.com/rpmsphere/noarch/master/t/takao-fonts-00303.01-4.1.noarch.rpm
mpdとcantataの設定
sudo nano /etc/mpd.conf
ーーーーーーーーーーーーーーーーーーーーーーーーーーーーーーーーーーー
# See: /usr/share/doc/mpd/mpdconf.example
#bind_to_address "any"
bind_to_address "127.0.0.1"
port "6600"
#bind_to_address "localhost"
#bind_to_address "127.0.0.1"
#bind_to_address "192.168.2.101"
music_directory "~/Music"
pid_file "~/.mpd/mpd.pid"
db_file "~/.mpd/mpd.db"
state_file "~/.mpd/mpd_state"
playlist_directory "~/.mpd/playlists"
audio_output {
type "alsa"
name "Audio USB Audio"
device "hw:0,0"
mixer_type "none"
dsd_usb "yes"
buffer_time "100000"
period_time "100000"
use_mmap "yes"
auto_resample "no"
auto_channels "no"
auto_format "no"
}
password "1234@read,add,control,admin"
#user "apl"
ーーーーーーーーーーーーーーーーーーーーーーーーーーーーーーーーーーーーーーーーーー
ホームに~/,mpdフォルダ作成
mkdir ~/,mpd
mkdir~/,mpd/playlists
以下空白のファイル作成、とりあえず###などを記入しておく。
leafpad ~/.mpd/mpd.pid
leafpad ~/.mpd/mpd_state
sudo mkdir /etc/timidity
cantataの設定
mkdir ~/.config/cantata
~/.config/cantata/cantata.conf 新規作成
私の記事を参照されたし。
私の前回の記事
fedora 35 server + openbox
前回の記事とあまりかわりばえしないが、fcitx5-mozcは初経験です。
fedora 35 serverはインストーラーがもうすこし扱いやすいものにしてほしい・・・・。
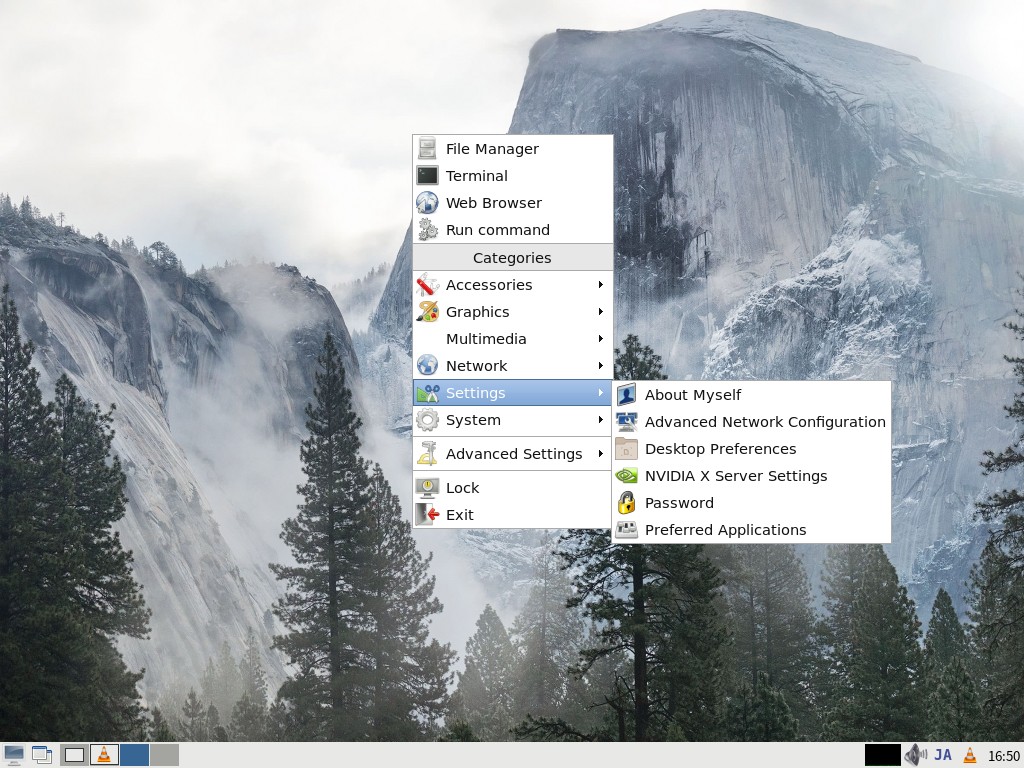
以下参考画像

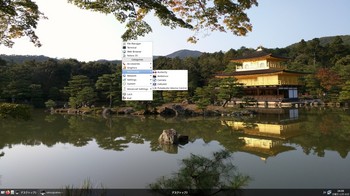
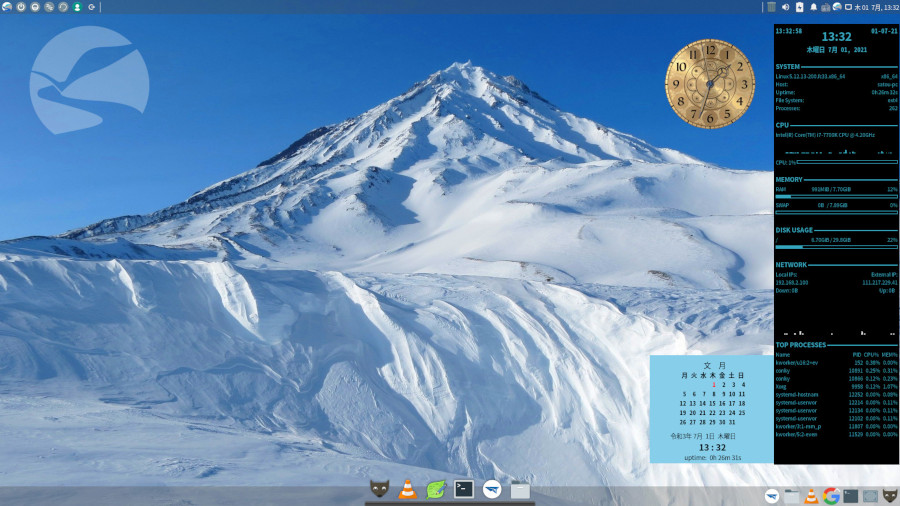
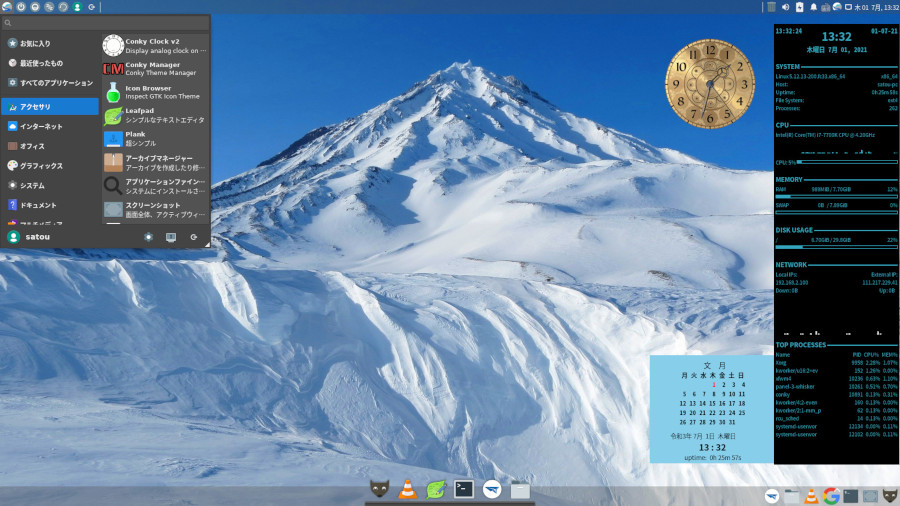
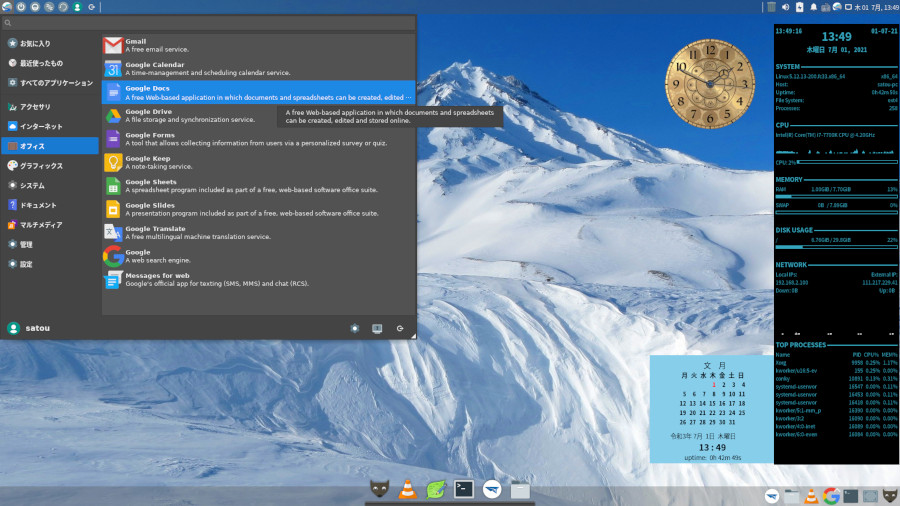
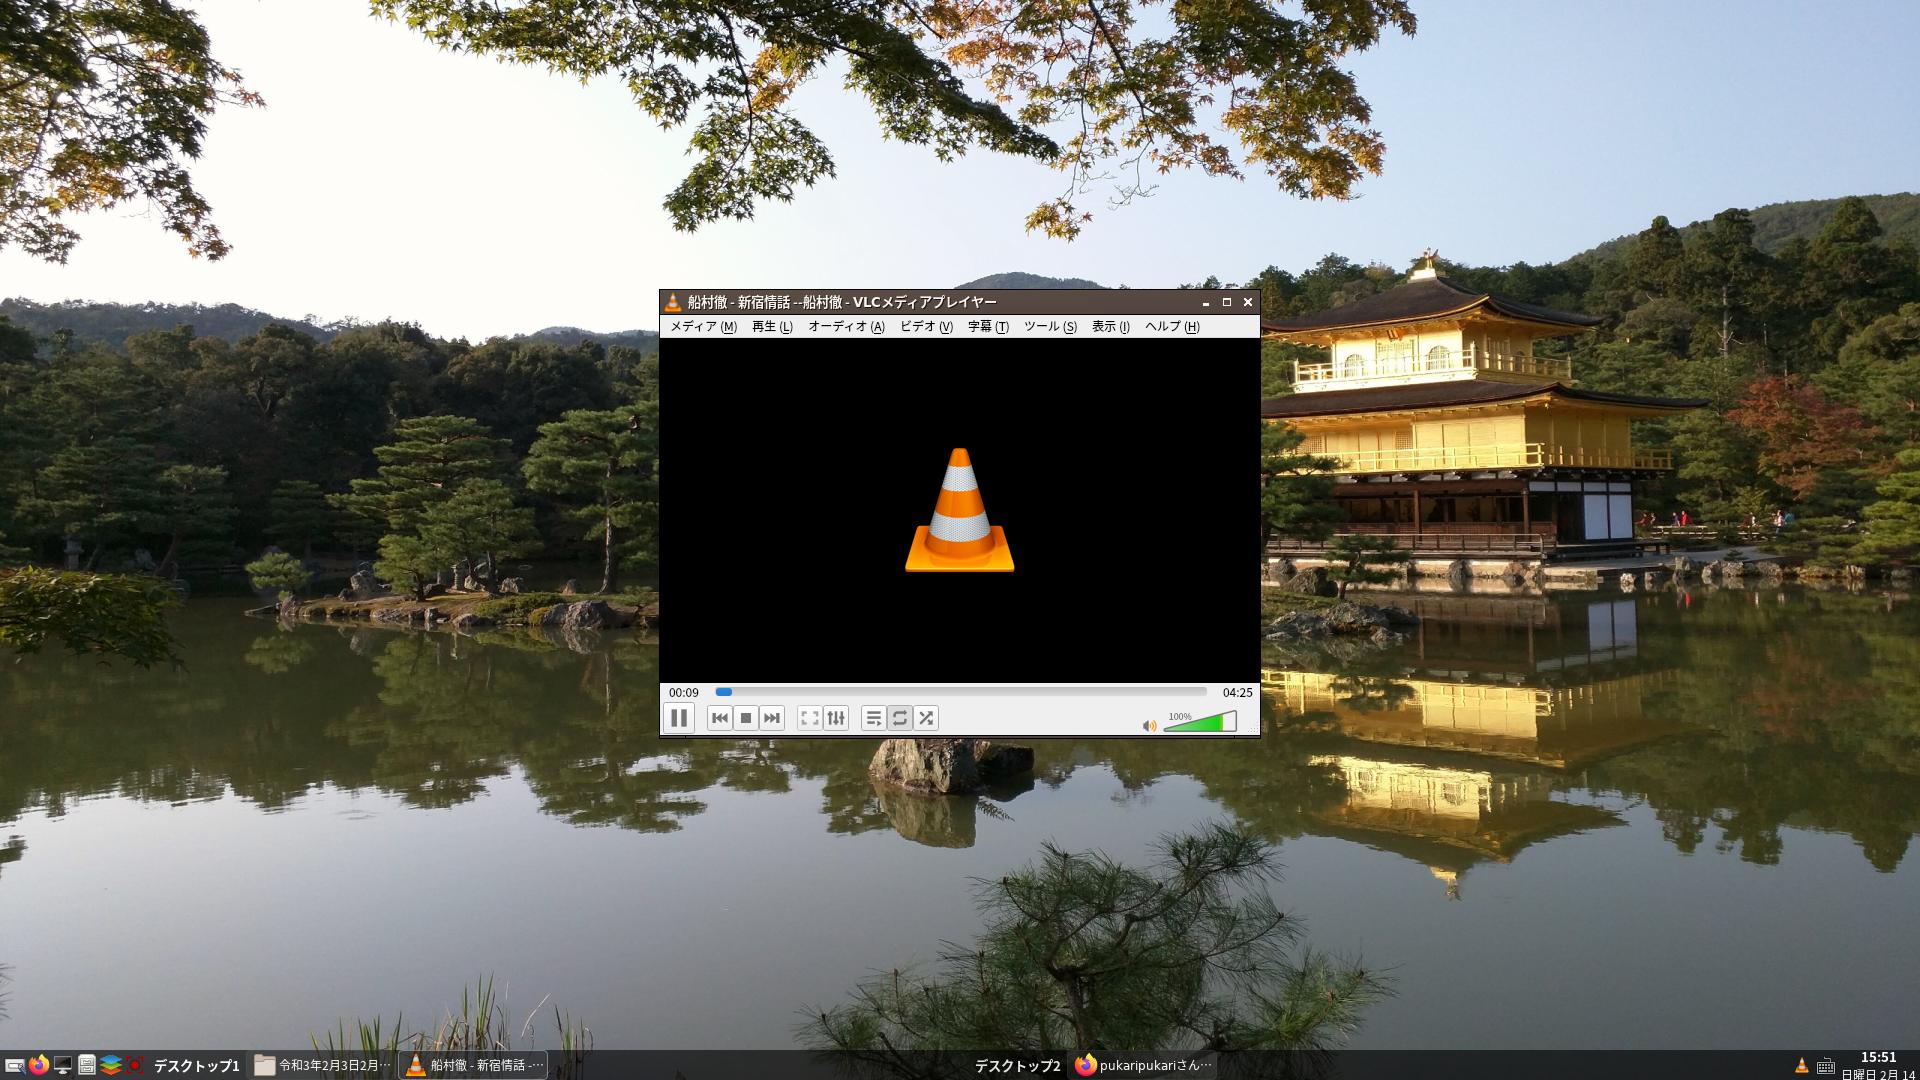
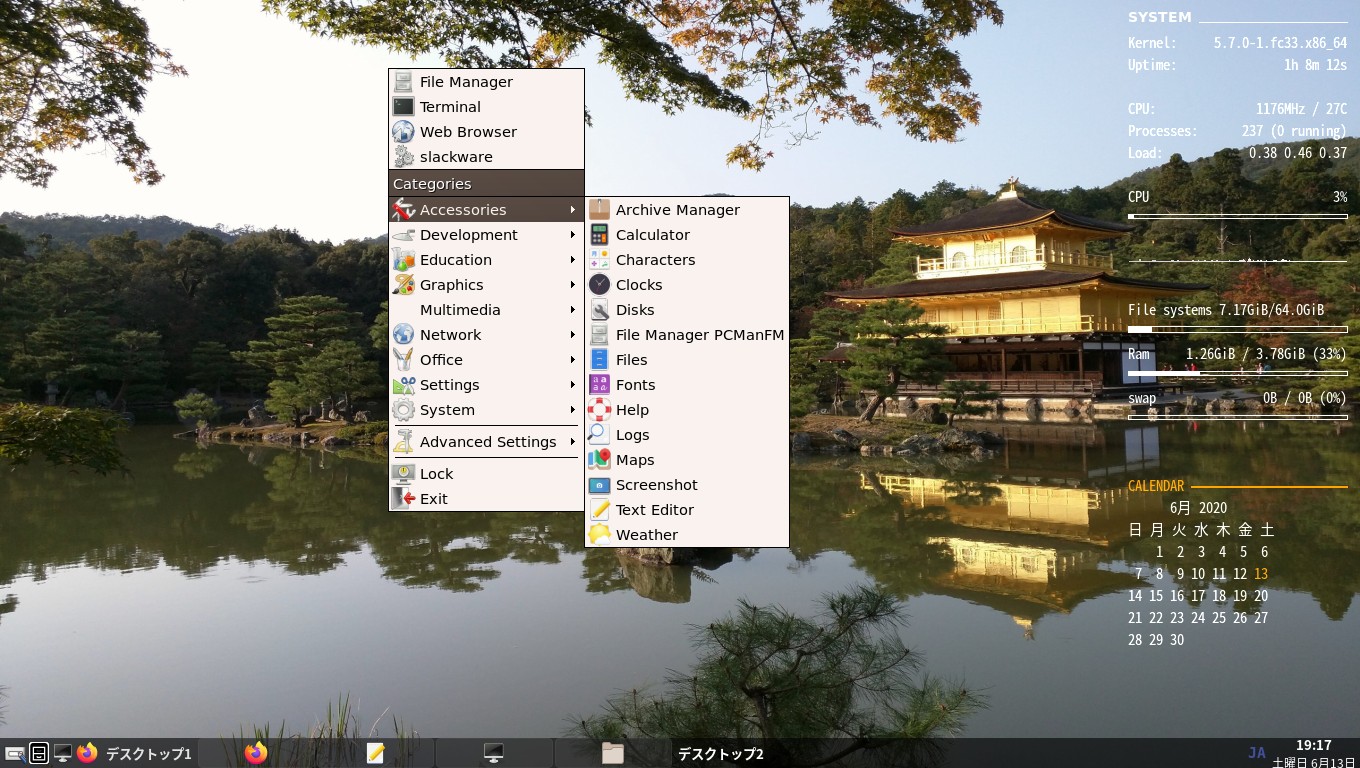
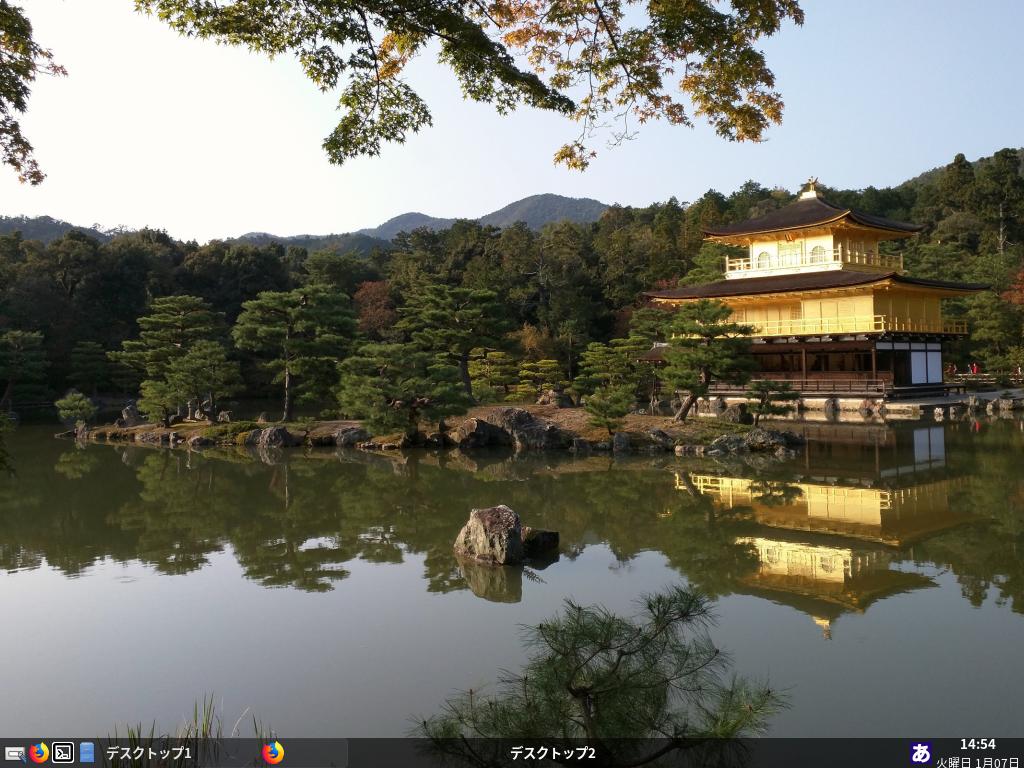
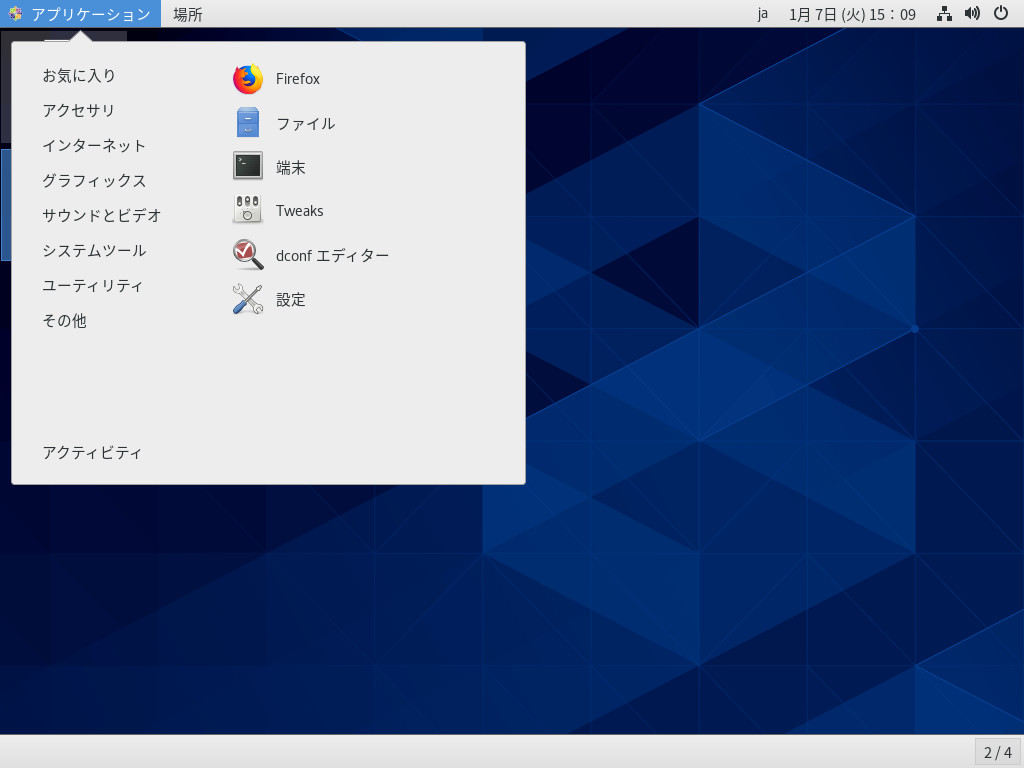
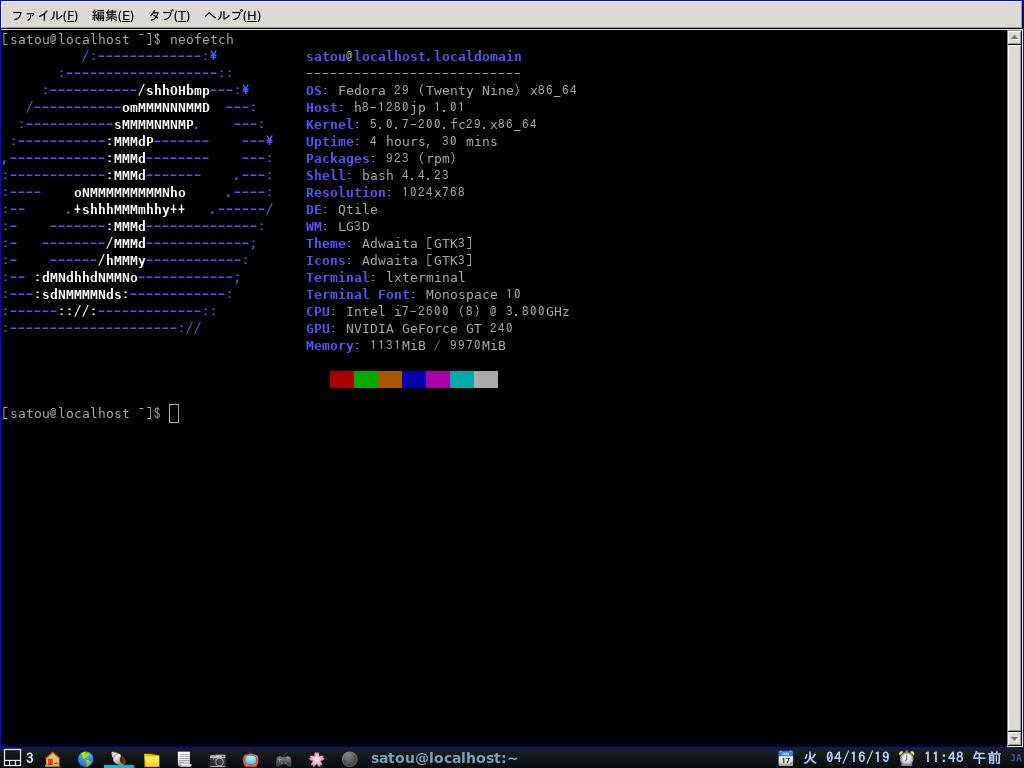
openboxのメニューの画像
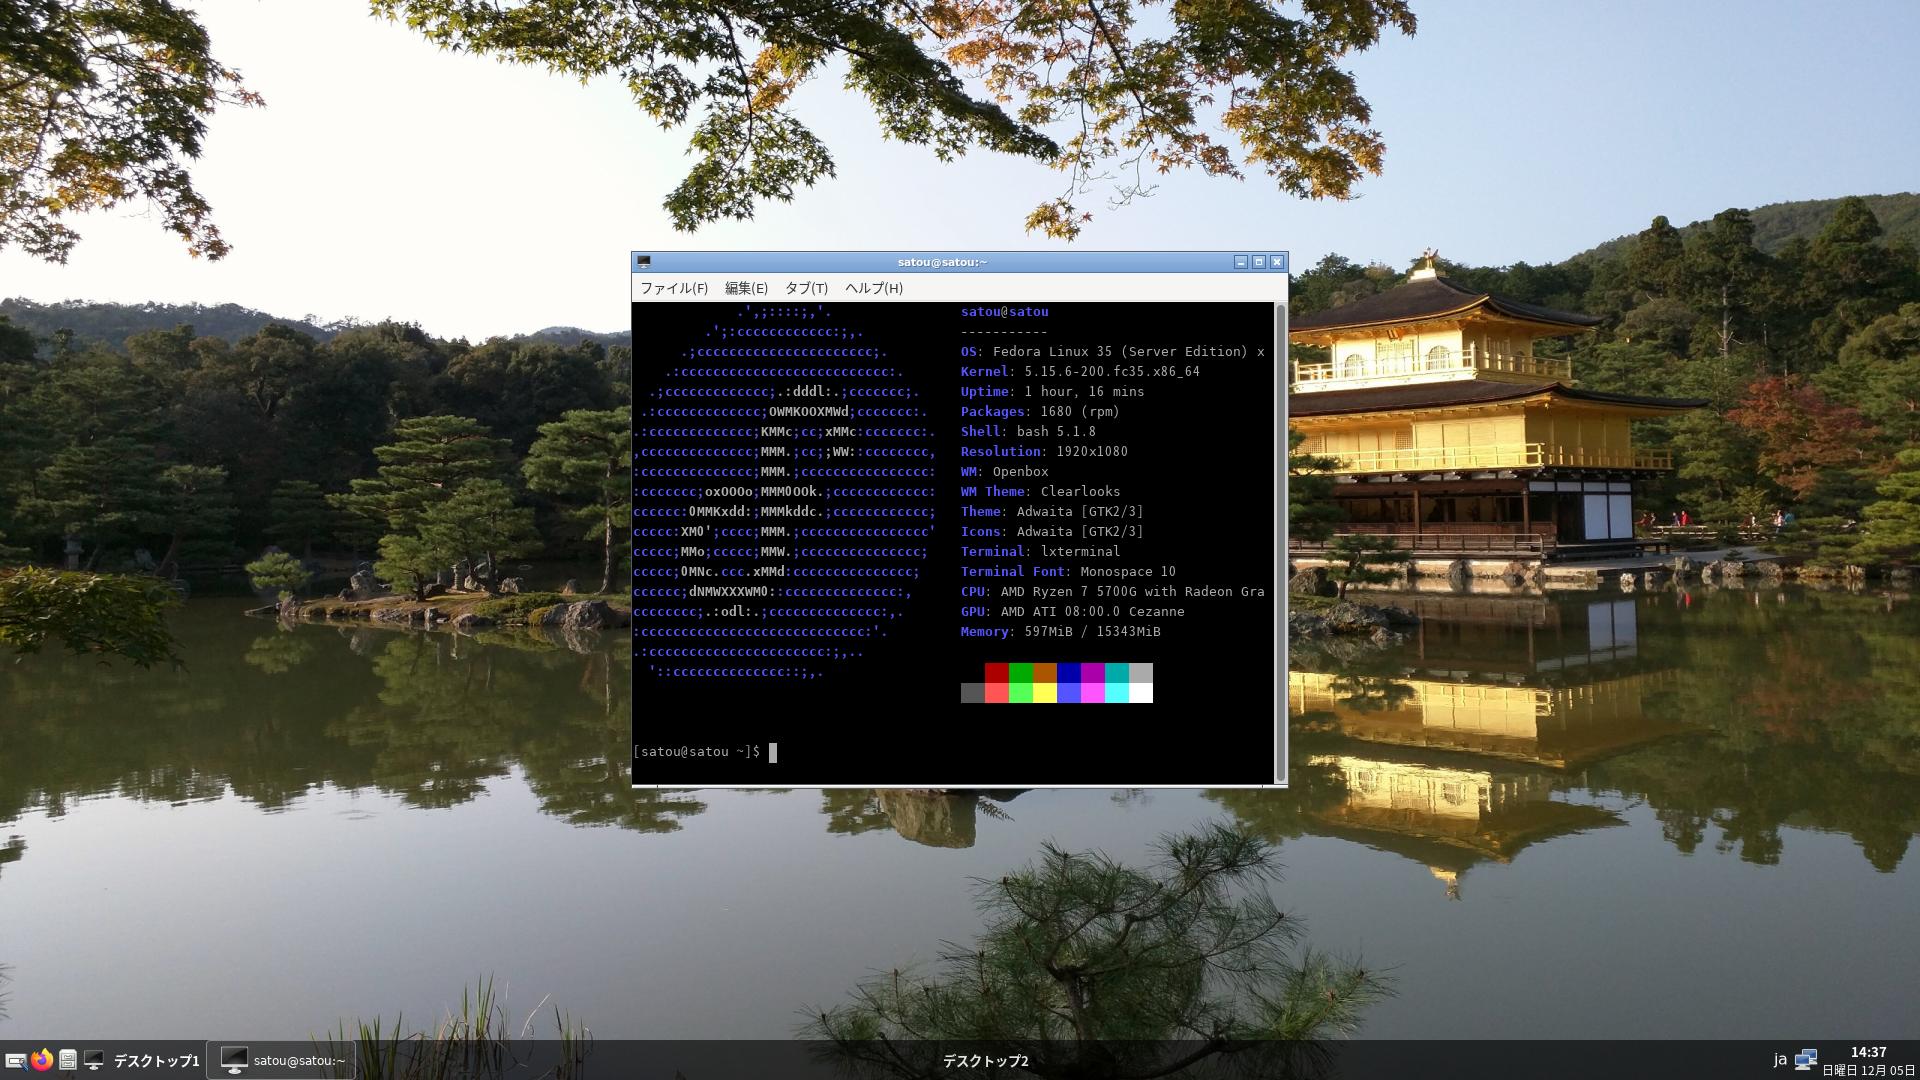
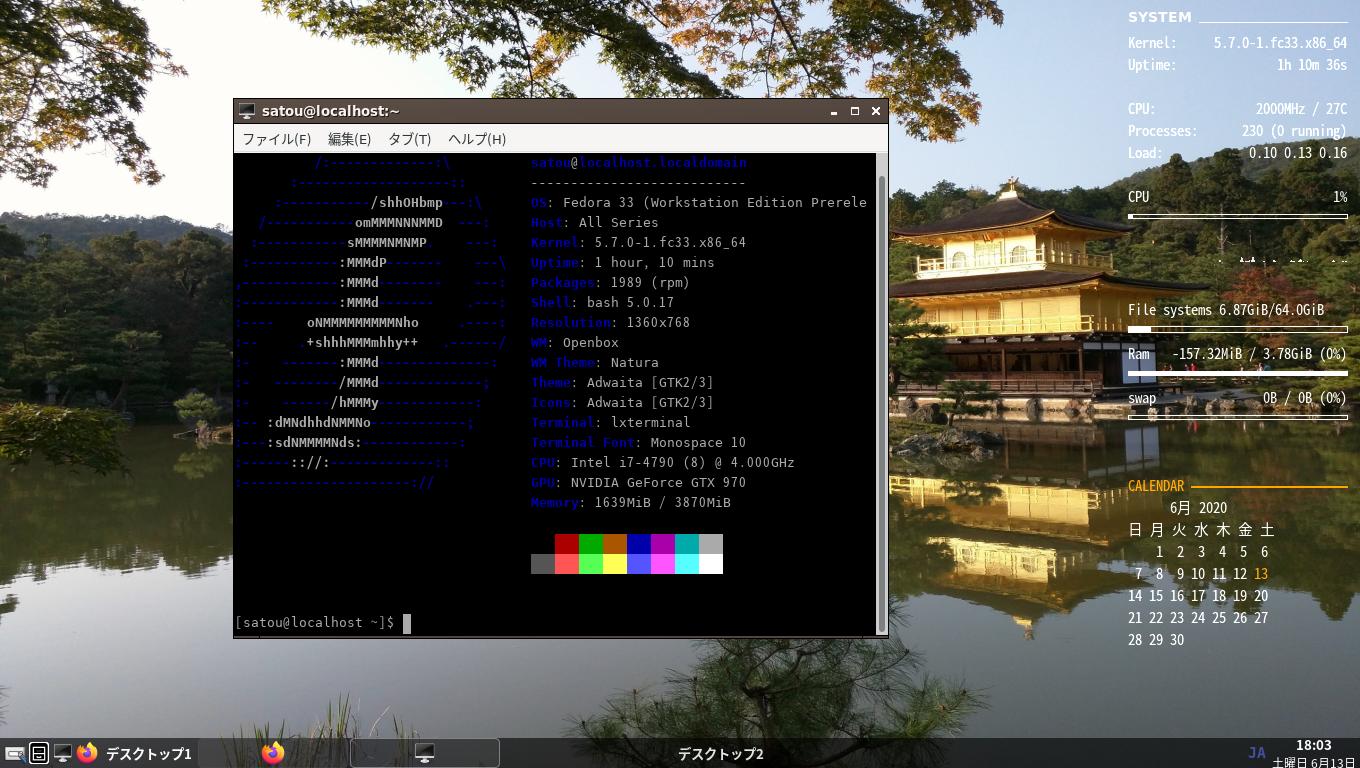
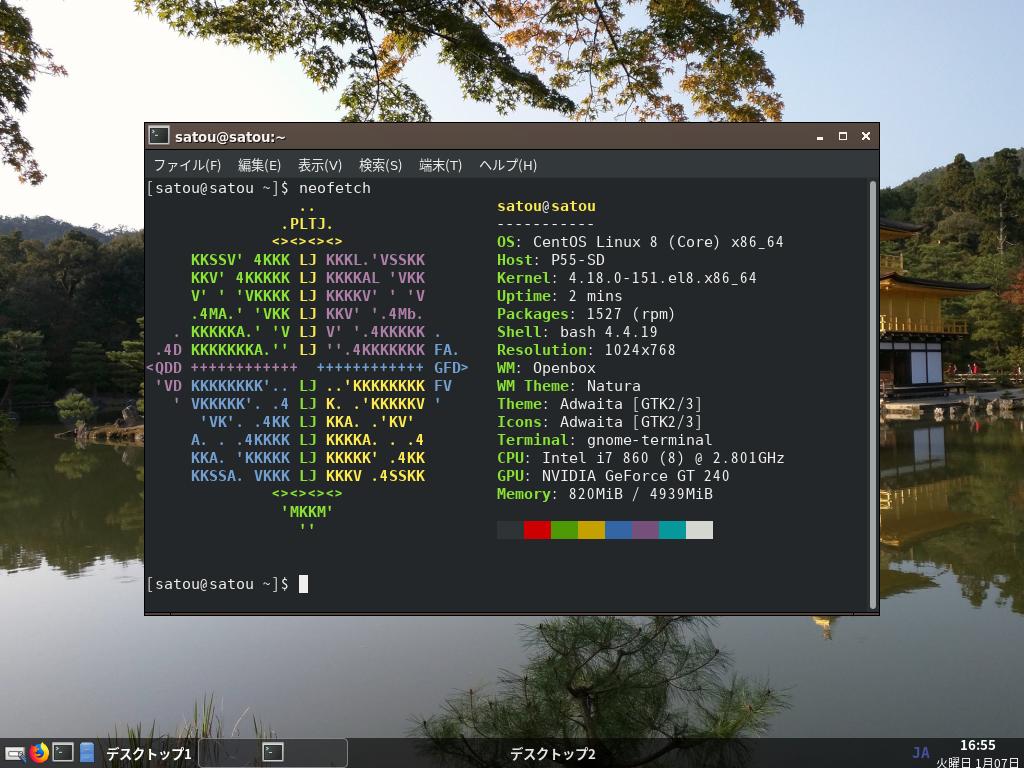
neofetchの画像
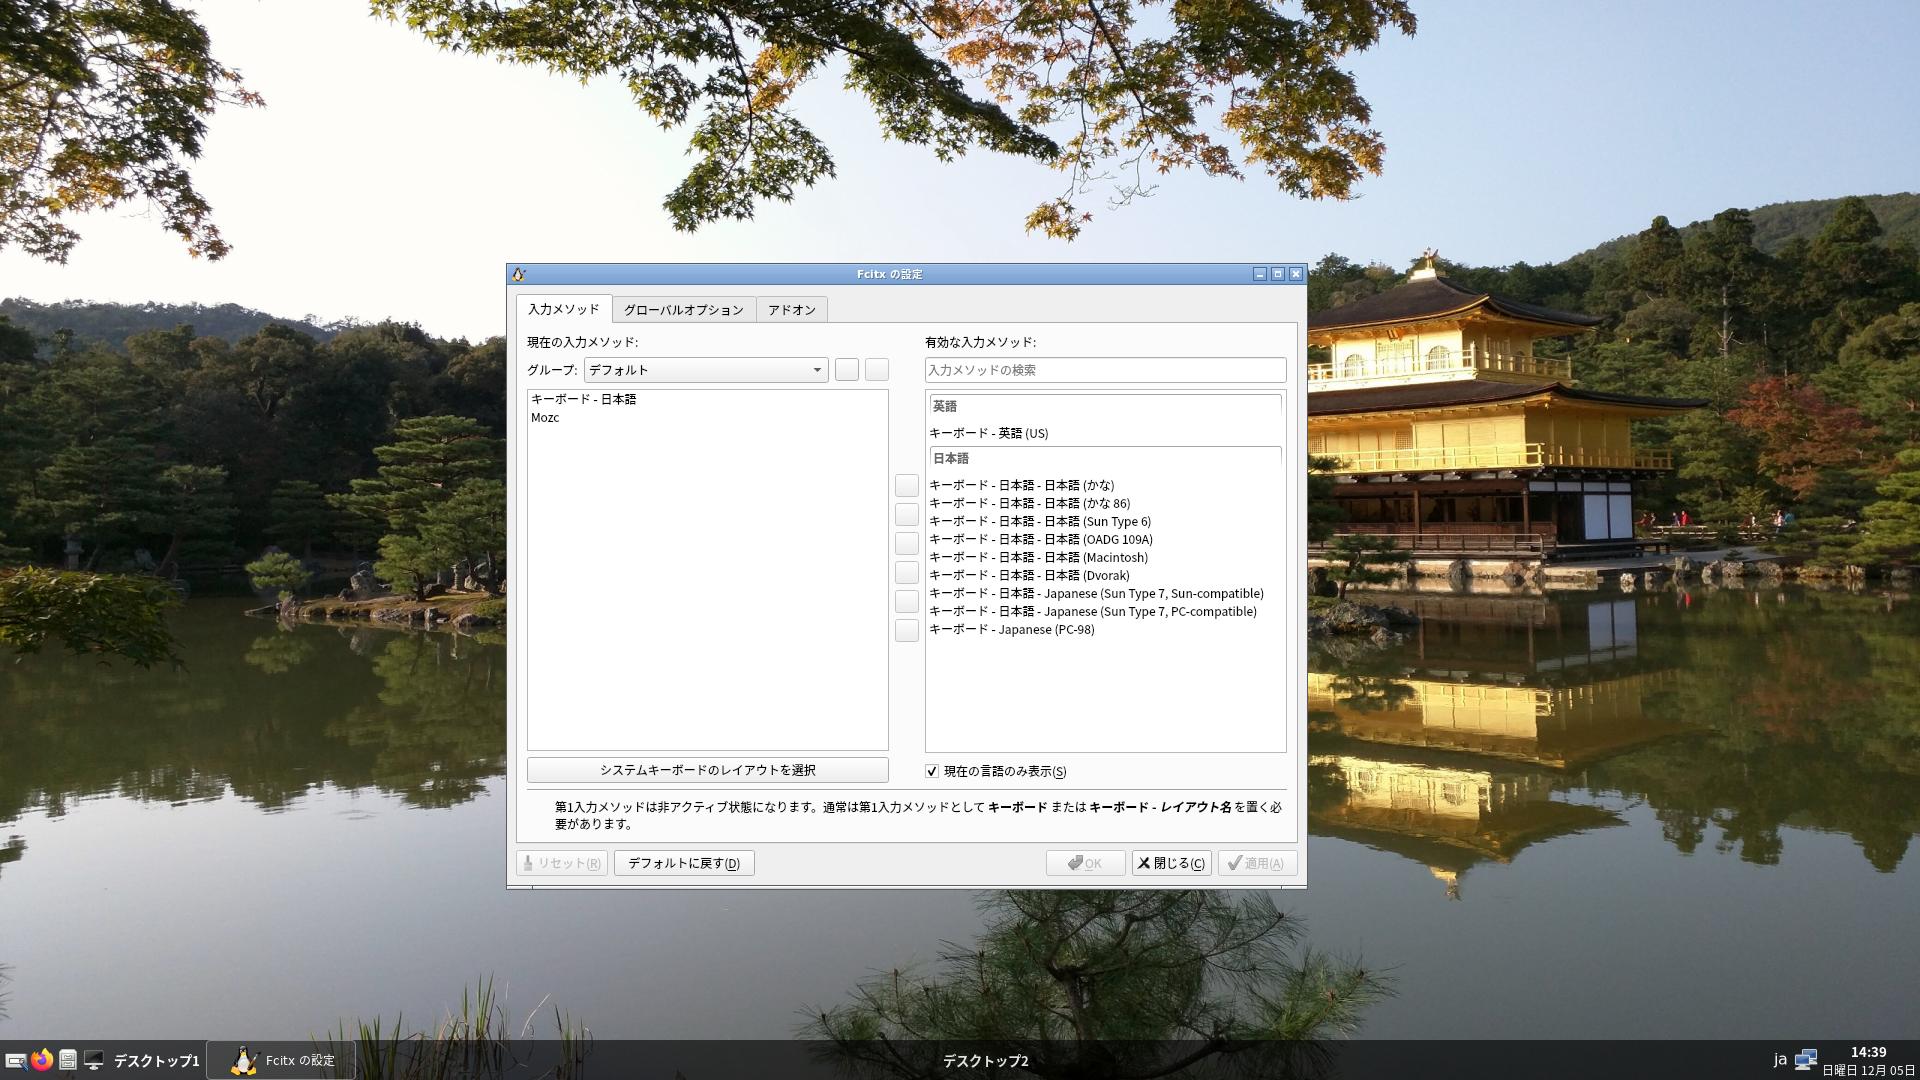
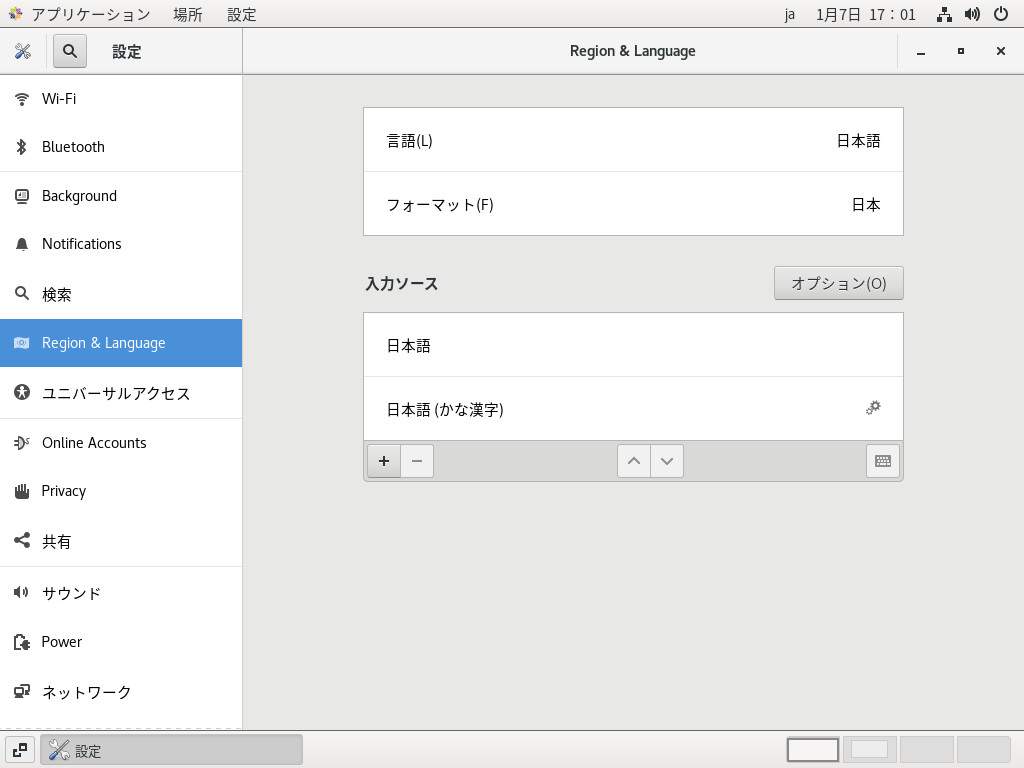
fcitx5の設定

oblogoutの画像
ごちそうさん
https://www.dailymotion.com/video/x6tvvnm
serenelinux + conky [fedora系]
serenelinux + conky
お仕事の方はご苦労さまです。
お仕事の方はご苦労さまです。
あいもかわらずlinuxであそんでいます。
今回の私のパソコン環境 os serenelinux xfce4デスクトップ
CPU: Intel i7-7700K (8) @ 4.500GH
GPU: NVIDIA GeForce GT 730
monitor: HDMI接続
SereneLinux-33-ja-2020.12.31-734508c-x86_64.iso
SereneLinuxは、fedora系 日本製。
インストールは gnome-disksにてusbメモリーに書き込み。起動させてssdにインストールした。
わたしの環境では驚くほど早くインストールが終了した。
日本製なので素人が手を加えるところは無いでしょう。ibus-mozc が入っていました。
ーーーーーーーーーーーーーーーーーーーーーーーーーーーーーーーーーーー
以下改悪
SereneLinux + conky
conky、その他のインストール
sudo dnf install firefox lua plank fcitx-anthy fcitx fcitx-configtool leafpad file-roller xorg-x11-apps yad imlib2-devel libX11-devel libXinerama-devel make mirage
sudo dnf remove ibus
rm ~/.config/autostart/ibus.desktop
参照されたし以下の私の記事
ーーーーーーーーーーーーーーーーーーーーーーー
#!/bin/sh
if pidof conky | grep [0-9] > /dev/null
then
exec killall conky
else
sleep 2
conky -d -c /home/satou/.config/conky/calendar1
sleep 3
conky &
/home/satou/.conky/analog_clock1/analog.sh
exit
fi
if pidof conky | grep [0-9] > /dev/null
then
exec killall conky
else
sleep 2
conky -d -c /home/satou/.config/conky/calendar1
sleep 3
conky &
/home/satou/.conky/analog_clock1/analog.sh
exit
fi
ーーーーーーーーーーーーーーーーーーーーーーーー
メニュー 設定 セッションと起動
新規作成
名前 conky
コマンド ~/conky.sh
ーーーーーーーーーーーーーーーーーーーーーーーーーーーーーー
~/.conkyrc 編集 個々のパソコンによって違う。
ネット関係
terminal に$ ip ad と入力して出てくる。
82~83行 に四箇所記入 私の場合
${font sans-serif:normal:size=8}Down: ${downspeed eno1} ${alignr}Up: ${upspeed eno1}
${color lightgray}${downspeedgraph eno1 80,130 } ${alignr}${upspeedgraph eno1 80,130 }$color
ーーーーーーーーーーーーーーーーーーーーーーーーーーーーーー
以上説明省略
SereneLinuxには、プラウザ flast-gecko-nightly というものが入っている。firefoxとほぼ一緒でしょう。
SereneLinuxには、officeソフトをgoogleを使い完結しているでしょう。
日本語入力 fcitx-anthyに変更した。
plank を起動させた。
メニュー 設定 外観
xfce-flat
アイコン
paper
SereneLinuxは、fedora 33 のソフトを使っており conkyをダウングレードしなくてはならなかった。
centos 7 のconkyを使った。
sudo dnf install '~/ダウンロード/conky-1.9.0-16.20140617gitab826d.el7.x86_64.rpm'
sudo dnf install '~/ダウンロード/conky-manager-2.3.4-1.el7.x86_64.rpm'
sudo dnf install '~/ダウンロード/takao-fonts-00303.01-4.1.noarch.rpm'
sudo dnf install '~/ダウンロード/conky-manager-2.3.4-1.el7.x86_64.rpm'
sudo dnf install '~/ダウンロード/takao-fonts-00303.01-4.1.noarch.rpm'
sudo dnf install '~/ダウンロード/hsetroot-1.0.5-1.fc33.x86_64.rpm'
serenelinux + conky
メニューにアナログ時計の項目がでています。
googleを多用している。
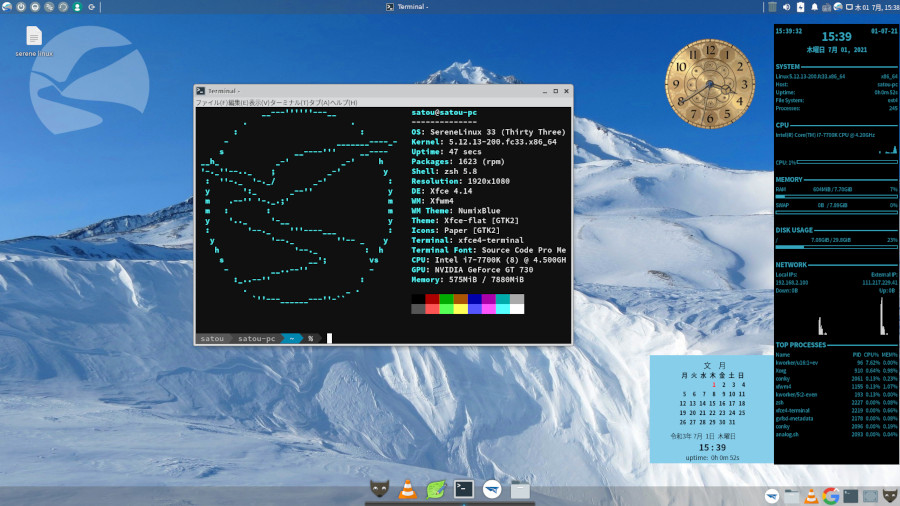
neofetch
youtube
NHK らじるらじる 聞き逃しダウンロード fedora linux [fedora系]
NHK らじるらじる 聞き逃しダウンロード fedora linux
NHKさんでは、ストリーミング形式で配信しているため、ダウンロードはできません。
となっていますが・・・・。
Video DownloadHelper を使ってfirefox でダウンロードした。
準備
fedora では net.downloadhelper.coapp-1.6.3-1 というものをインストールした。
ダウンロードして解凍、インストール。
cd ~/Downloads
tar xf ~/Downloads/net.downloadhelper.coapp-1.6.3-1_amd64.tar.gz
cd ~/Downloads/net.downloadhelper.coapp-1.6.3
~/Downloads/net.downloadhelper.coapp-1.6.3/bin/net.downloadhelper.coapp-linux-64 install --user
終了
北斗晶さんの聞き逃しをダウンロードしました。
fedora の自分のホームに、dwhelperフォルダが自動作成されていました。
プレーヤー NHKラジオ らじる★らじる.mp4 19.2Mib 55分間。
おまけ
以下参考画像
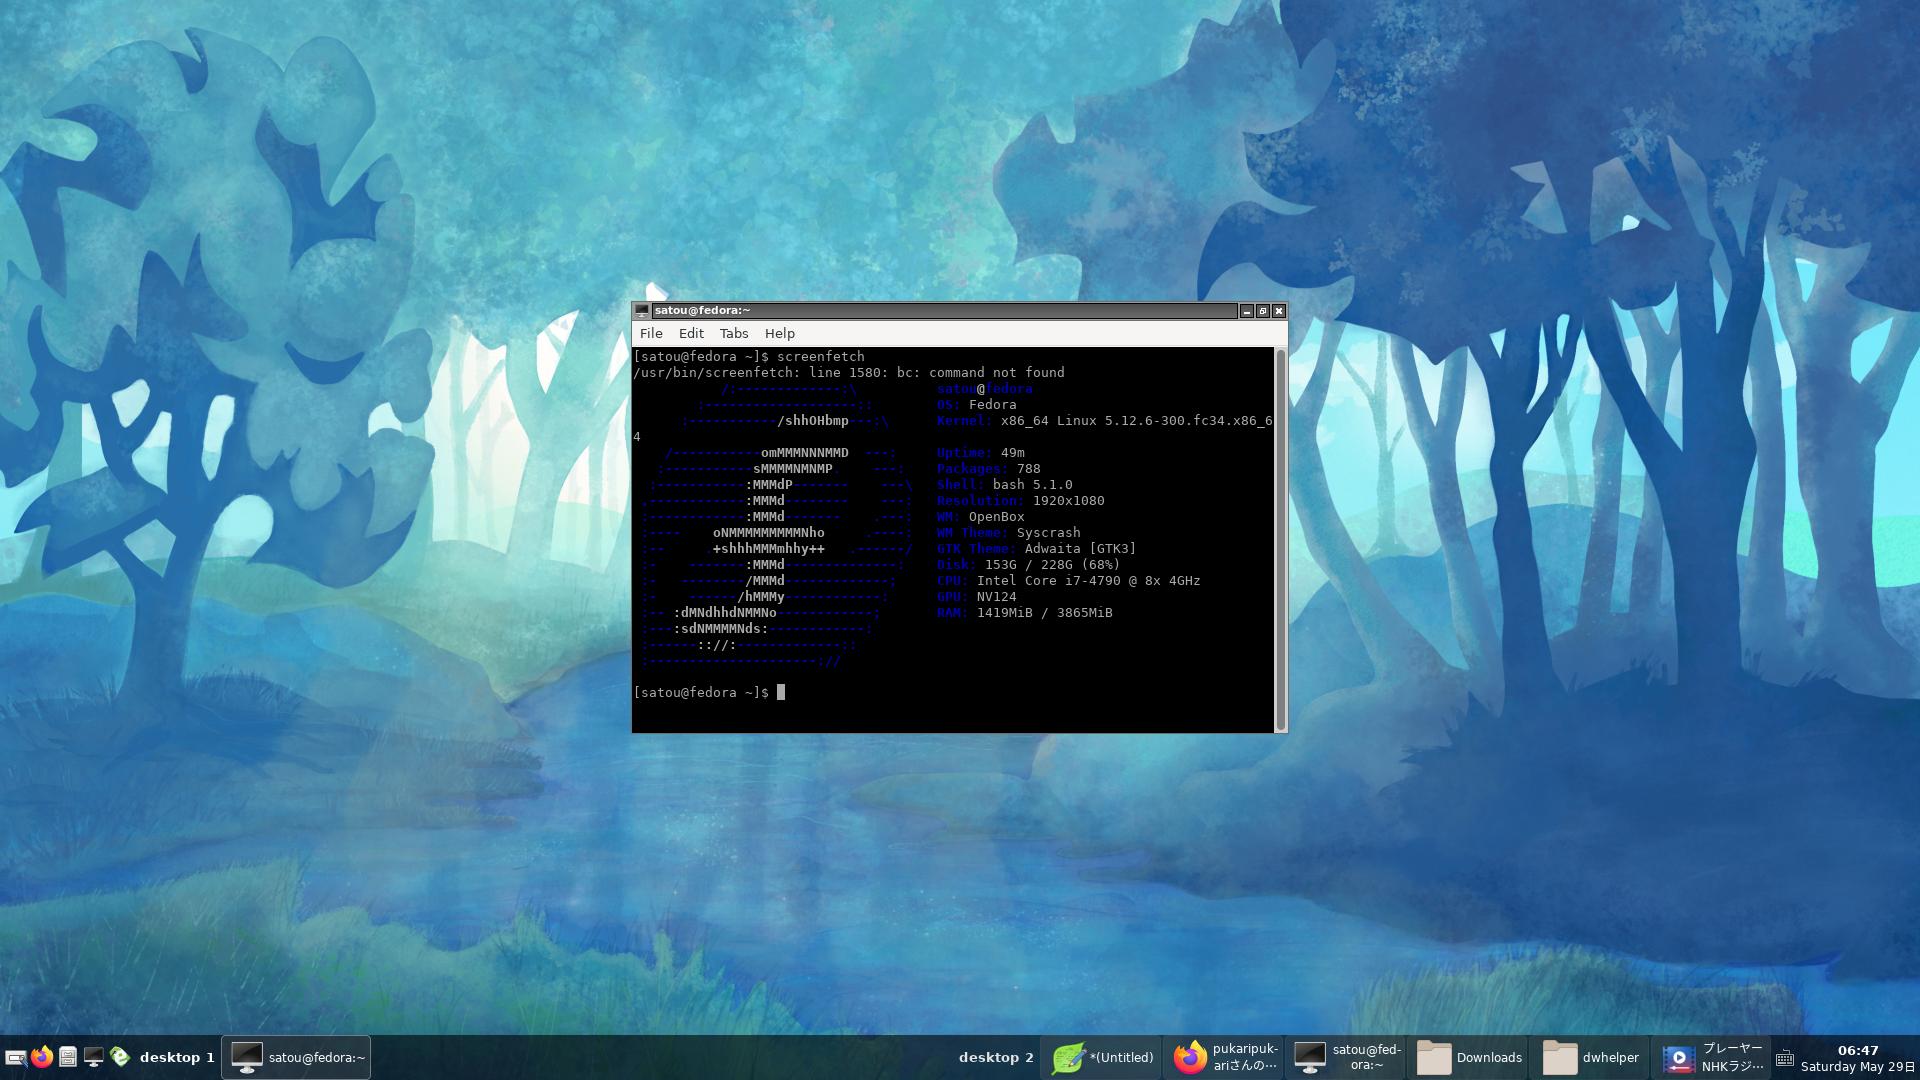
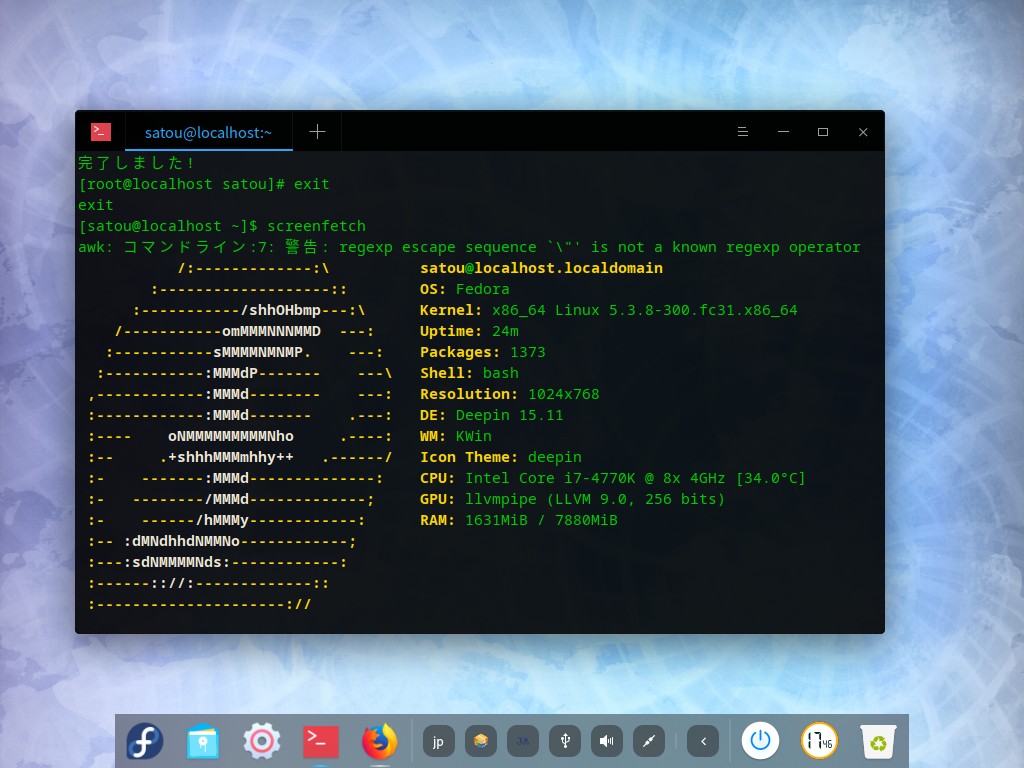
screenfetch の画像
ダウンロード中
Fedora Server + openbox 2021 [fedora系]
Fedora Server + openbox 2021
あいもかわらずlinuxで遊んでいます。
今回の私のパソコン環境 openboxウインドーマネージャー
CPU: Intel i7-7700K (8) @ 4.500GHz
GPU: NVIDIA GeForce GT 730
monitor: hdmi接続
Fedora Server
Fedora-Server-dvd-x86_64-33-1.2.iso
Fedora-Serverをusbメモリーに # gnome-disks を使い書き込み、ssdにインストールした。
インストールおえて起動するとログイン画面はテキスト状態です。正常。
root または ユーザー名でログインする
login :
passwd :
ーーーーーーーーーーーーーーーーーーーーーーーーーーーーーーーーーーーーーーーーーーーーー
今回は、Fedora-Serverをopenboxのデスクトップにした。
簡単のようで面倒くさい作業でしょう。
sudo passwd
sudo dnf update
Basic Desktop のグループインストール
sudo dnf group install "Basic Desktop"
lightdmの設定
sudo nano /etc/lightdm/lightdm.conf
greeter-session=lightdm-gtk-greeter
nano ~/.xinitrc
exec openbox-session
lightdmが起動するようにする。
sudo systemctl set-default graphical.target
sudo reboot
sudo dnf install tint2 obconf pcmanfm leafpad lxterminal gnome-disk-utility fcitx-anthy fcitx fcitx-configtool neofetch file-roller easytag vlc
su
cat << EOF >> /etc/environment
export GTK_IM_MODULE=fcitx
export QT_IM_MODULE=fcitx
export XMODIFIERS=@im=fcitx
EOF
exit
mkdir -pv ~/.config/autostart
cat << EOF >> ~/.config/autostart/fcitx.desktop
[Desktop Entry]
Exec=/usr/bin/sh -c "/usr/bin/fcitx -r -d"
Icon=application-x-shellscript
Name=fcitx
Type=Application
Version=1.0
EOF
sudo groupadd storage
ユーザー名は適宜に。
sudo usermod satou -aG storage
sudo nano /etc/polkit-1/rules.d/10-enable-mount.rules 新規作成
polkit.addRule(function(action, subject) {
if (action.id == "org.freedesktop.udisks2.filesystem-mount-system" && subject.isInGroup("storage")) {
return polkit.Result.YES;
}
});
sudo dnf install https://mirrors.rpmfusion.org/free/fedora/rpmfusion-free-release-33.noarch.rpm
sudo dnf install https://mirrors.rpmfusion.org/nonfree/fedora/rpmfusion-nonfree-release-33.noarch.rpm
nvidiaドライバー
sudo dnf install xorg-x11-drv-nvidia-390xx akmod-nvidia-390xx audacity-freeworld ffmpeg-libs avidemux mirage
sudo reboot
hsetroot-masterのインストール
https://github.com/himdel/hsetroot
sudo dnf install imlib2-devel libX11-devel libXinerama-devel make
cd ~/ダウンロード/hsetroot-master
make
sudo make install
obmenu-generatorのインストール
sudo dnf install git perl-Gtk2 cpanminus
sudo cpanm Linux::DesktopFiles
sudo cpanm Data::Dump
git clone https://github.com/trizen/obmenu-generator
sudo cp obmenu-generator/obmenu-generator /usr/bin
sudo chmod +x /usr/bin/obmenu-generator
mkdir ~/.config/obmenu-generator
cp -r obmenu-generator/schema.pl ~/.config/obmenu-generator/
cp -r /etc/xdg/openbox ~/.config/
obmenu-generator -s -i
oblogoutのインストール
https://github.com/Cloudef/oblogout-fork
sudo dnf install https://raw.githubusercontent.com/rpmsphere/noarch/master/p/python2-distutils-extra-2.39-17.noarch.rpm
sudo dnf install https://raw.githubusercontent.com/rpmsphere/x86_64/master/p/python2-dbus-1.2.16-3.x86_64.rpm
sudo dnf install python2-pillow intltool pygtk2
cd ~/ダウンロード/oblogout-fork-master
sudo python2 ~/ダウンロード/oblogout-fork-master/setup.py install
oblogout
snap を使う
sudo dnf install snapd
sudo ln -s /var/lib/snapd/snap /snap
sudo snap install onlyoffice-desktopeditors
sudo snap install youtube-dl
sudo snap install simplescreenrecorder
gmrunのインストール
sudo dnf install https://download-ib01.fedoraproject.org/pub/epel/7/x86_64/Packages/g/gmrun-0.9.2-29.el7.x86_64.rpm
scrotのインストール
sudo dnf install https://raw.githubusercontent.com/rpmsphere/x86_64/master/g/giblib-1.2.4-28.x86_64.rpm
sudo dnf install https://download-ib01.fedoraproject.org/pub/fedora/linux/releases/32/Everything/x86_64/os/Packages/s/scrot-0.8-21.fc31.x86_64.rpm
printキーの設定
/home/satou/.config/openbox/rc.xml 編集
360行付近
<keybind key="Print">
<action name="Execute">
<startupnotify>
<enabled>true</enabled>
<name>scrot</name>
</startupnotify>
<command>scrot '%Y-%m-%d-%T_$wx$h_scrot.jpg' -e 'mv $f /home/satou/Pictures'</command>
</action>
</keybind>
tint2 obmenu-generatorの設定は 前回の私の記事参照されたし
~/.config/openbox/autostart 私の場合
sleep 3
hsetroot -fill /home/satou/Pictures/wallpaper/Kinkaku_Ji_by_Elizabeth_K_Joseph.jpg &
tint2 &
lxpolkit &
hsetroot -fill /home/satou/Pictures/wallpaper/Kinkaku_Ji_by_Elizabeth_K_Joseph.jpg &
tint2 &
lxpolkit &
Fedora-Server から openboxをいれるひとはあまりいないでしょう。
fedora- lxde版があるから
自分の好みにしたいかたは、これもありかな。
以下参考画像
以下参考画像

openboxのメニュー
neofetchの画像
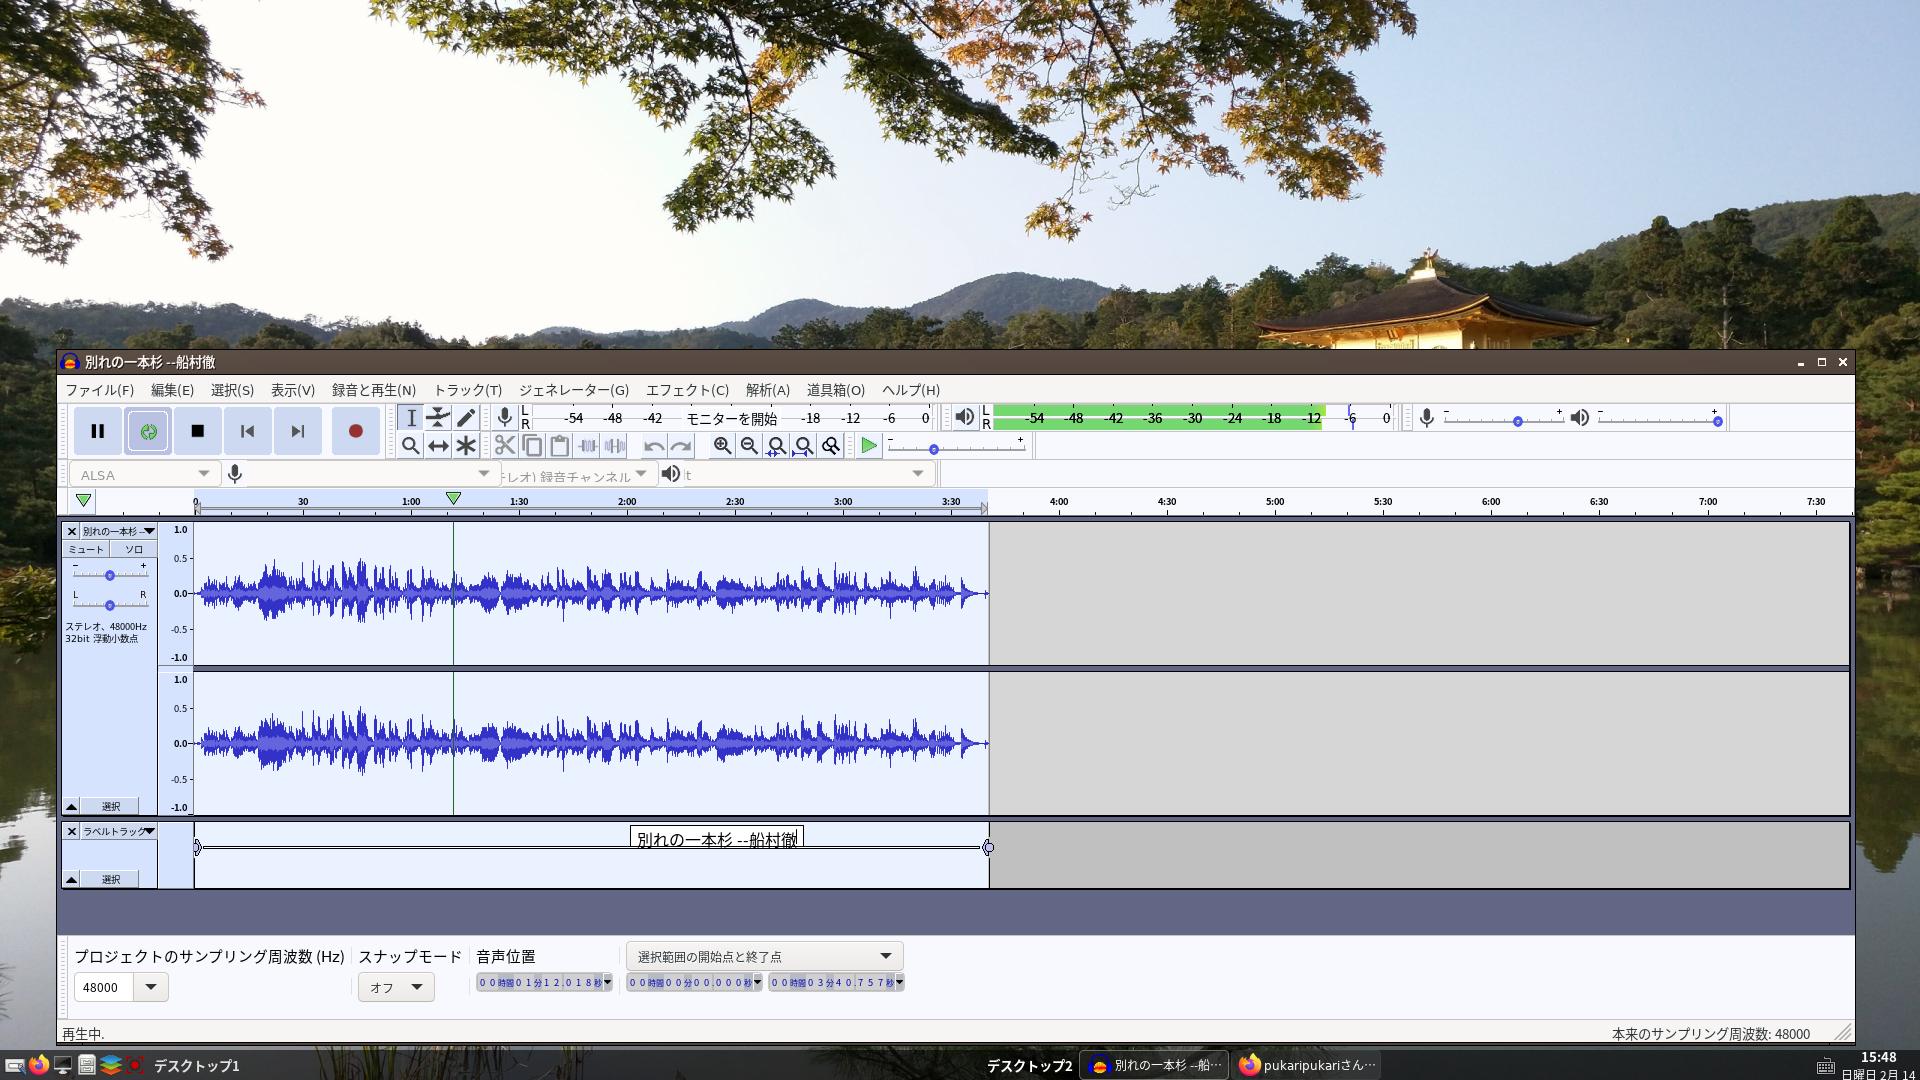
audacityの画像
onlyoffice-desktopeditorsの画像
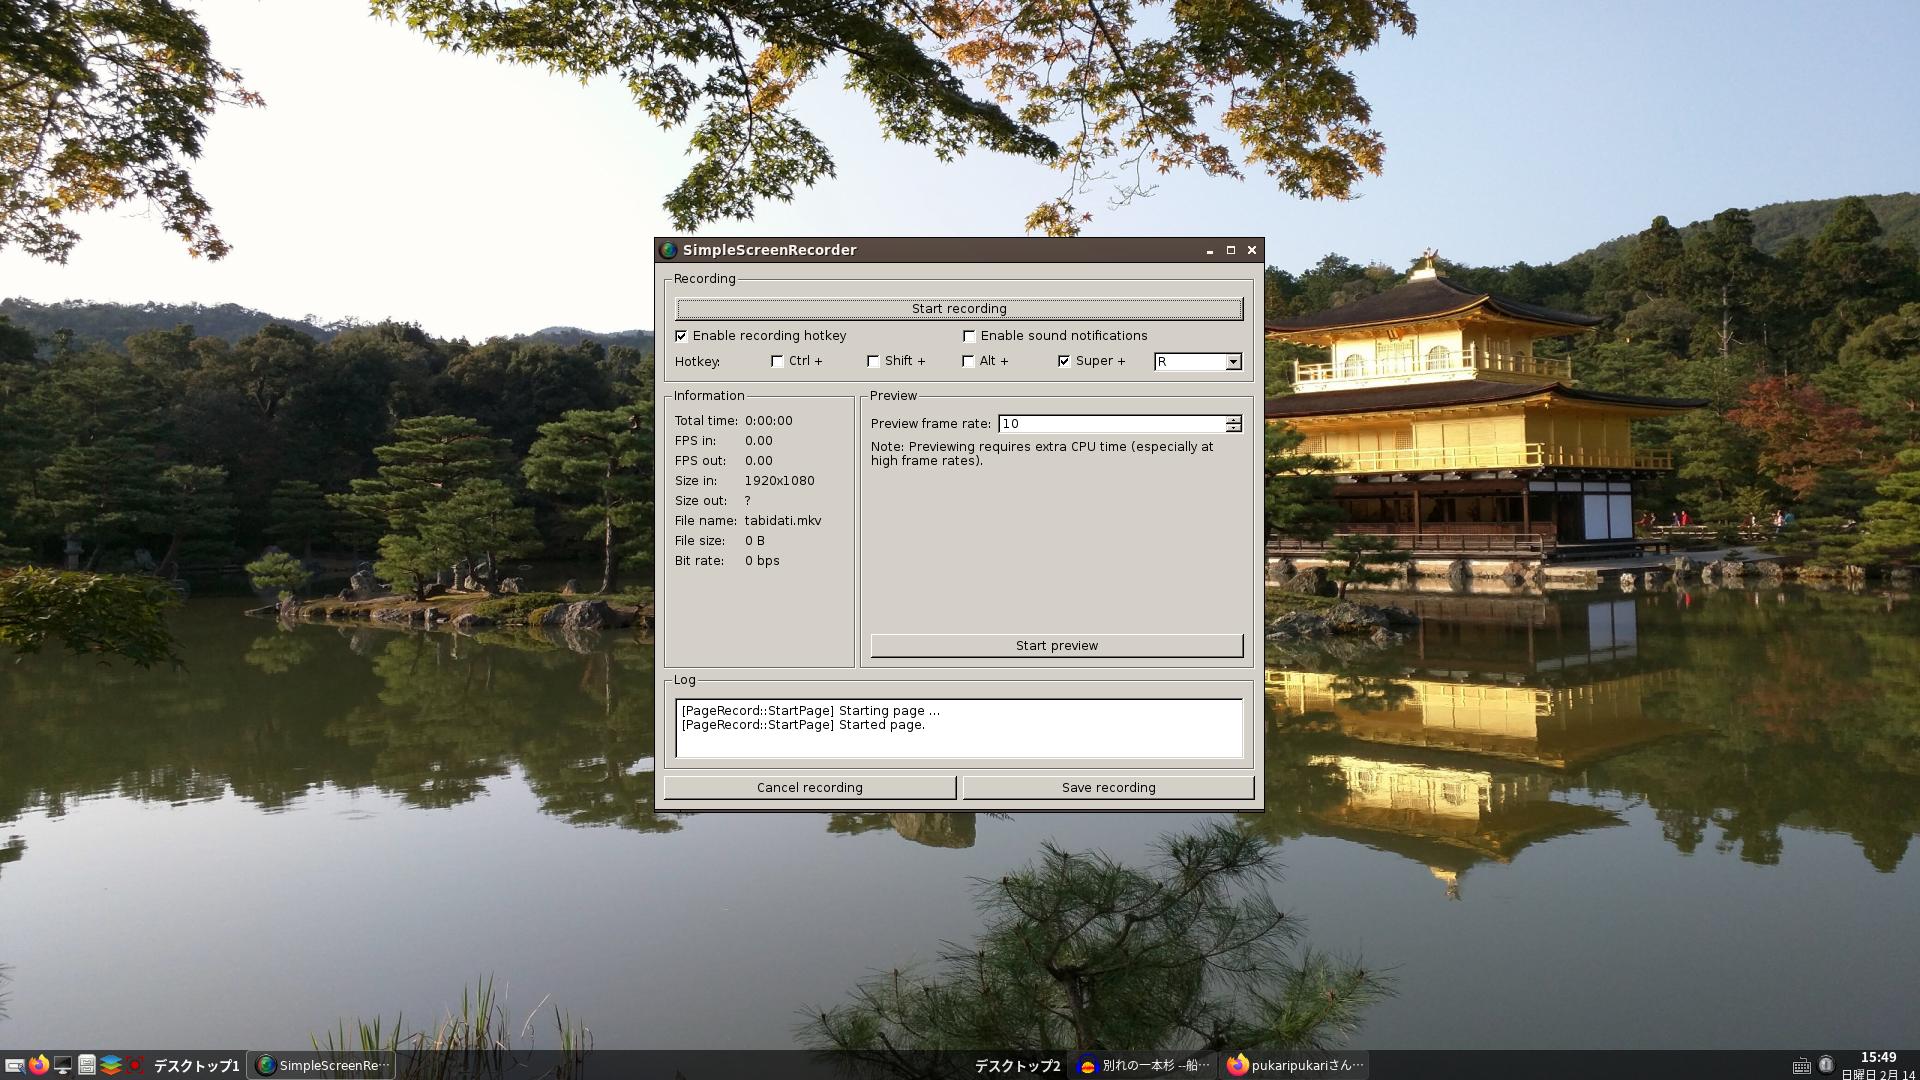
simplescreenrecorderの画像
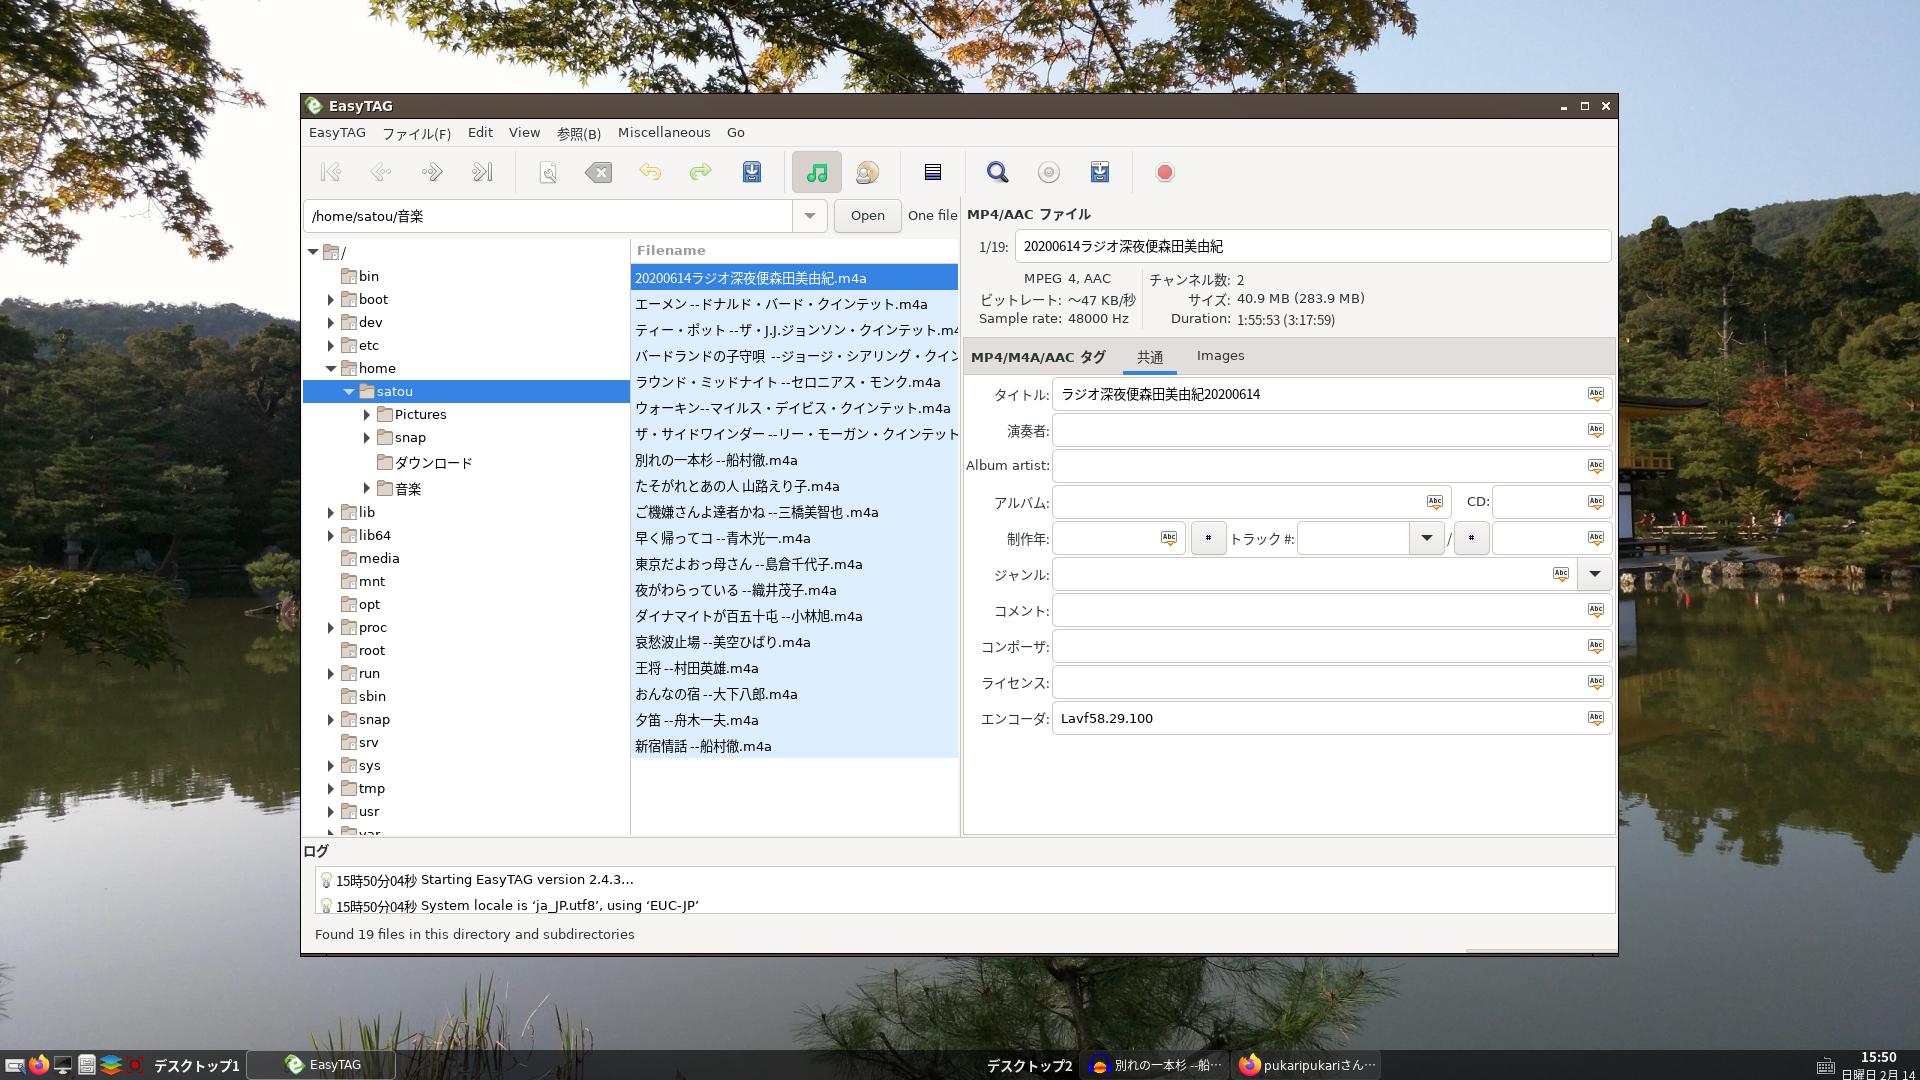
easytagの画像
vlcの画像
fcitxの設定の画像
ーーーーーーーーーーーーーーーーーーーーーーーー
日本語入力について
fedoraの日本語入力は、ふつうibus-kkc でしょう。
私は、fcitxが好みです。fedoraには、fcitx-mozc がありません。
しかたなく fcitx-anthy を使っていました。
fedora fcitx-mozc を検索していたら、
openSUSEのパッケージを使うことができます。というサイトを見つけた。
四年前の記事のようですが・・・・。
https://plumz.me/archives/6496/
openSUSE Tumbleweedのものを試してみた。以下のファイルをweb上からダウンロード
fcitx-mozc-2.25.4150.102-1.3.x86_64.rpm
libprotobuf25-3.14.0-1.2.x86_64.rpm
mozc-2.25.4150.102-1.3.x86_64.rpm
mozc-gui-tools-2.25.4150.102-1.3.x86_64.rpm
この4個を同時にインストールした。
sudo dnf install ~/ダウンロード/fcitx-mozc-2.25.4150.102-1.3.x86_64.rpm ~/ダウンロード/mozc-2.25.4150.102-1.3.x86_64.rpm ~/ダウンロード/mozc-gui-tools-2.25.4150.102-1.3.x86_64.rpm ~/ダウンロード/libprotobuf25-3.14.0-1.2.x86_64.rpm
ログアウト、ログイン。
fcitxの設定を開くとそこにはすでに mozc の文字がありました。
ーーーーーーーーーーーーーーーーーーーーーー
https://www.youtube.com/watch?v=0Y-vH-GNpnw&t=317s
fedora rawhide 2020 [fedora系]
fedora rawhide 2020
あいもかわらずlinuxであそんでいます
今回のわたしのパソコン環境 os fedora rawhide openboxウインドーマネージャー
CPU: Intel i7-4790 (8) @ 4.000GHz
GPU: NVIDIA GeForce GTX 970
monitor: HDMI接続
あいもかわらずlinuxであそんでいます
今回のわたしのパソコン環境 os fedora rawhide openboxウインドーマネージャー
CPU: Intel i7-4790 (8) @ 4.000GHz
GPU: NVIDIA GeForce GTX 970
monitor: HDMI接続
Fedora-Workstation-Live-x86_64-Rawhide-20200607.n.0.iso
fedoraは、人気のあるosでしょう。
fedora32をインストールしてみた。dnf update をしてみてあまりの多さに驚いた。
なので fedora rawhide(ローリング・リリース版) をためしてみた。
あたらしめのパソコンならなんの設定もしなくとも容易にインストールできるでしょう。
古いnvidiaドライバーをつかっているパソコンは、fedora rawhide は避けた方がいいでしょう。
dnf install xorg-x11-drv-nvidia-340xx akmod-nvidia-340xx などをインストールしても
errorがでて起動しなかった。fedora32場合は正常にうごていた。
ーーー $,# の記号省略
インストール終了後
sudo passwd
rpmfusionのインストール
rawhide の場合
dnf install https://download1.rpmfusion.org/free/fedora/rpmfusion-free-release-rawhide.noarch.rpm https://download1.rpmfusion.org/nonfree/fedora/rpmfusion-nonfree-release-rawhide.noarch.rpm
動画用
dnf install ffmpeg-libs
日本語入力
nano /etc/profile
export XMODIFIERS='@im=IBUS'
export GTK_IM_MODULE='ibus'
export QT_IM_MODULE='ibus'
export LC_CTYPE=$LANG
ibus-setup
以上設定終了 以下マイブームopenboxウインドーマネージャー
dnf install openbox obconf tint2 lxterminal pcmanfm
hsetrootのインストール
https://github.com/himdel/hsetroot
必要なもののインストール
dnf install imlib2-devel libX11-devel libXinerama-devel make
cd ~/ダウンロード/hsetroot-master
make
sudo make install
obmenu-generatorのインストール
dnf remove PackageKit-gtk3-module
dnf install git perl-Gtk2 cpanminus
# cpanm Linux::DesktopFiles
# cpanm Data::Dump
# exit
$ git clone git://github.com/trizen/obmenu-generator
$ sudo cp obmenu-generator/obmenu-generator /usr/bin
$ sudo chmod +x /usr/bin/obmenu-generator
$ mkdir ~/.config/obmenu-generator
$ cp -r obmenu-generator/schema.pl ~/.config/obmenu-generator/
$ cp -r /etc/xdg/openbox ~/.config/
$ obmenu-generator -s -i
oblogoutのインストール
必要なもののインストール python2をつかうためにfc31のアプリが使われる
dnf install intltool
dnf install https://download-ib01.fedoraproject.org/pub/fedora/linux/updates/31/Everything/x86_64/Packages/p/python2-distutils-extra-2.39-16.fc31.noarch.rpm
dnf install https://download-ib01.fedoraproject.org/pub/fedora/linux/releases/31/Everything/x86_64/os/Packages/p/python2-pillow-6.1.0-3.fc31.x86_64.rpm
dnf install https://download-ib01.fedoraproject.org/pub/fedora/linux/releases/31/Everything/x86_64/os/Packages/p/python2-dbus-1.2.8-6.fc31.x86_64.rpm
dnf install https://download-ib01.fedoraproject.org/pub/fedora/linux/releases/31/Everything/x86_64/os/Packages/p/python2-gtkextra-1.1.0-37.fc31.x86_64.rpm
exit
git clone https://github.com/Cloudef/oblogout-fork
cd /home/satou/oblogout-fork
sudo python2 /home/satou/oblogout-fork/setup.py install
oblogoutのアイコンの変更 foom から oxygen に。
nano /etc/oblogout.conf
buttontheme = oxygen
scrotのインストール
dnf install https://download-ib01.fedoraproject.org/pub/fedora/linux/releases/30/Everything/x86_64/os/Packages/g/giblib-1.2.4-28.fc28.x86_64.rpm
dnf install https://download-ib01.fedoraproject.org/pub/fedora/linux/releases/32/Everything/x86_64/os/Packages/s/scrot-0.8-21.fc31.x86_64.rpm
openbox の設定
nano /home/satou/.config/openbox/autostart
xrandr -s 1360x768
sleep 3
hsetroot -fill /home/satou/Pictures/wallpaper/Kinkaku_Ji_by_Elizabeth_K_Joseph.jpg &
tint2 &
ibus-daemon -drx
conky &
nano ~/.config/openbox/rc.xml Printキーの設定
<keybind key="Print">
<action name="Execute">
<startupnotify>
<enabled>true</enabled>
<name>scrot</name>
</startupnotify>
<command>scrot '%Y-%m-%d-%T_$wx$h_scrot.jpg' -e 'mv $f /home/satou/Pictures'</command>
</action>
</keybind>
fedora rawhide には、gnomeデスクトップがもれなくついてくる。
gnomeデスクトップはあまり好きではありません。
file manager の nautilus が最悪の状態。
そんななかで以下のアプリはいいかも。
gnome-characters
fedora rawhideは、快適なosでしょう。
以下参考画像
openboxのメニューの画像
neofetchの画像
テキストエデッターの画像
gnome-charactersの画像

hsetrootのインストール
ローカル路線バス乗り継ぎの旅
https://www.youtube.com/watch?v=V2KztegUmY8&t=71s
https://www.youtube.com/watch?v=n_a4BZhJnK8
https://www.youtube.com/watch?v=V2KztegUmY8&t=71s
https://www.youtube.com/watch?v=n_a4BZhJnK8
centos8 + openbox [fedora系]
centos8 + openbox
お仕事の方はごくろうさまです。
あいもかわらずlinuxであそんでいます。
今回のわたしのパソコンは os centos8 openboxウインドーマネージャー
CPU: Intel i7 860 (8) @ 2.801GHz
GPU: NVIDIA GeForce GT 240
CentOS-Stream-8-x86_64-20191219-dvd1.iso
centos8は普通の方は手を出さないでしょう。
パソコンサーバーとして、隠れファンは日本にも多数おられるとおもわれる。
centos8 のインストールは、このパソコンの場合ふるい nvidiaドライバーを使用しているため grubメニューで tab キー
そして nomodeset と記入する必要があった。
centos8 のインストールで注意することは、ネット接続を on にする。時刻、日付を東京にする。kdumpも・・・。
インストール終了後 なにもしないでそのまま再起動させる。
しかしこのパソコンの場合 ctrl+alt+F3 でやっとログイン画面をだすことができた。
$ と # の記号は省略した。
login:root
passwd:
不安定なのでパソコンを、リマウントさせる。/dev/sda3は centos8をインストールしたパーティションです。
# mount -o remount,rw /dev/sda3
# dnf update
reboot
login:satou
passwd:
startx
firefoxがふつうに動くので、リポジトリをコペパでインストールした。
dnf install epel-release
dnf install https://www.elrepo.org/elrepo-release-8.0-2.el8.elrepo.noarch.rpm
dnf install https://download1.rpmfusion.org/free/el/rpmfusion-free-release-8.noarch.rpm
dnf install https://download1.rpmfusion.org/nonfree/el/rpmfusion-nonfree-release-8.noarch.rpm
dnf config-manager --set-enabled PowerTools
rpm -ivh https://sauronlenoir.be/repo/rpm/sauronlenoir-release-1-0.el8.noarch.rpm
sudo dnf install http://rpmfind.net/linux/epel/7/x86_64/Packages/s/SDL2-2.0.10-1.el7.x86_64.rpm
sudo dnf install ffmpeg
sudo dnf install gstreamer1-libav
rpmfusionをインストールしたら、nvidia-driversをインストールできる。
最新のnvidia-440 が入ったようだ。古いパソコンドライバーでもいけるかもしれない・・・そのままにしておく。
dnf install nvidia-drivers
dnf install gnome-tweak-tool dconf-editor langpacks-ja pavucontrol ibus-kkc vlc gimp
localectl set-locale LANG=ja_JP.UTF-8
source /etc/locale.conf
echo $LANG
ibus-setup
nano /etc/profile
export GTK_IM_MODULE=ibus
export XMODIFIERS=@im=ibus
export QT_IM_MODULE=ibus
ibus-daemon -drx
メニュー→gnomeの設定→デバイス→キーボード→次の入力ソースへ切り替える zengakuhangaku キー
reboot
nautilusの設定を普通にする。$ で・・・
gsettings set org.gnome.nautilus.preferences always-use-location-entry true
gsettings set org.gnome.nautilus.preferences default-sort-order "type"
gsettings set org.gnome.nautilus.list-view default-visible-columns "['name', 'type', 'size', 'date_modified', 'starred']"
gsettings set org.gnome.desktop.interface clock-show-date true
アイコンがおおきすぎるときは、nautilus の横線三本のアイコンクリック 100% となっているところを変える。
selinuxを無効に設定
nano /etc/selinux/config
SELINUX=disabled
systemctl disable kdump
systemctl disable auditd.service
systemctl disable smartd.service
systemctl disable mdmonitor.service
このパソコンの場合、nvidiaドライバー、上記のサービスを停止してやっと gdm が起動するようになりました。
usermod -aG wheel satou
これでふつうのgnomeのデスクトップができあがり、終了
ーーーーーーーーーーーーーーーーーーーーーーーーーーーーーーーーーーーーーーーーーーーーーーーーーーー
ーーーーーーーーーーーーーーーーーーーーーーーーーーーーーーーーーーーーーーーーーーーーーーーーーーー
これから、素人のわたしの改悪がはじまります。
マイブーム openboxウインドウーマネージャー
centos7では容易に出来た。
centos8では、どうでしょうか。
centos8で、openboxウインドウーマネージャーに必要なアプリの一部は、fedora 30 のアプリを使用した。
openbox tint2 obconf feh scrot neofetch ちまちま入れていった。
dnf install openbox
dnf install http://download-ib01.fedoraproject.org/pub/epel/7/x86_64/Packages/t/tint2-16.2-3.el7.x86_64.rpm
dnf install http://download-ib01.fedoraproject.org/pub/fedora/linux/releases/30/Everything/x86_64/os/Packages/o/obconf-2.0.4-14.20150213git63ec47.fc30.x86_64.rpm
dnf install http://download-ib01.fedoraproject.org/pub/fedora/linux/releases/30/Everything/x86_64/os/Packages/f/feh-3.1.3-1.fc30.x86_64.rpm
dnf install http://download-ib01.fedoraproject.org/pub/fedora/linux/releases/30/Everything/x86_64/os/Packages/g/giblib-1.2.4-28.fc28.x86_64.rpm
dnf install http://download-ib01.fedoraproject.org/pub/fedora/linux/releases/30/Everything/x86_64/os/Packages/s/scrot-0.8-20.fc30.x86_64.rpm
dnf install http://download-ib01.fedoraproject.org/pub/fedora/linux/releases/30/Everything/x86_64/os/Packages/j/jp2a-1.0.7-4.fc30.x86_64.rpm
dnf install http://download-ib01.fedoraproject.org/pub/fedora/linux/releases/30/Everything/x86_64/os/Packages/n/neofetch-6.0.0-2.fc30.noarch.rpm
ーーーーーーーーーーーーーーーーーーーーーーーーーーーーーーーーーーーーーーーーーーーーーーーーーーーーーーーーー
oblogoutのインストール
python27 intltool python2-distutils-extra Pillow pygtk2 git
dnf install python27 intltool git
dnf install http://download-ib01.fedoraproject.org/pub/fedora/linux/releases/30/Everything/x86_64/os/Packages/p/python2-distutils-extra-2.39-10.fc30.noarch.rpm
alternatives --config python
python2 選択した。
python -m pip install Pillow
dnf install http://download-ib01.fedoraproject.org/pub/fedora/linux/releases/30/Everything/x86_64/os/Packages/p/python2-dbus-1.2.8-5.fc30.x86_64.rpm
dnf install http://download-ib01.fedoraproject.org/pub/fedora/linux/releases/30/Everything/x86_64/os/Packages/p/python2-cairo-1.18.0-2.fc30.x86_64.rpm
dnf install http://download-ib01.fedoraproject.org/pub/fedora/linux/releases/30/Everything/x86_64/os/Packages/p/pygtk2-2.24.0-25.fc30.x86_64.rpm
oblogoutのインストール $ で・・・
git clone https://github.com/Cloudef/oblogout-fork
cd /home/satou/oblogout-fork
sudo python2 /home/satou/oblogout-fork/setup.py install
テスト
oblogout
oblogoutのサイト アイコンの準備
上記のサイトからarchlinux用ファイルをダウンロードしてアイコンを取り出す。
https://launchpad.net/oblogout/0.2/0.2.0/+download/oblogout-0.2-1-x86_64.pkg.tar.gz
/home/satou/ダウンロード/oblogout-0.2-1-x86_64.pkg.tar.gz 解凍。
/home/satou/oblogout-0.2-1-x86_64.pkg/usr/share/themes
上記のフォルダを以下のように名前変更
/home/satou/.themes
アイコン変更
nano /etc/oblogout.conf
24行目
buttontheme = foom
または
buttontheme = oxygen
obmenu-generatorインストール
必要なアプリのインストール
dnf install gtk2-devel cpanminus
obmenu-generatorインストール参考サイト様。
git clone git://github.com/trizen/obmenu-generator
sudo cp obmenu-generator/obmenu-generator /usr/bin
mkdir ~/.config/obmenu-generator
cp -r obmenu-generator/schema.pl ~/.config/obmenu-generator/
sudo cpanm Gtk2
sudo cpanm Linux::DesktopFiles
sudo cpanm Data::Dump
sudo chmod +x /usr/bin/obmenu-generator
obmenu-generator -s -i
oblogoutの使用
nano /home/satou/.config/obmenu-generator/schema.pl の編集
105行目
##{exit => ['Exit', 'application-exit']},
108行目
{item => ['oblogout', 'Exit', 'application-exit']},
こんかいのパソコンは、Intel i7 860 11年前のパソコンですがまだまだ現役でしょう。
centos8のサーバーとしてもおそらく快適にうごくとおもわれます。
参考サイト様
CentOS7 → CentOS8のインストール作業、めも
How To Install FFmpeg on CentOS 8 / RHEL 8
xfceデスクトップのインストールしたい時
以下参考画像
openboxウインドーマネージャーの画像
gnomeデスクトップの画像
languageの設定の画像
neofetchの画像

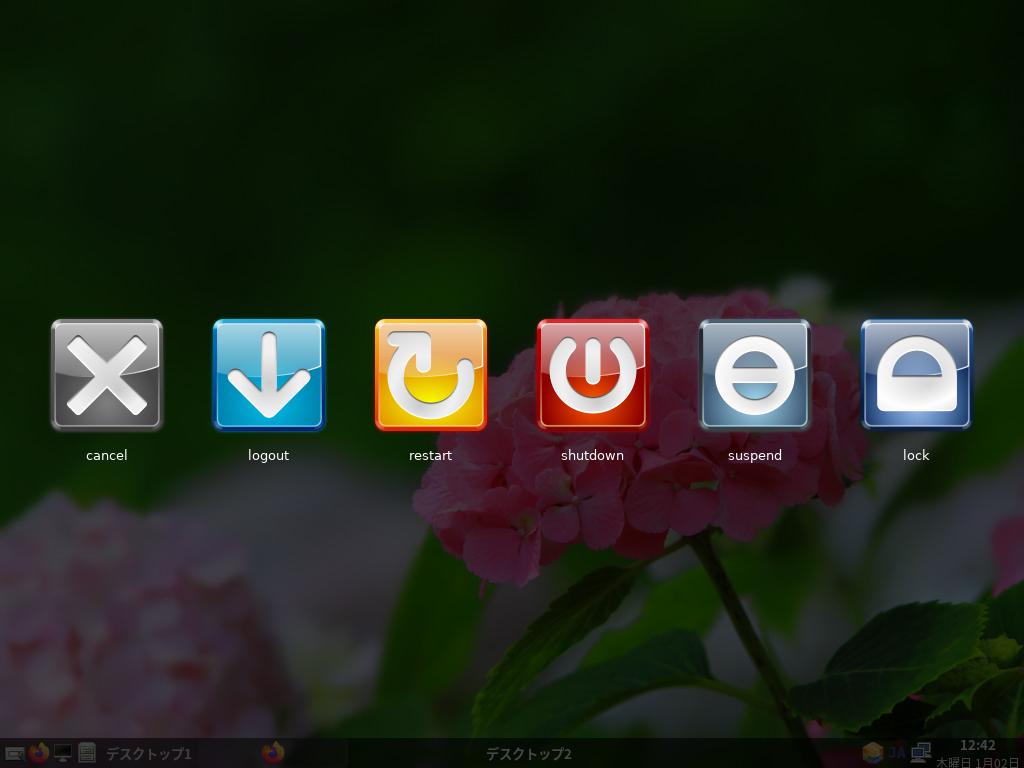
oblogoutの画像
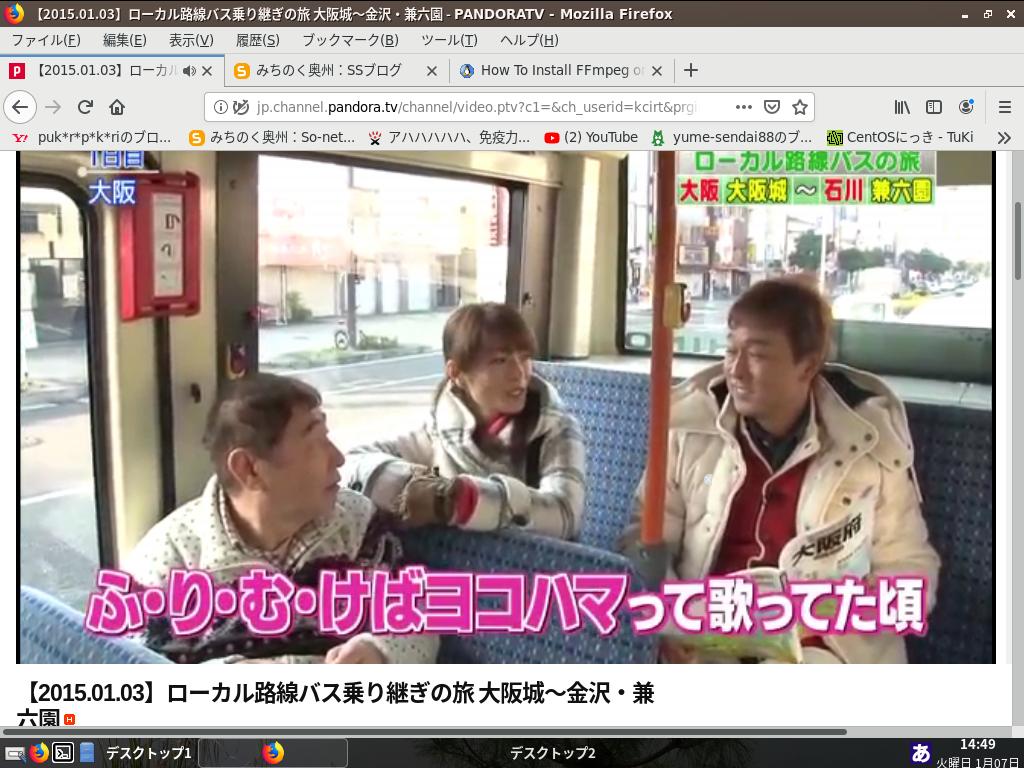
ローカル路線バス乗り継ぎの旅 大阪城〜金沢・兼六園 web
fedora + oblogout [fedora系]
fedora + oblogout
あいもかわらずlinuxであそんでいます
・・・・ことしもよろしく。
今回のわたしのパソコン環境 os fedora openboxウインドーマネージャー
CPU: Intel i7 860 (8) @ 2.801GHz
GPU: NVIDIA GeForce GT 640 Rev. 2
Fedora-Server-netinst-x86_64-31-1.9.iso
今回のパソコンは、Intel i7 860 で11年前のパソコン。
usbメモリーに gnome-disks をつかい書き込み ssd にインストールした。
インストールの時にソフト選択で、xfceデスクトップを選択してインストールをすすめた。
この古いパソコンには、xfceデスクトップ選択するのが最適でしょう。ほかはだめでした。
まいプームのopenboxウインドーマネージャー。
oblogoutは、fedoraでうごくのでしょうか。
fedora31では、python2を排除してあるとかなんとかという記事もありました。
ちょっとハードルがたかそうです。
obmenu-generatorインストール
必要なアプリのインストール
dnf install gcc gcc-c++ kernel-devel nautilus-open-terminal perl-Glib perl-Pango perl-Data-Dump perl-Cairo perl-Gtk2 git perl-App-cpanminus
obmenu-generatorインストール参考サイト様。
前回の私の記事も参照されたし
oblogoutのインストール
必要なアプリのインストール
dnf install unar python27 intltool python2-dbus python2-gtkextra python-imaging python2-distutils-extra
oblogoutインストール参考サイト様。
git clone https://github.com/Cloudef/oblogout-fork
cd /home/satou/oblogout-fork
sudo python2 /home/satou/oblogout-fork/setup.py install
oblogoutのサイト アイコンの準備
上記のサイトからarchlinux用ファイルをダウンロードしてアイコンを取り出す。
https://launchpad.net/oblogout/0.2/0.2.0/+download/oblogout-0.2-1-x86_64.pkg.tar.gz
unar /home/satou/ダウンロード/oblogout-0.2-1-x86_64.pkg.tar.gz
/home/satou/oblogout-0.2-1-x86_64.pkg/usr/share/themes
上記のフォルダを以下のように名前変更
/home/satou/.themes
テスト
oblogout
アイコン変更
nano /etc/oblogout.conf
24行目
buttontheme = foom
または
buttontheme = oxygen
oblogoutの使用
/home/satou/.config/obmenu-generator/schema.pl の編集
105行目
##{exit => ['Exit', 'application-exit']},
108行目
{item => ['oblogout', 'Exit', 'application-exit']},
oblogoutのインストールのときに必要なアプリをみつけるのが
ほねでしょう。無事 oblogout が起動できた。
scrotのインストール
fedora31では、scrot がインストールできません。
https://fedora.pkgs.org/30/fedora-x86_64/giblib-1.2.4-28.fc28.x86_64.rpm.html
上記をインストールすれば、可能。
以下参考画像。
openboxの画像
oxygenのアイコンの画像

駐在刑事
fedora server + deepin 2019 [fedora系]
fedora server + deepin 2019
お仕事の方はごくろうさまです。
あいもかわらずlinuxであそんでいます。
今回の私のパソコン環境は os fedora deepinデスクトップ
CPU: Intel i7-4770K (8) @ 4.000GHz
GPU: NVIDIA GeForce GTS 250
Fedora-Server-netinst-x86_64-31-1.9.iso
fedora31はリリースされたばかりです。
nvidiaドライバー使用のパソコンは、
fedoraのインストールの時grubメニューでnomodesetの記入は必須でしょう。
Fedora-Server-netinst-x86_64-31-1.9.isoをインストールするときに
ソフト選択の項目のところでdeepin desktopを選択してssdにインストールした。
インストール終了後再起動すると、deepinデスクトップのログイン画面がでた。
手間いらずで、fedora版deepinデスクトップのできあがりでしょう。
ご本家deepinとのちがいは、wps officeが入っていなことでしょう。
あとはほぼ一緒。
歯車アイコンクリック→キーレイアウトは、japanese(kana86)を選択した。
ibus-setup
dnf install firefox leafpad screenfetch neofetch mirage
rpmfusionのインストール
dnf install https://download1.rpmfusion.org/free/fedora/rpmfusion-free-release-$(rpm -E %fedora).noarch.rpm
dnf install https://download1.rpmfusion.org/nonfree/fedora/rpmfusion-nonfree-release-$(rpm -E %fedora).noarch.rpm
h264コーデックのインストール
dnf install gstreamer1-libav
ご本家deepinでは、japanese(kana86)を選択しても
キーレイアウトがうまくjapaneseにならなかった。
わたしは日本語入力でかな入力をしている。
キーレイアウトがうまくゆかないとかな入力は失敗するでしょう。
fedora版deepinは、キーレイアウトについて何の問題もなかった。
fedora版deepinは、ご本家よりもよいのでは。Deepin 15.11で最新。
以下参考画像。
dnf install gstreamer1-libav
ご本家deepinでは、japanese(kana86)を選択しても
キーレイアウトがうまくjapaneseにならなかった。
わたしは日本語入力でかな入力をしている。
キーレイアウトがうまくゆかないとかな入力は失敗するでしょう。
fedora版deepinは、キーレイアウトについて何の問題もなかった。
fedora版deepinは、ご本家よりもよいのでは。Deepin 15.11で最新。
以下参考画像。

歯車アイコンクリックの画像
fアイコンクリックの画像
screenfetchの画像
fedora openboxウインドウマネージャー いまさら [fedora系]
openboxウインドウマネージャー いまさら
お仕事の方はごくろうさまです。
あいもかわらずlinuxであそんでいます。
今回のわたしのパソコン環境 os fedora openboxウインドウマネージャー
CPU: Intel i7-4790K (8) @ 4.400GHz
GPU: NVIDIA GeForce GT 710
Fedora-Server-netinst-x86_64-30-1.2.iso
私のfedoraの前回の記事、fedoraの前前回の記事、参考にされたし。
openboxウインドウマネージャーはlxdeデスクトップで使用されている。
openboxウインドウマネージャーは多くの方が知っておられると思う。
fedoraでopenboxウインドウマネージャーをインストールするとほかのosよりはいい感じのメニューがありました。
しかし、いまいちつかいづらい。
素のopenboxのフォルダは /etc/xdg/openboxにあり、/home/satou/.config/openboxにコピーする。
obmenu-generatorをインストールすることにした。
fedora rpmfusion 追加
$ wget http://download1.rpmfusion.org/free/fedora/rpmfusion-free-release-30.noarch.rpm
$ wget http://download1.rpmfusion.org/nonfree/fedora/rpmfusion-nonfree-release-30.noarch.rpm
その後、
$ sudo dnf install rpmfusion-free-release-30.noarch.rpm
$ sudo dnf install rpmfusion-nonfree-release-30.noarch.rpm
必要なものをインストール
# yum install perl-Gtk2 git perl-App-cpanminus
obmenu-generatorインストール参考サイト様
http://sparkylinux.org/wiki/doku.php/obmenu_generator
git clone git://github.com/trizen/obmenu-generator
sudo cp obmenu-generator/obmenu-generator /usr/bin
cp -r obmenu-generator/schema.pl ~/.config/obmenu-generator/
sudo cpanm Linux::DesktopFiles
sudo cpanm Data::Dump
sudo chmod +x /usr/bin/obmenu-generator
$ obmenu-generator -p -i
$ obmenu-generator -s -i
マイプームのショットカットキーは
/home/satou/.config/openbox/rc.xml に追記。
ーーーーーーーーーーーーーーーーーーーーーーーーーーーーーーーーー
<keybind key="W-S-F11">
<action name="Execute">
<startupnotify>
<enabled>true</enabled>
<name>firefox</name>
</startupnotify>
<command>firefox</command>
</action>
</keybind>
<keybind key="W-S-F12">
<action name="Execute">
<startupnotify>
<enabled>true</enabled>
<name>pcmanfm</name>
</startupnotify>
<command>pcmanfm</command>
</action>
</keybind>
<keybind key="W-Return">
<action name="Execute">
<startupnotify>
<enabled>true</enabled>
<name>lxterminal</name>
</startupnotify>
<command>lxterminal</command>
</action>
</keybind>
<keybind key="Print">
<action name="Execute">
<startupnotify>
<enabled>true</enabled>
<name>pkill openbox</name>
</startupnotify>
<command>scrot '%Y-%m-%d-%T_$wx$h_scrot.jpg' -e 'mv $f /home/satou/Pictures'</command>
</action>
</keybind>
<keybind key="W-S-e">
<action name="Execute">
<startupnotify>
<enabled>true</enabled>
<name>pkill openbox</name>
</startupnotify>
<command>pkill openbox</command>
</action>
</keybind>
ーーーーーーーーーーーーーーーーーーーーーーーーーーーーー
obmenu-generatorはよくできているソフトでしょう。うまく起動させるにはちょっとほねですが。
以下参考画像。
<action name="Execute">
<startupnotify>
<enabled>true</enabled>
<name>firefox</name>
</startupnotify>
<command>firefox</command>
</action>
</keybind>
<keybind key="W-S-F12">
<action name="Execute">
<startupnotify>
<enabled>true</enabled>
<name>pcmanfm</name>
</startupnotify>
<command>pcmanfm</command>
</action>
</keybind>
<keybind key="W-Return">
<action name="Execute">
<startupnotify>
<enabled>true</enabled>
<name>lxterminal</name>
</startupnotify>
<command>lxterminal</command>
</action>
</keybind>
<keybind key="Print">
<action name="Execute">
<startupnotify>
<enabled>true</enabled>
<name>pkill openbox</name>
</startupnotify>
<command>scrot '%Y-%m-%d-%T_$wx$h_scrot.jpg' -e 'mv $f /home/satou/Pictures'</command>
</action>
</keybind>
<keybind key="W-S-e">
<action name="Execute">
<startupnotify>
<enabled>true</enabled>
<name>pkill openbox</name>
</startupnotify>
<command>pkill openbox</command>
</action>
</keybind>
ーーーーーーーーーーーーーーーーーーーーーーーーーーーーー
obmenu-generatorはよくできているソフトでしょう。うまく起動させるにはちょっとほねですが。
以下参考画像。
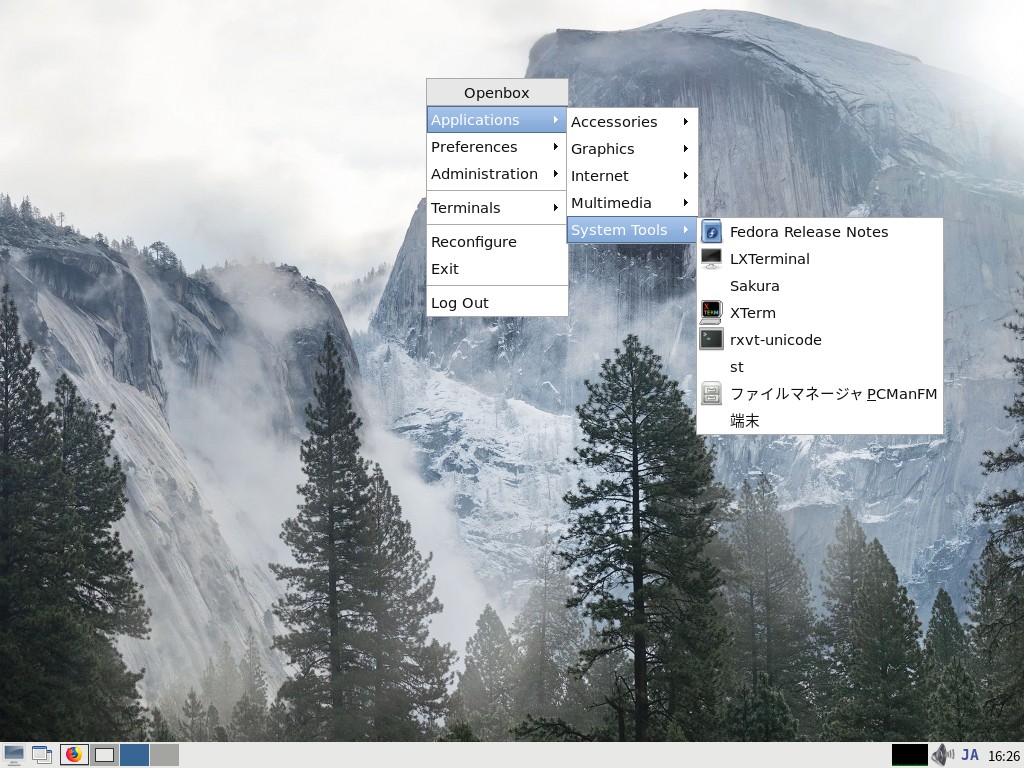
fedoraのopenboxの画像
obmenu-generatorをインストールした後の画像
neofetchの画像
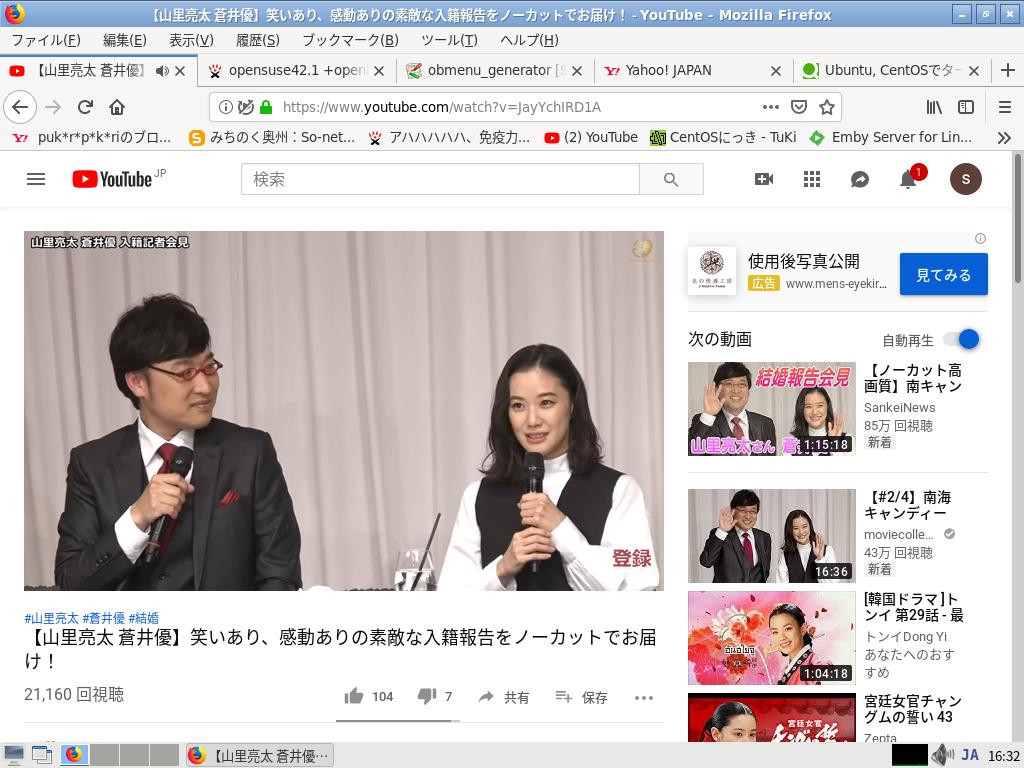
youtubeの画像

山里さん関連の記事の画像
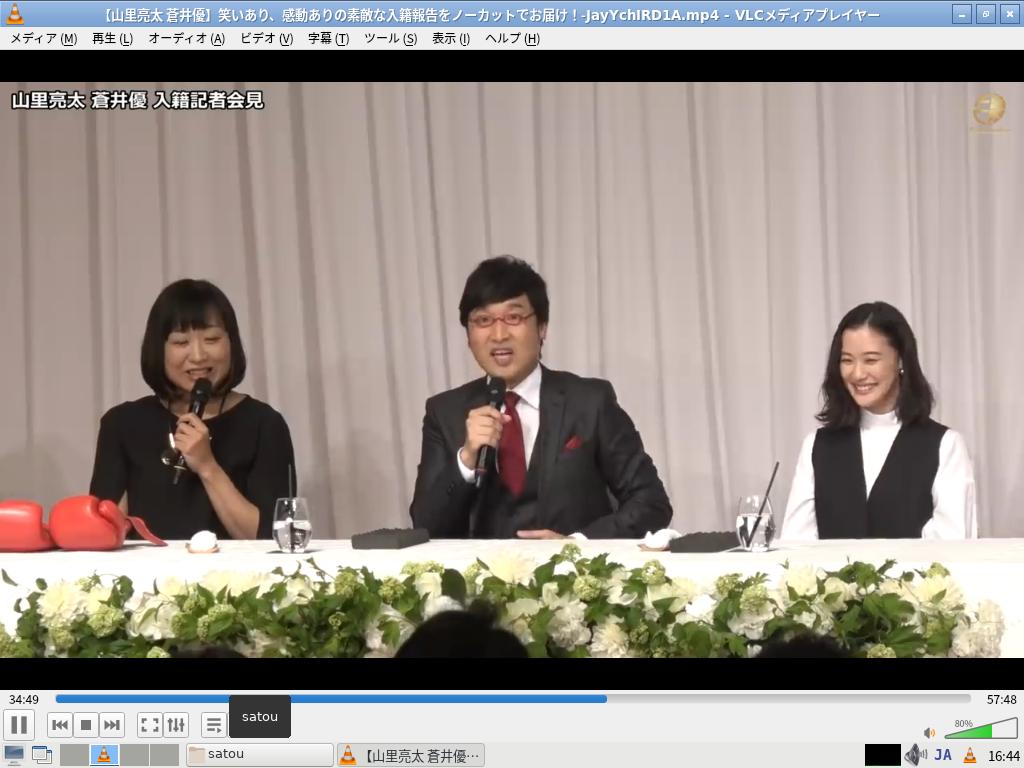
vlcの画像
youtube-dl でダウンロードした。
$ youtube-dl https://www.youtube.com/watch?v=JayYchIRD1A
fedora minimal + qtileウィンドウマネージャー [fedora系]
fedora minimal + qtileウィンドウマネージャー
お仕事の方はご苦労さまです。
あいかわらずlinuxであそんでいます。
今回の私のパソコン環境は osは fedora qtileウィンドウマネージャー
CPU: Intel Core i7-2600 @ 8x 3.8GHz
GPU: GeForce GT 240/PCIe/SSE2
Fedora-Server-netinst-x86_64-29-1.2.iso
qtileウィンドウマネージャーは全く知らなかった。
fedora minimalのインストールでbase-desktopを選択したときに、
7つのウィンドウマネージャーが入っていた。その中にqtileがあった。
qtileウィンドウマネージャーは2008年8月31日初リリースされた。
web上には新旧の情報が混在している。
qtile0.13.0が最新。
qtile0.10.0の設定ファイルconfig.pyは
qtile0.13.0では動かない。
fedoraはqtile0.12.0が使われている。
qtile home
http://docs.qtile.org/en/latest/
素の設定では以下の様になっている。
win+enter terminal
ctrl+win+q qtile終了。
win+w アプリ閉じる。
設定
1. /home/satou/.config/qtileフォルダ新規作成
オリジナルのconfig.pyは以下にある。使用しない。
config.pyの設定に失敗すると素の設定になる。
/usr/lib/python3.7/site-packages/libqtile/config.py
config.pyをweb上から取得する
/home/satou/.config/qtile/config.pyを新規作成。
2. フォントのインストールとrofiのインストール
rpmfusionのインストール。参考サイト様
dnf install google-noto-emoji-color-fonts
dnf install un-core-dotum-fonts
dnf install ipa-gothic-fonts ipa-pgothic-fonts
dnf install rofi
今回私は上記のフォントをインストールした。
3. /home/satou/.config/qtile/autostart.shの新規作成
#!/bin/bash
ibus-daemon -r -d -x
nitrogen --restore &
4. ショットカットの作成 i3と同じにする。
/home/satou/.config/qtile/config.pyの編集
Key([mod], "Return", lazy.spawn("lxterminal")),
Key([mod, "shift"],"F12", lazy.spawn("pcmanfm")),
Key([mod, "shift"],"F11", lazy.spawn("firefox")),
Key(["mod1"], "F4", lazy.window.kill()),
Key([mod, "shift"], "r", lazy.restart()),
Key([mod, "shift"], "e", lazy.shutdown()),
Key([mod], "d", lazy.spawn("/usr/bin/rofi -modi run,drun -show drun run")),
5. rofiの設定
/home/satou/.config/rofiフォルダ新規作成
/home/satou/.config/rofi/config新規作成。
web上から取得。
今回使用させていただいたmort65さん謹製のqtileの設定はよくできているとおもいます。
https://github.com/qtile/qtile-examples/tree/master/mort65
ubuntu、debian、qtile0.10.0が使われている。
qtile0.13.0をつかうなら、arch系、fedora系、gentoo系のosを使うべし。
i3と同じショットカットにしたので使用には問題はない。i3と同じレベルか。
タスクbarは/home/satou/.config/qtile/config.pyの編集で上、下にかえられる。
topか、bottomかこのみのわかれるところでしょう。
フォントサイズは14にしている。
widget_defaults = dict(
font='ubuntu bold',
fontsize=14,
padding=3,
)
extension_defaults = widget_defaults.copy()
screens = [
Screen(
top=bar.Bar(
参考画像。
qtileウィンドウマネージャー
neofetch画像
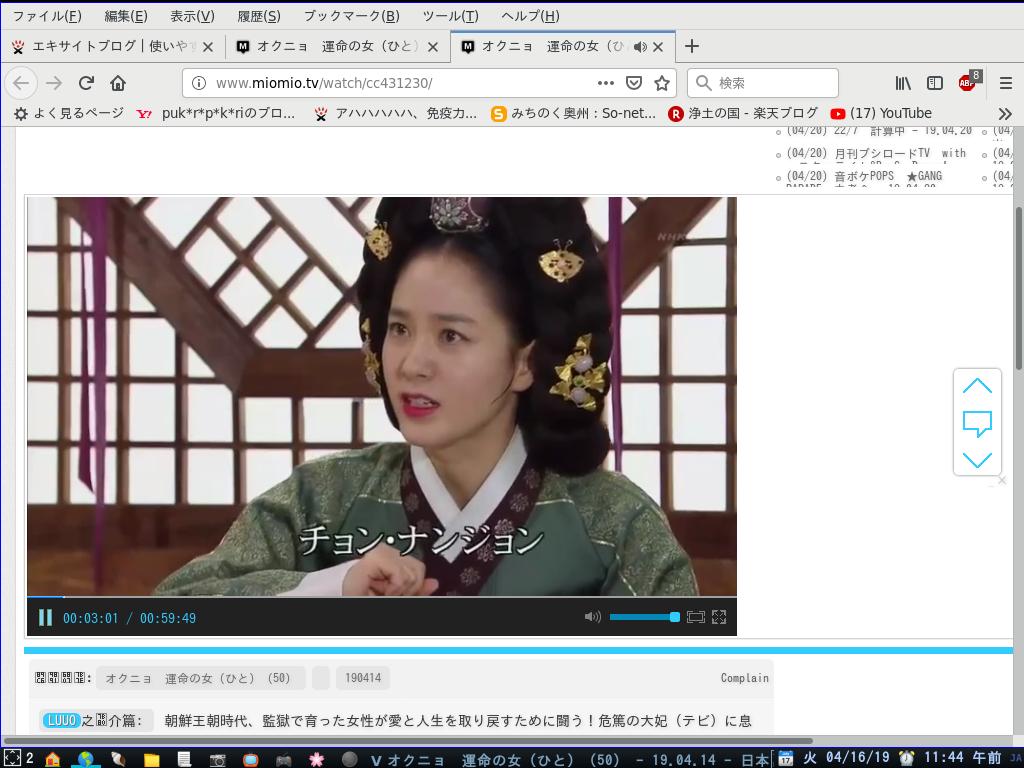
オクニョ
nvidiaドライバーは、rpmfusionからインストールした。正攻法ではうまくゆかなかったので。
fedora repo 追加
$ wget http://download1.rpmfusion.org/free/fedora/rpmfusion-free-release-30.noarch.rpm
$ wget http://download1.rpmfusion.org/nonfree/fedora/rpmfusion-nonfree-release-30.noarch.rpm
その後、下記のようにコマンドを実行します。
$ sudo dnf install rpmfusion-free-release-30.noarch.rpm
$ sudo dnf install rpmfusion-nonfree-release-30.noarch.rpm
https://rpmfusion.org/Howto/NVIDIA
dnf install xorg-x11-drv-nvidia-340xx akmod-nvidia-340xx
nano /etc/default/grub の中のnomodesetの部分は削除した。そして、update
grub2-mkconfig -o /boot/grub2/grub.cfg
reboot


