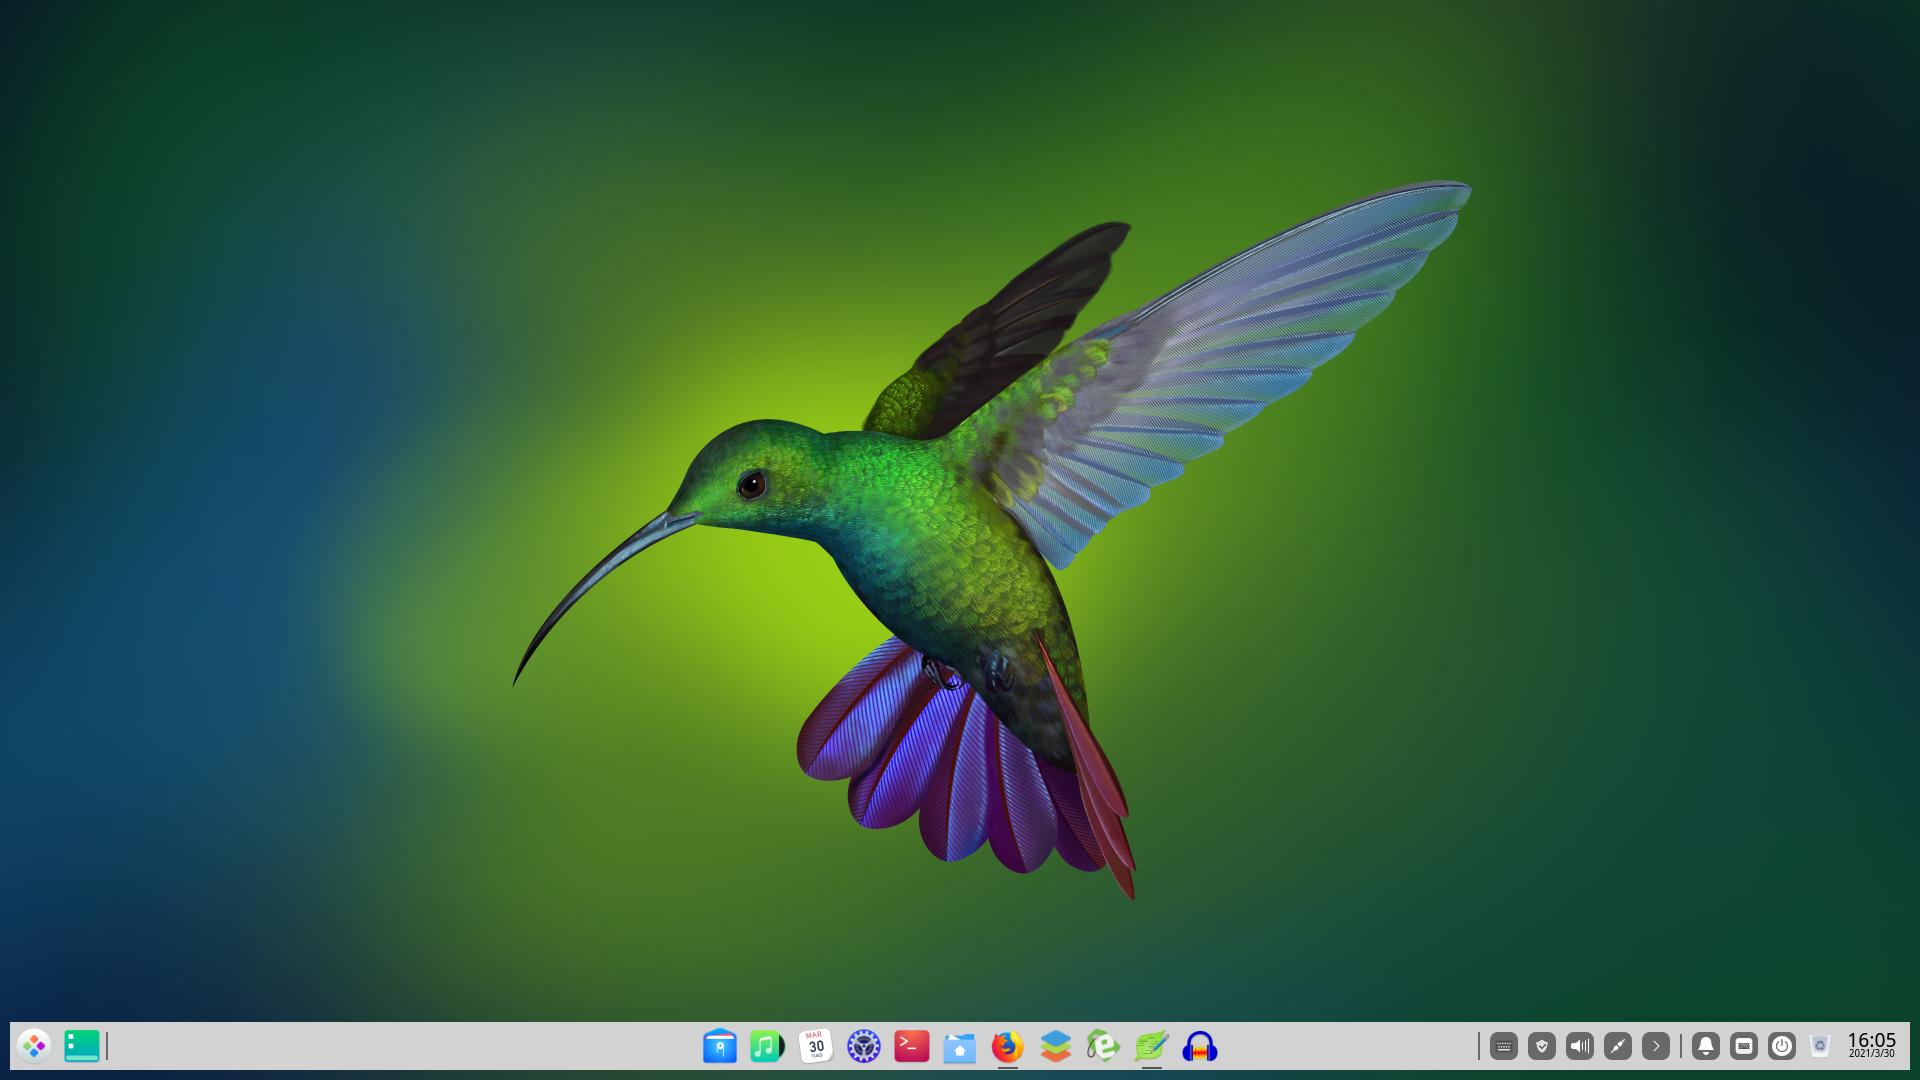
garuda linux 2021 [arch系]
garuda linux
お仕事の方はごくろうさまです。
あいもかわらずlinuxであそんでいます。
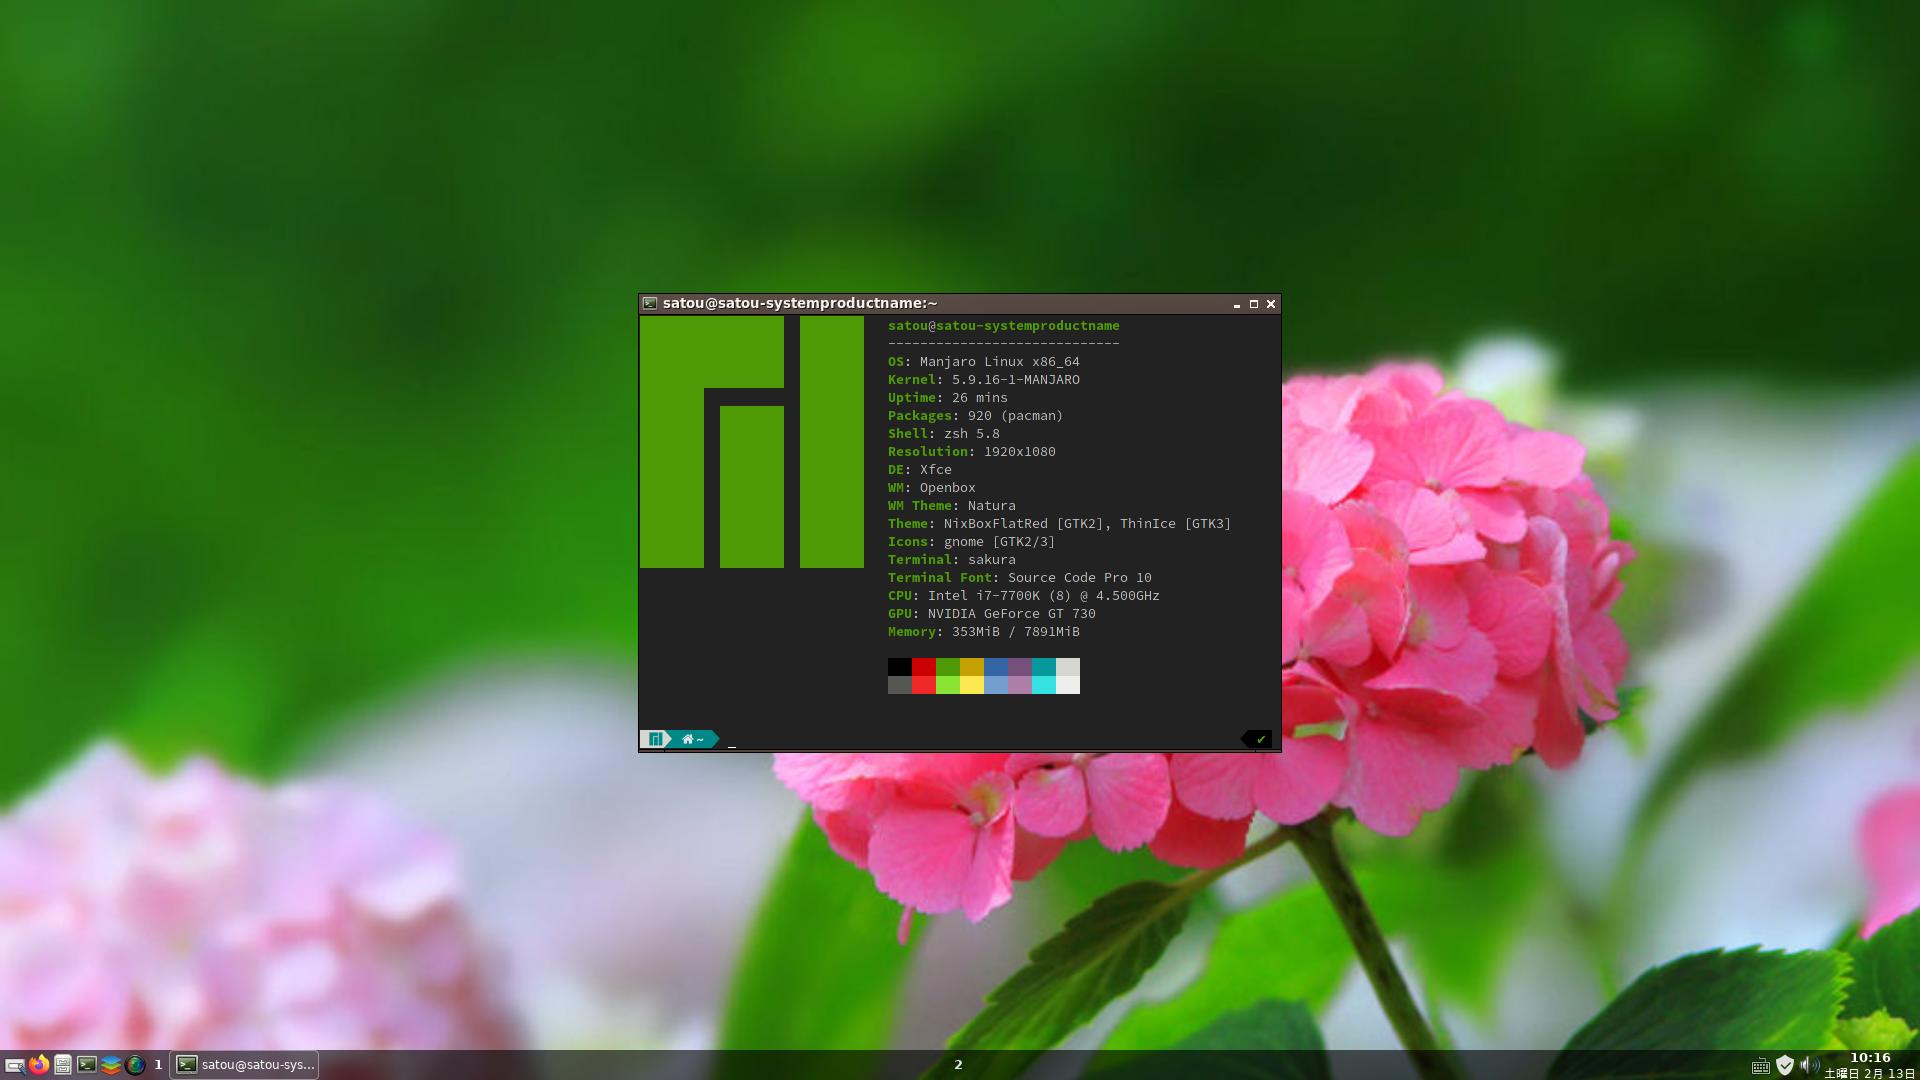
今回の私のバソコン環境は os garuda linux(Plasma 5.22.4)
CPU: Intel i7-7700K (8) @ 4.5GHz
GPU: NVIDIA GeForce GT 730
monitor: HDMI接続
garuda linux
garuda-dr460nized-linux-zen-210507.iso
garuda linux は インド製、arch系
usbメモリーに $ gnome-disks を使い書き込み、ssdにインストールした。
ssdのフォーマットはインストールするパーテイションを先にext4にしておく。
btrfsしか選択できないようになっていた。保持を選択。
ssdのファイルシステムは、gpt形式を使用。
gpt形式でのインストールでは、マウントポイントを2個設定する必要がある。いまさら。
パーティション / と パーティション /boot efi
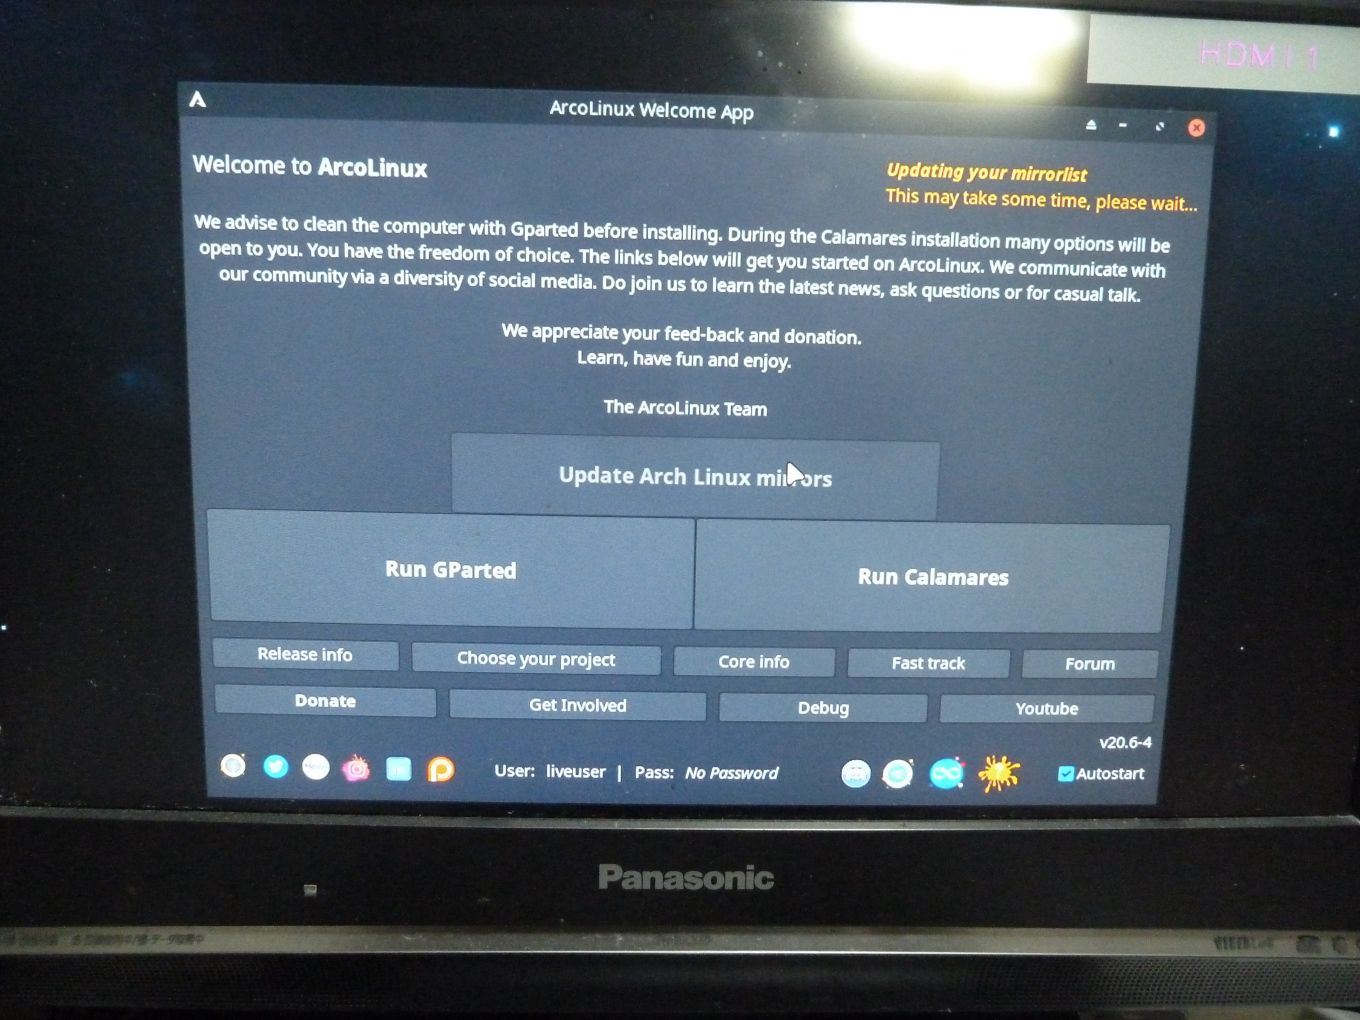
garuda linuxは、最初に起動すると
garuda welcome が自動起動している。
案内にしたがって、updateや設定がおえるようになっている。
残念ながら、chaotic-aurリポジトリ pgp鍵取得errorで、失敗した。
以下荒業で動くようにした。
sudo pacman -S firefox nano pcmanfm
sudo nano /etc/pacman.conf 編集 おしまいのほう。
[chaotic-aur]
SigLevel = Never
Include = /etc/pacman.d/chaotic-mirrorlist
お仕事の方はごくろうさまです。
あいもかわらずlinuxであそんでいます。
今回の私のバソコン環境は os garuda linux(Plasma 5.22.4)
CPU: Intel i7-7700K (8) @ 4.5GHz
GPU: NVIDIA GeForce GT 730
monitor: HDMI接続
garuda linux
garuda-dr460nized-linux-zen-210507.iso
garuda linux は インド製、arch系
usbメモリーに $ gnome-disks を使い書き込み、ssdにインストールした。
ssdのフォーマットはインストールするパーテイションを先にext4にしておく。
btrfsしか選択できないようになっていた。保持を選択。
ssdのファイルシステムは、gpt形式を使用。
gpt形式でのインストールでは、マウントポイントを2個設定する必要がある。いまさら。
パーティション / と パーティション /boot efi
garuda linuxは、最初に起動すると
garuda welcome が自動起動している。
案内にしたがって、updateや設定がおえるようになっている。
残念ながら、chaotic-aurリポジトリ pgp鍵取得errorで、失敗した。
以下荒業で動くようにした。
sudo pacman -S firefox nano pcmanfm
sudo nano /etc/pacman.conf 編集 おしまいのほう。
[chaotic-aur]
SigLevel = Never
Include = /etc/pacman.d/chaotic-mirrorlist
sudo pacman -Syyu
注意garuda linuxには、timeshiftという機能がついている。
windowsの復元ポイント機能のようなもの。
osパーティションの容量を大幅に必要とするのでおすすめできない。
注意garuda linuxには、timeshiftという機能がついている。
windowsの復元ポイント機能のようなもの。
osパーティションの容量を大幅に必要とするのでおすすめできない。
/timeshift フォルダの中は空にした。
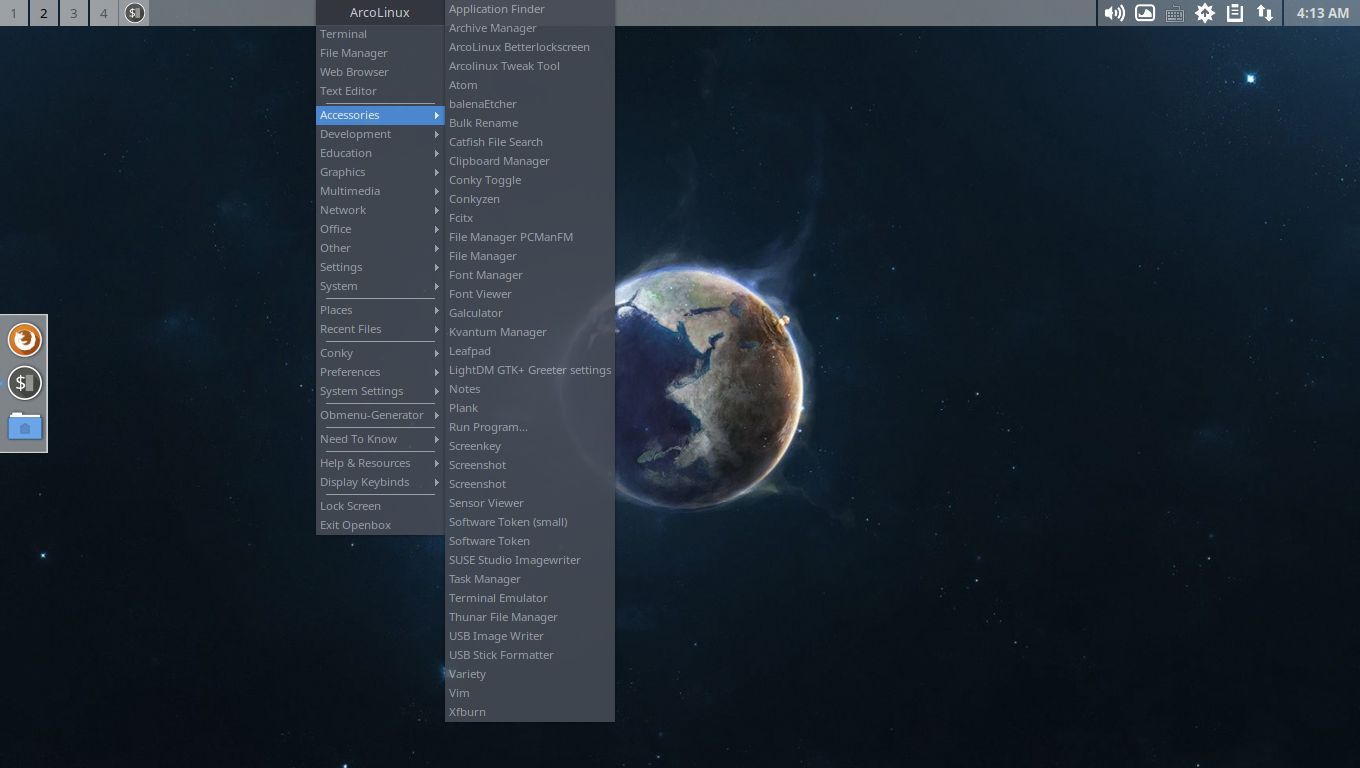
garuda linuxは、arch系なので好きなアプリを簡単に入れられるでしょう。
以下私のインストールしたもの
sudo pacman -S firefox nano pcmanfm onlyoffice alsa-utils pavucontrol gimp audacity celluloid kcm-fcitx fcitx-im fcitx-mozc fcitx-configtool libvoikko nuspell hspell
nano ~/.profile 追記
export GTK_IM_MODULE=fcitx
export QT_IM_MODULE=fcitx
export XMODIFIERS=”@im=fcitx”
以下私好みにした。
下のバー(latte-dock) Wigets アナログ時計追加。
kdeシステム設定 外観 で明るいテーマを選択。
それでも好みにならないときは 以下を直接編集 darkの文字を削除。
~/.gtkrc-2.0
~/.config/gtk-3.0/settings.ini
~/.config/gtk-4.0/settings.ini
firefoxが eroorで起動しなかった
fireDragonをつかい、firefoxをダウンロード 解凍。
sudo pcmanfm を使い /usr/lib/firefox に置き換えた。
dolphin の設定
右上の三本バーアイコンをクリック dolphinの設定 いまさら。
全般のその他の項目五個
チェックをすべてはずす。
Context Menu できるだけ少なく。
dolphinのサイドメニューを少なくした。
項目の上で右クリックすると 隠すのアイコンがあるのでチェックを入れる。
garudaとは、インドの神鳥の名前でしょう。garuda linuxは、
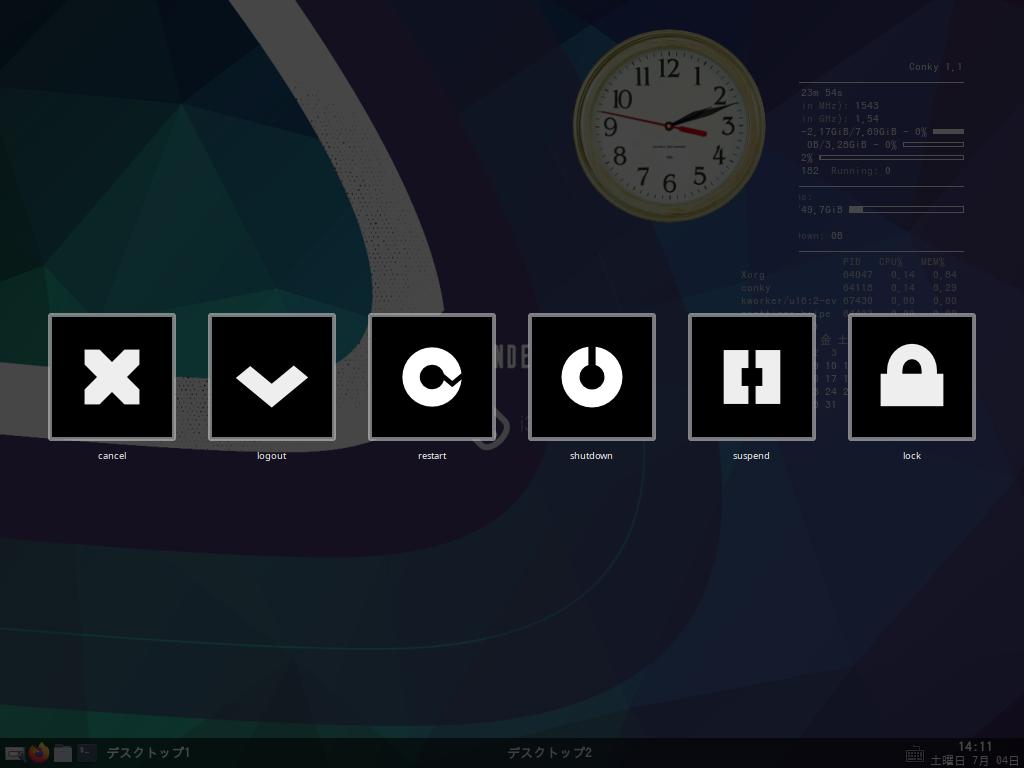
仮想デスクトップを移動するとデスクトップが回転します。
デスクトップにWigets ページャを追加しよう。
先進的なシステムにしようとしているのがうかがえる。
以下参考画像
以下参考画像

左上 Wigets ページャ の画像
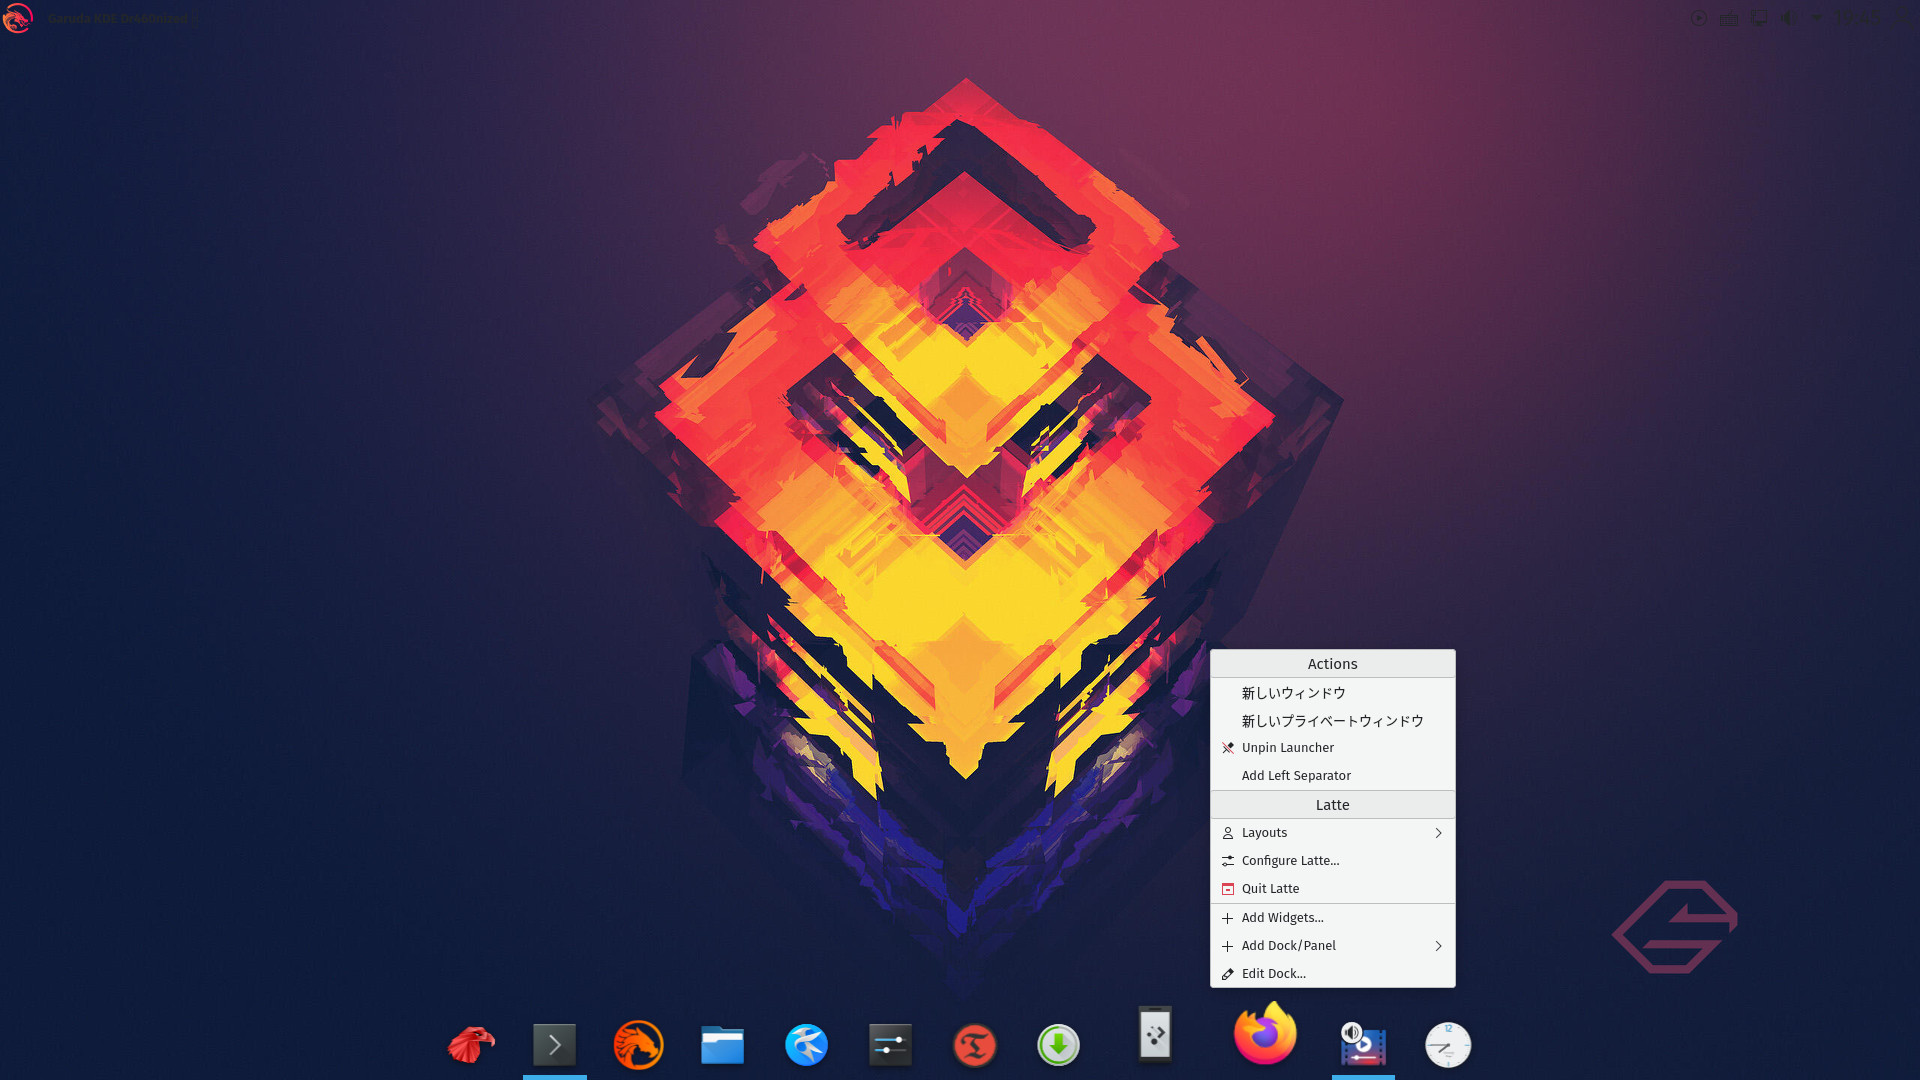
latte-dock 右クリック pin launcher にチェックで登録。
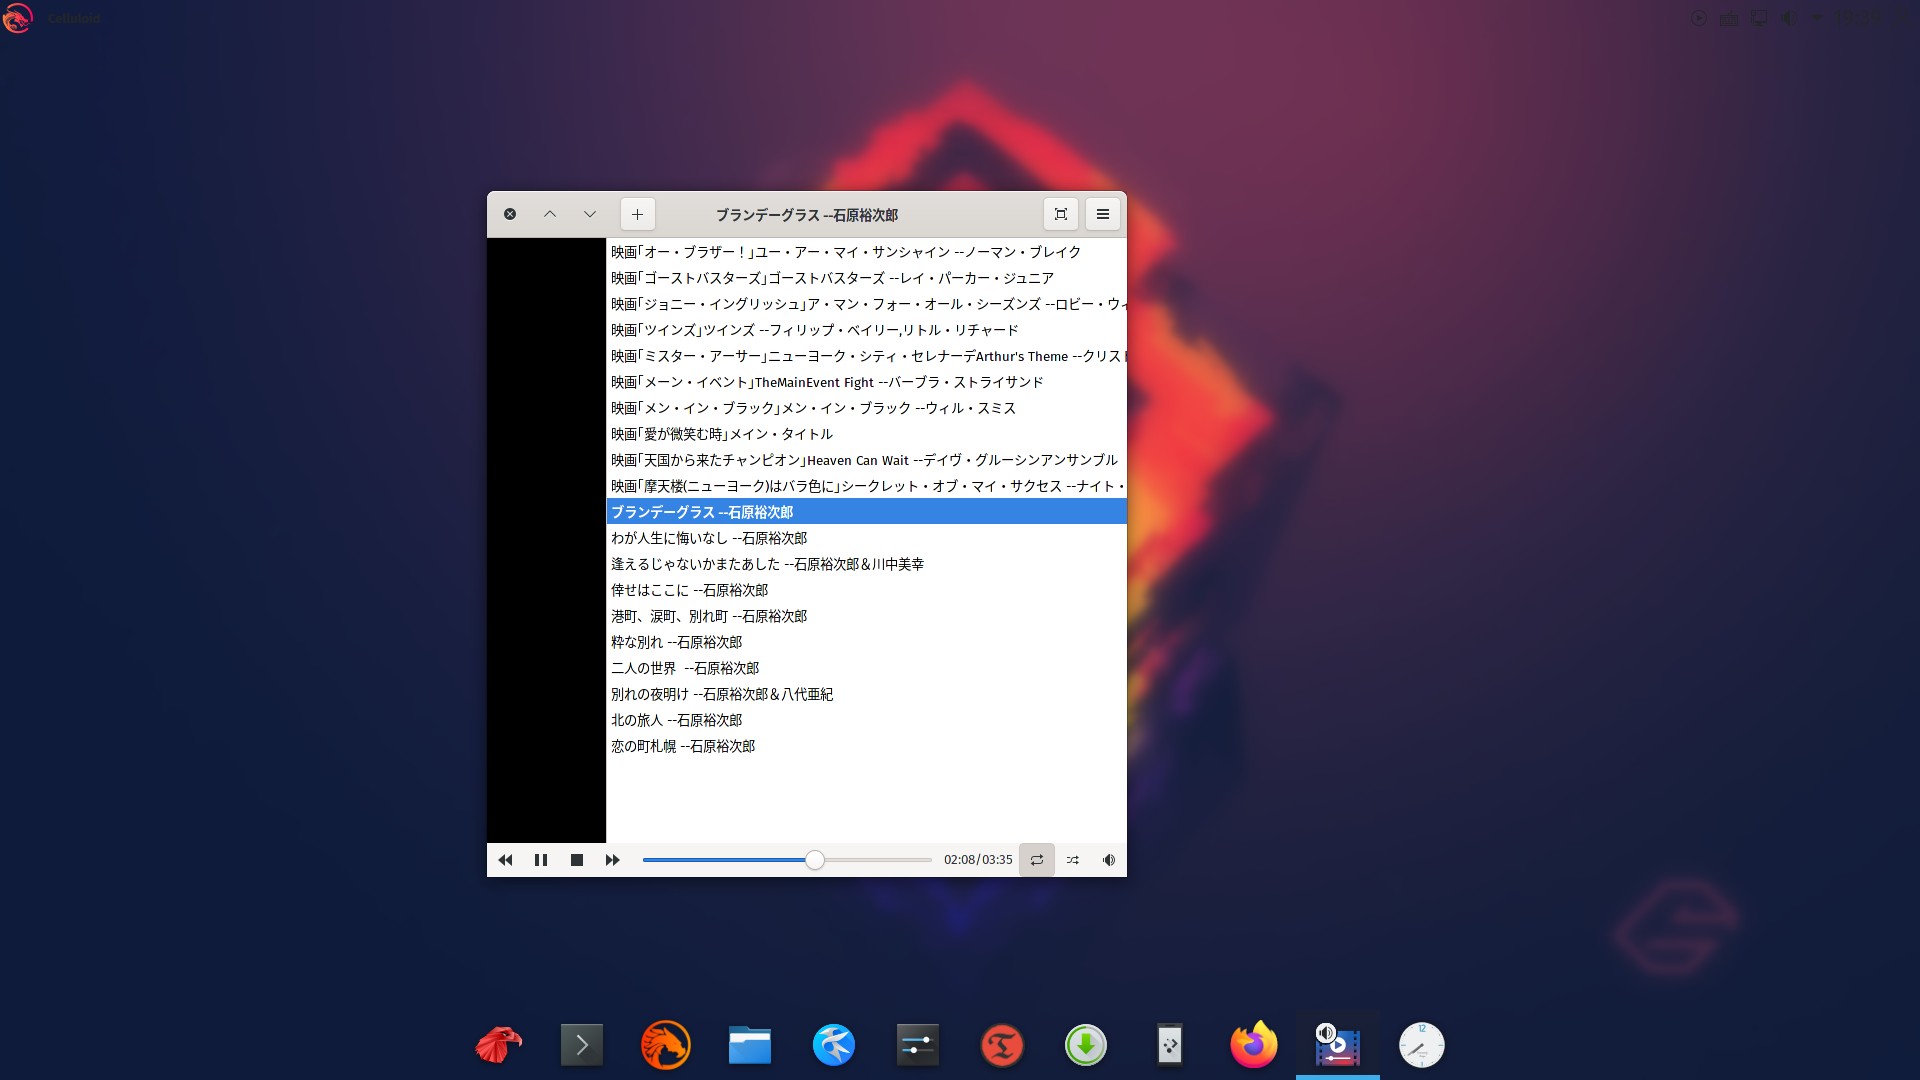
celluloidの画像
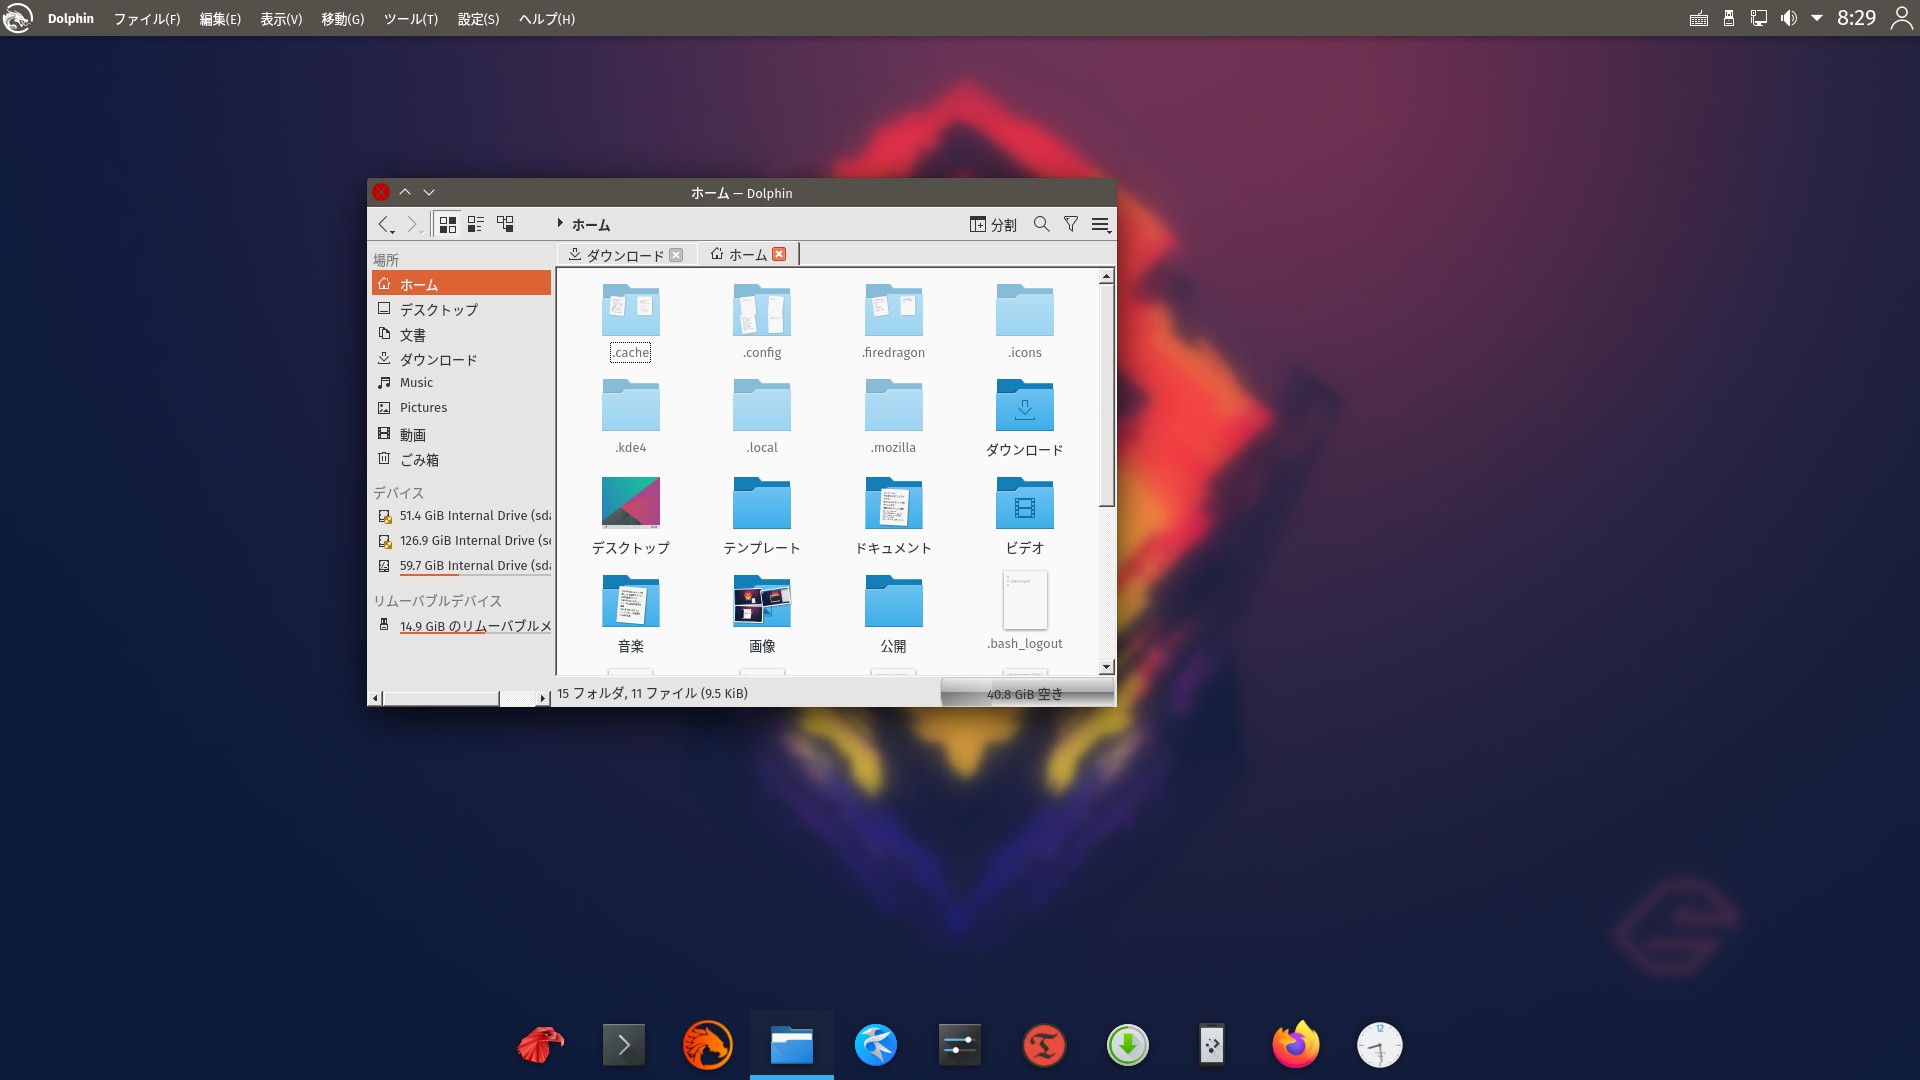
dolphinの画像
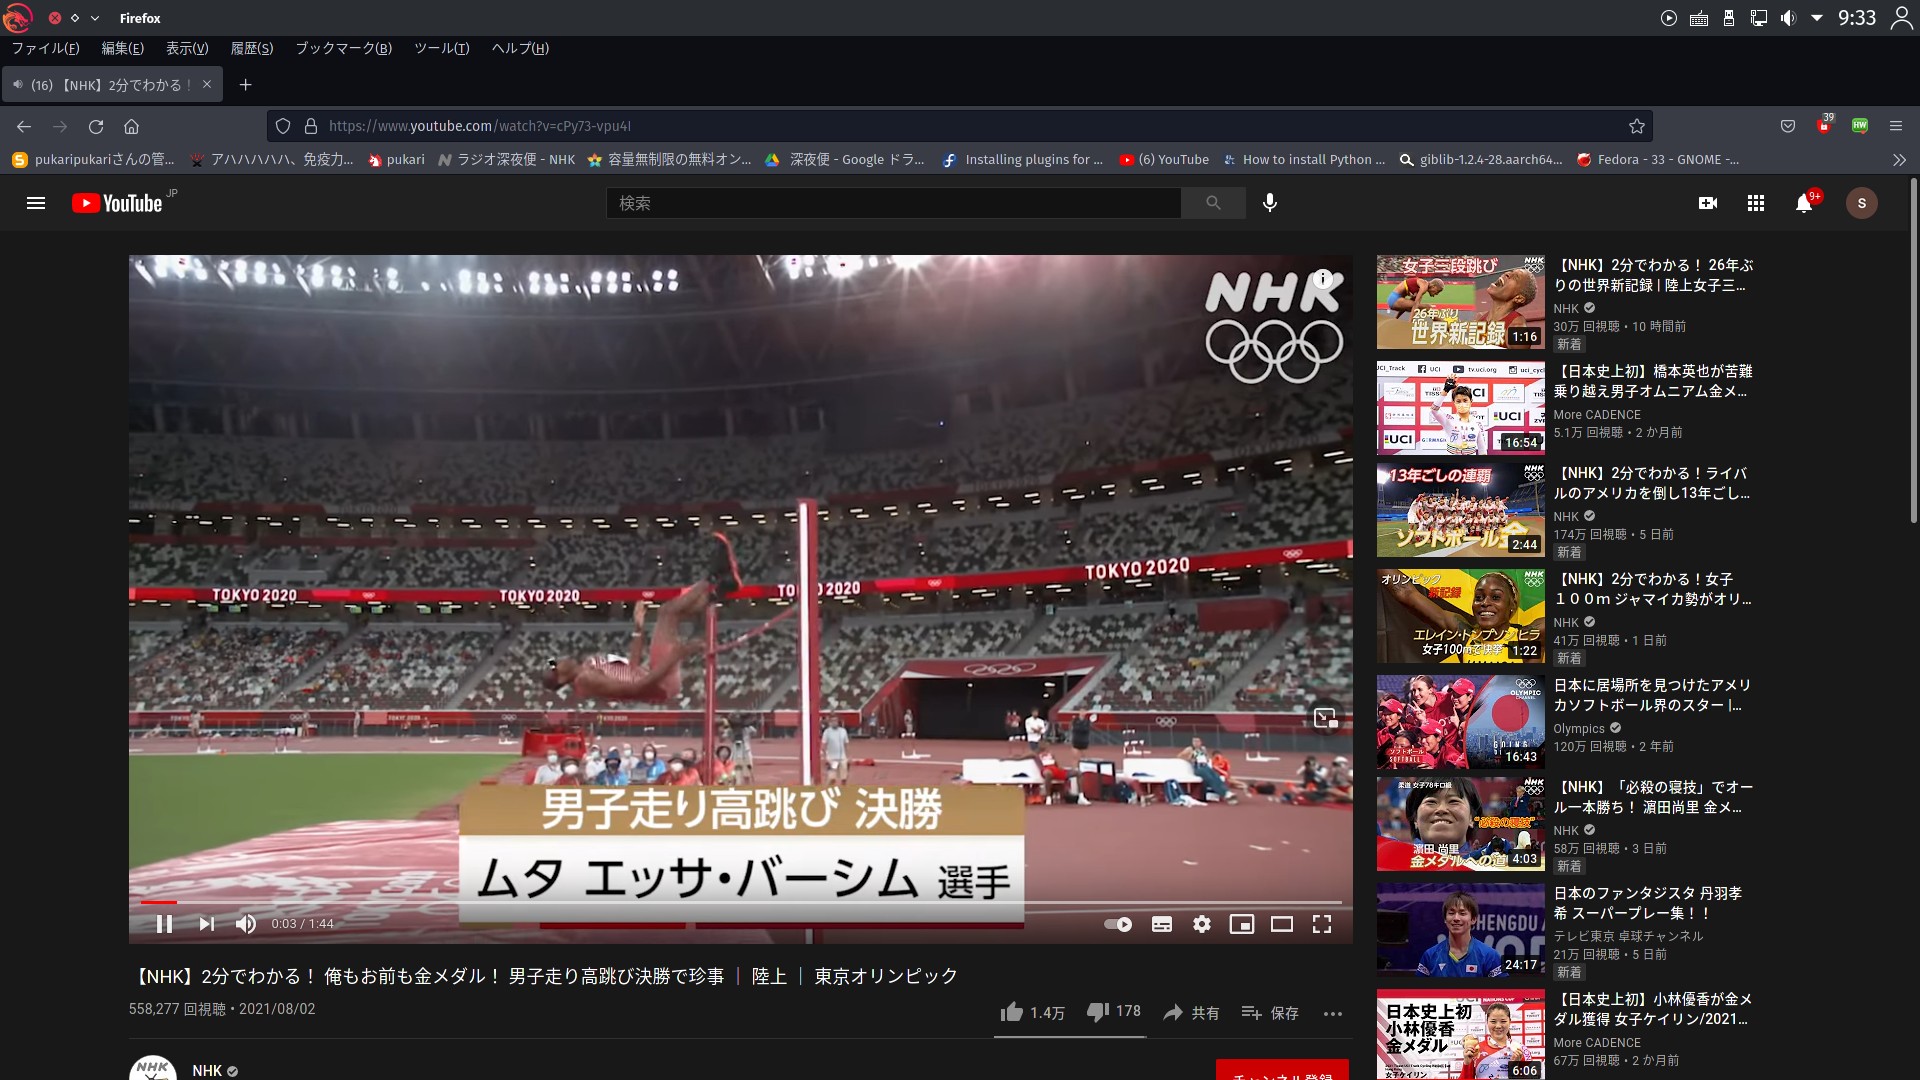
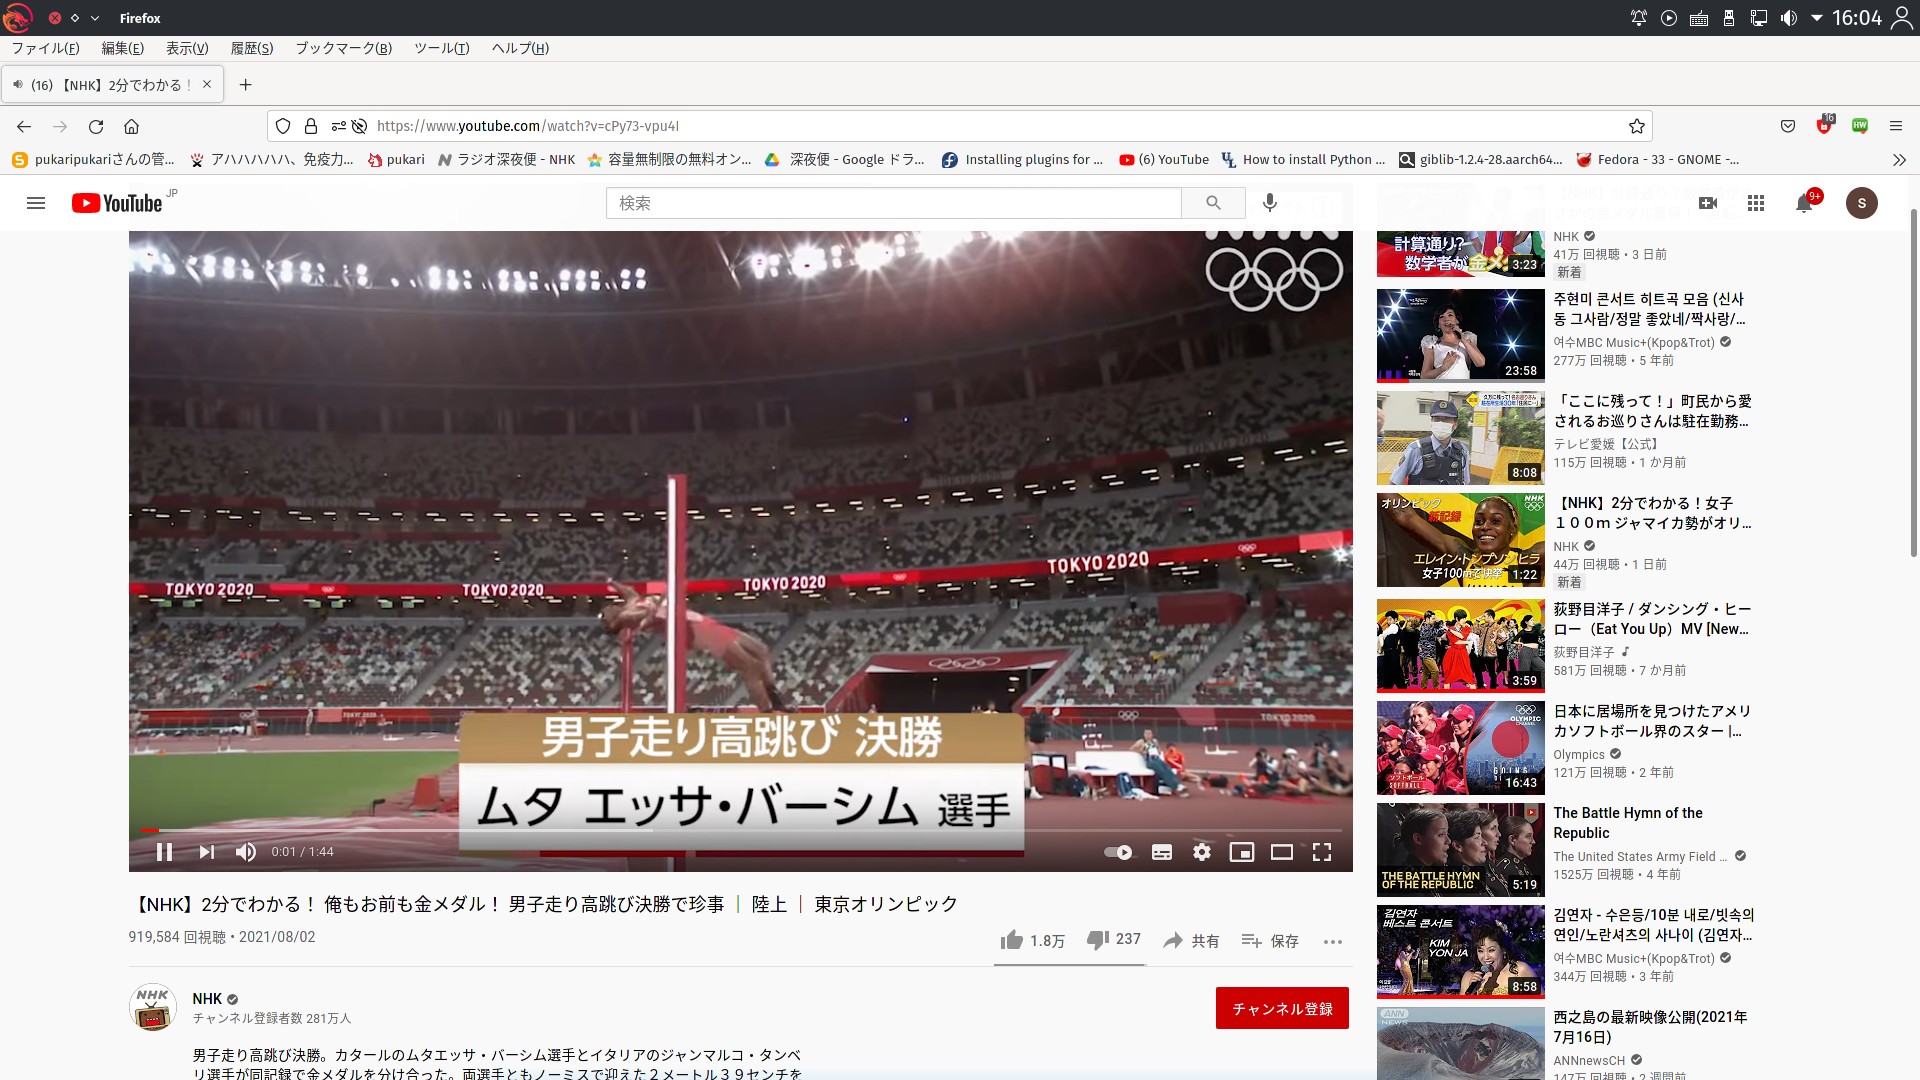
オリンピック 二人共に金メダル。2021/8/1
https://www.youtube.com/watch?v=cPy73-vpu4I
2m37cm
背景が白色の時
manjaro + anbox 2021 [arch系]
manjaro + anbox
あいもかわらずlinuxであそんでいます。
今回の私のパソコン環境 os manjaro xfceデスクトップ
CPU: Intel i7-4790 (8) @ 4.000GHz
GPU: NVIDIA GeForce GTX 970
manjaro
manjaro-xfce-21.0.4-210506-linux510.iso
あいもかわらずlinuxであそんでいます。
今回の私のパソコン環境 os manjaro xfceデスクトップ
CPU: Intel i7-4790 (8) @ 4.000GHz
GPU: NVIDIA GeForce GTX 970
manjaro
manjaro-xfce-21.0.4-210506-linux510.iso
以下anbox のインストールの記録です。
manjaroでデスプレイマネージャーがlightdmであること。
nvidiaドライバーは使わない。
localeが en_US であることが成功の鍵でしょう。
anboxインストールが終了したらlocaleを変えても良い。
sudo pacman-mirrors -c Japan
sudo pacman -Syyu
必要と思われるものをインストール。
sudo pacman -S dkms curl base-devel cmake git lzip android-tools cloud-init snapd
sudo snap install --beta --devmode anbox
https://github.com/anbox/anbox-modules
anbox-modules-master.zipをダウンロード、解凍。
cd '~/Downloads/anbox-modules-master'
sudo mkdir /dev/binder
'~/Downloads/anbox-modules-master/INSTALL.sh'
cd ..
cd ..
wget -O - https://raw.githubusercontent.com/geeks-r-us/anbox-playstore-installer/master/install-playstore.sh | bash
anbox.appmgr
anbox-bridgeの設置
https://raw.githubusercontent.com/anbox/anbox/master/scripts/anbox-bridge.sh
anbox-bridge 新規テキストファイル作成 設置場所 /usr/bin/anbox-bridge
sudo thunar
sudo anbox-bridge start
日本語化
sudo pacman -S fcitx-im fcitx-mozc fcitx-configtool libvoikko nuspell aspell hspell
sudo nano /etc/profile
export GTK_IM_MODULE=fcitx
export QT_IM_MODULE=fcitx
export XMODIFIERS=@im=fcitx
いまわたしは、fedora + anbox に挑戦しているがうまくゆかない。
それは、ubuntu、manjaroの場合はsnapd に AppArmor が使われている。
fedoraの場合、snapd に selinuxが使われている。
これのちがいによる障害の解決は素人にはむりでしょう。
以下参考画像。
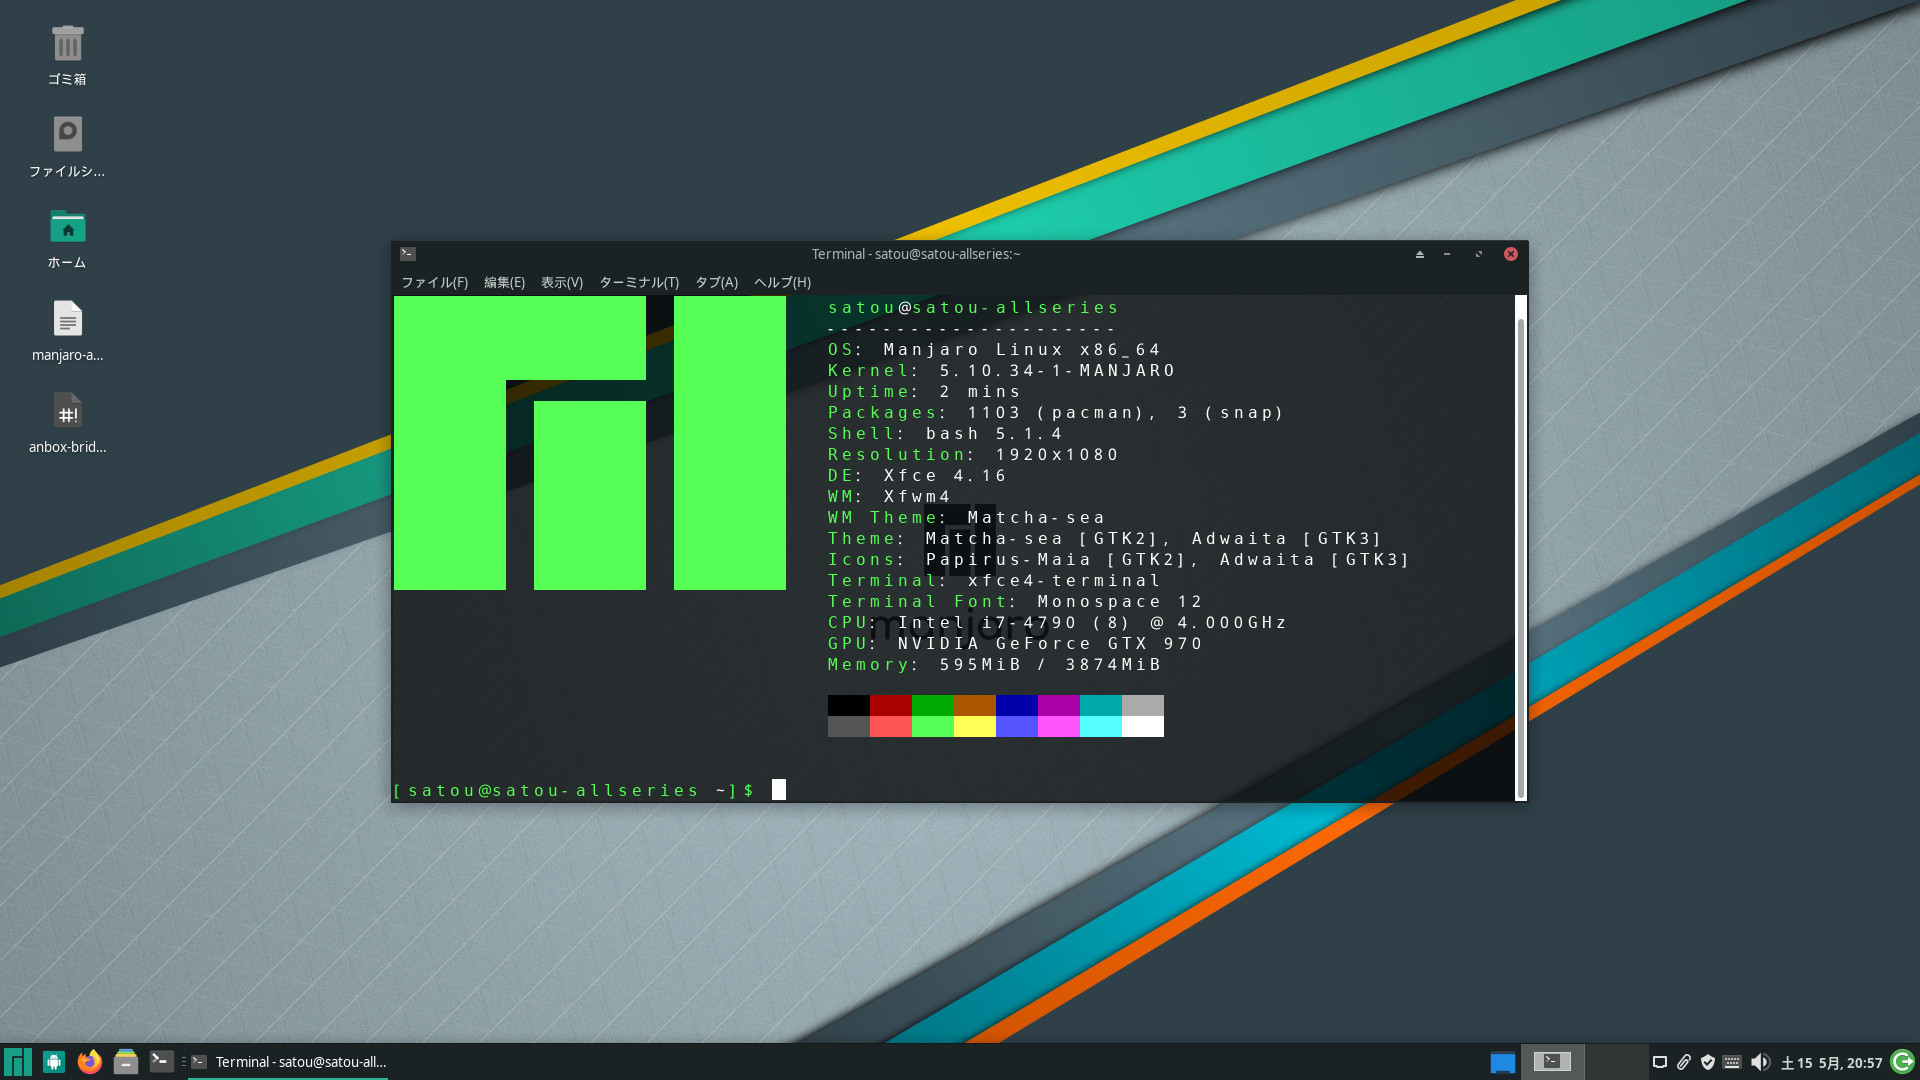
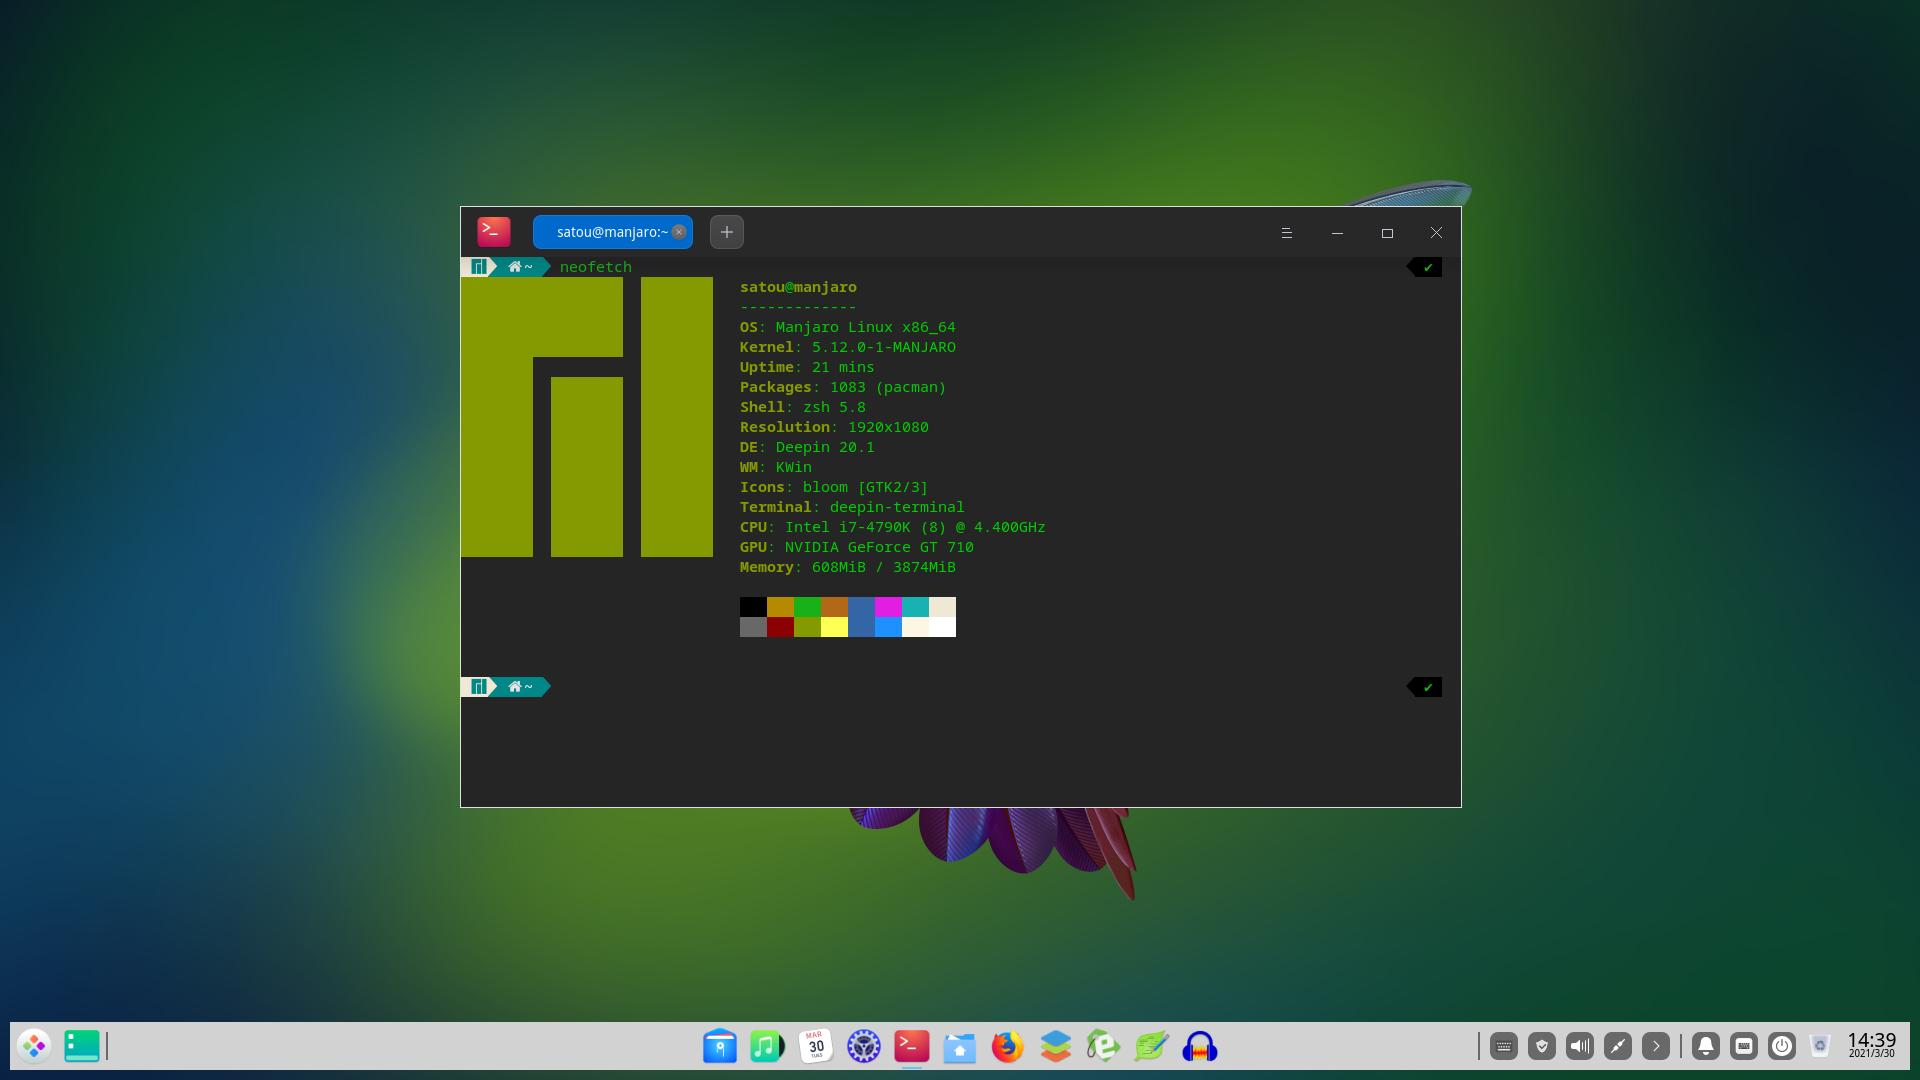
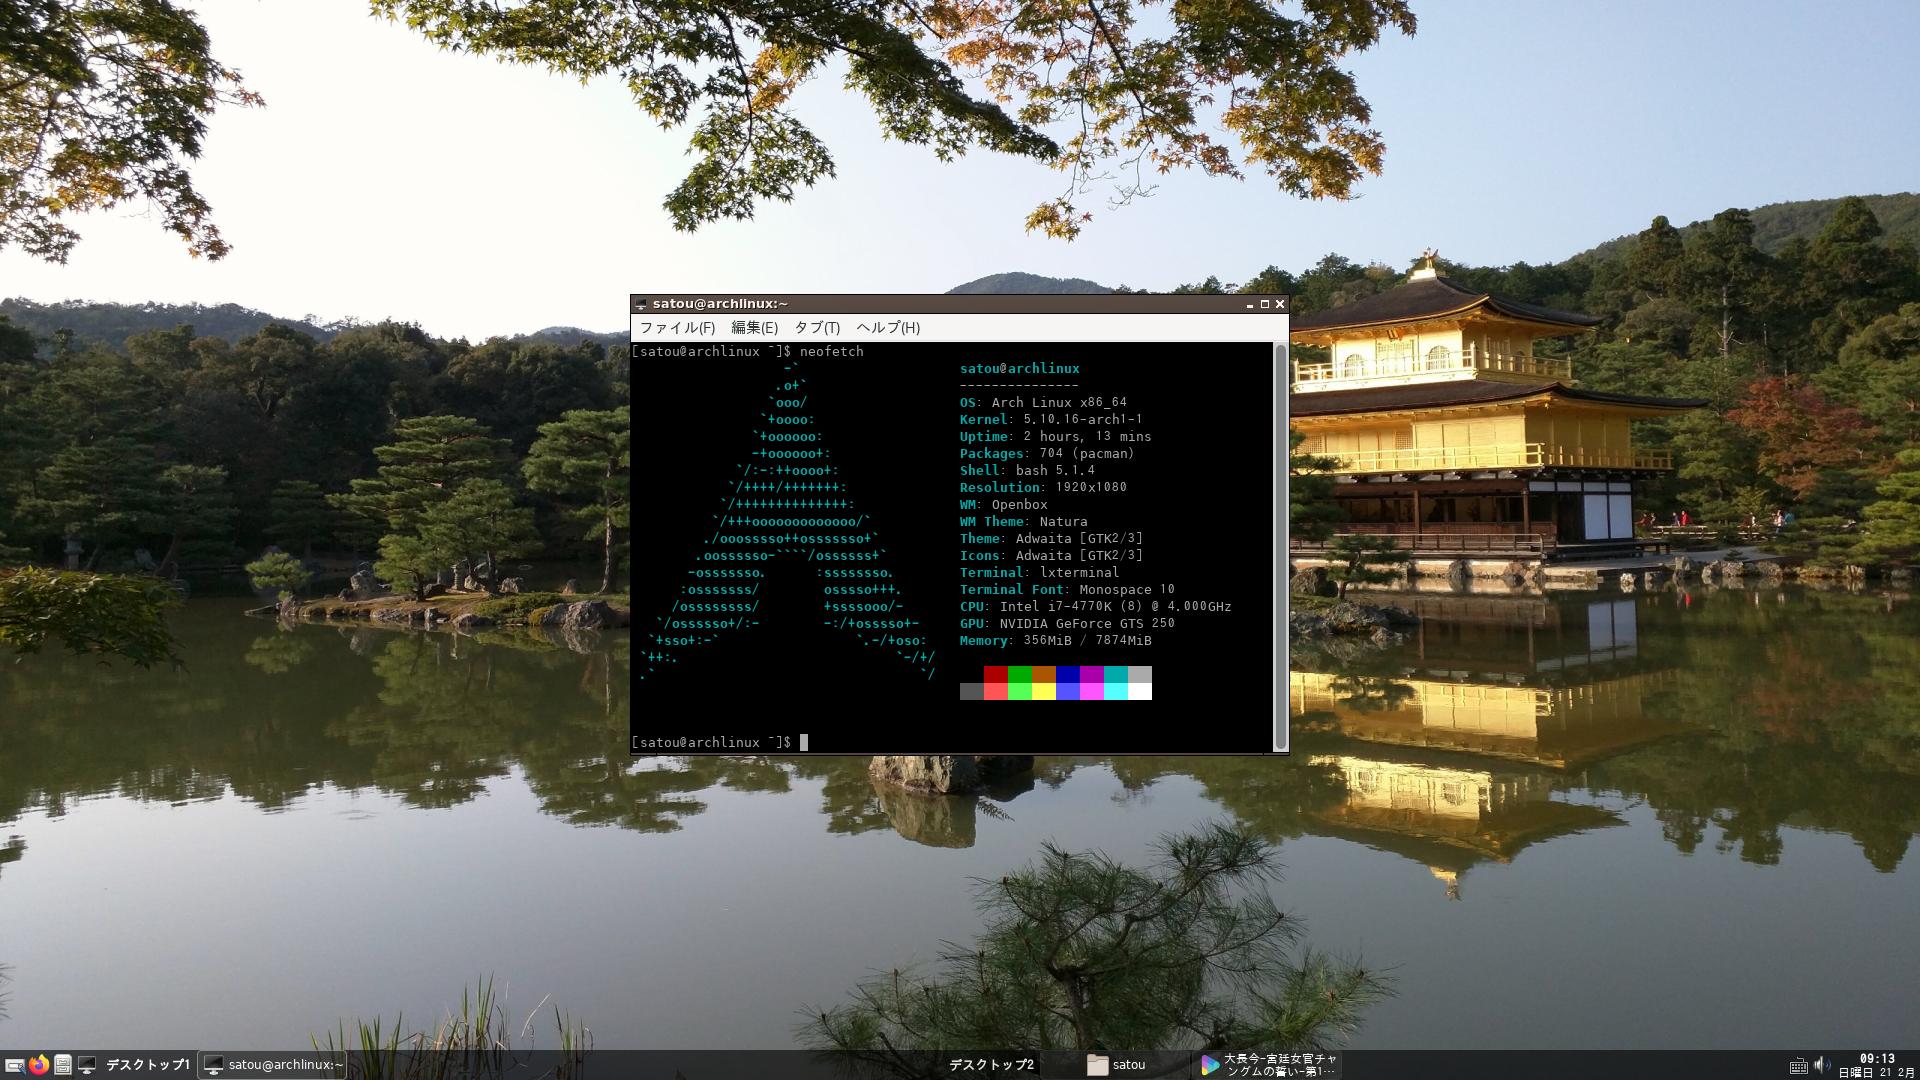
neofetch

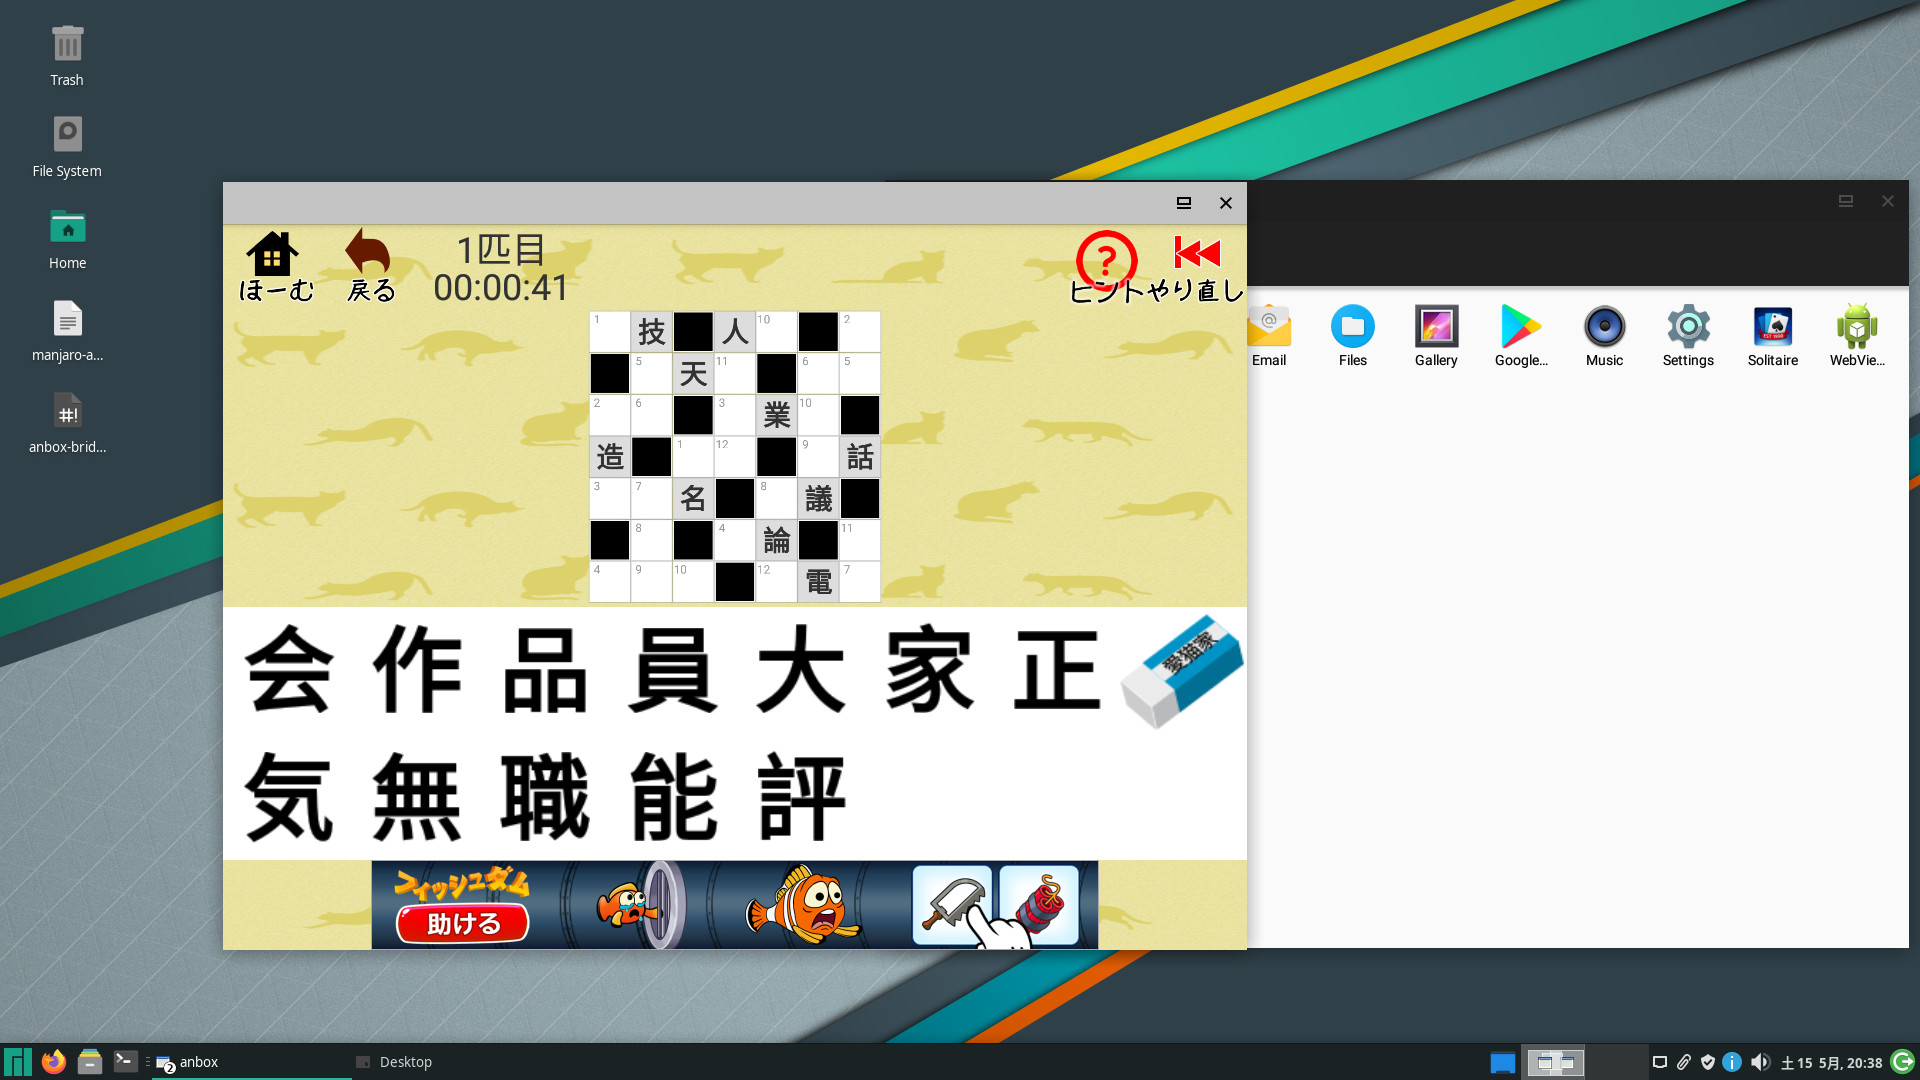
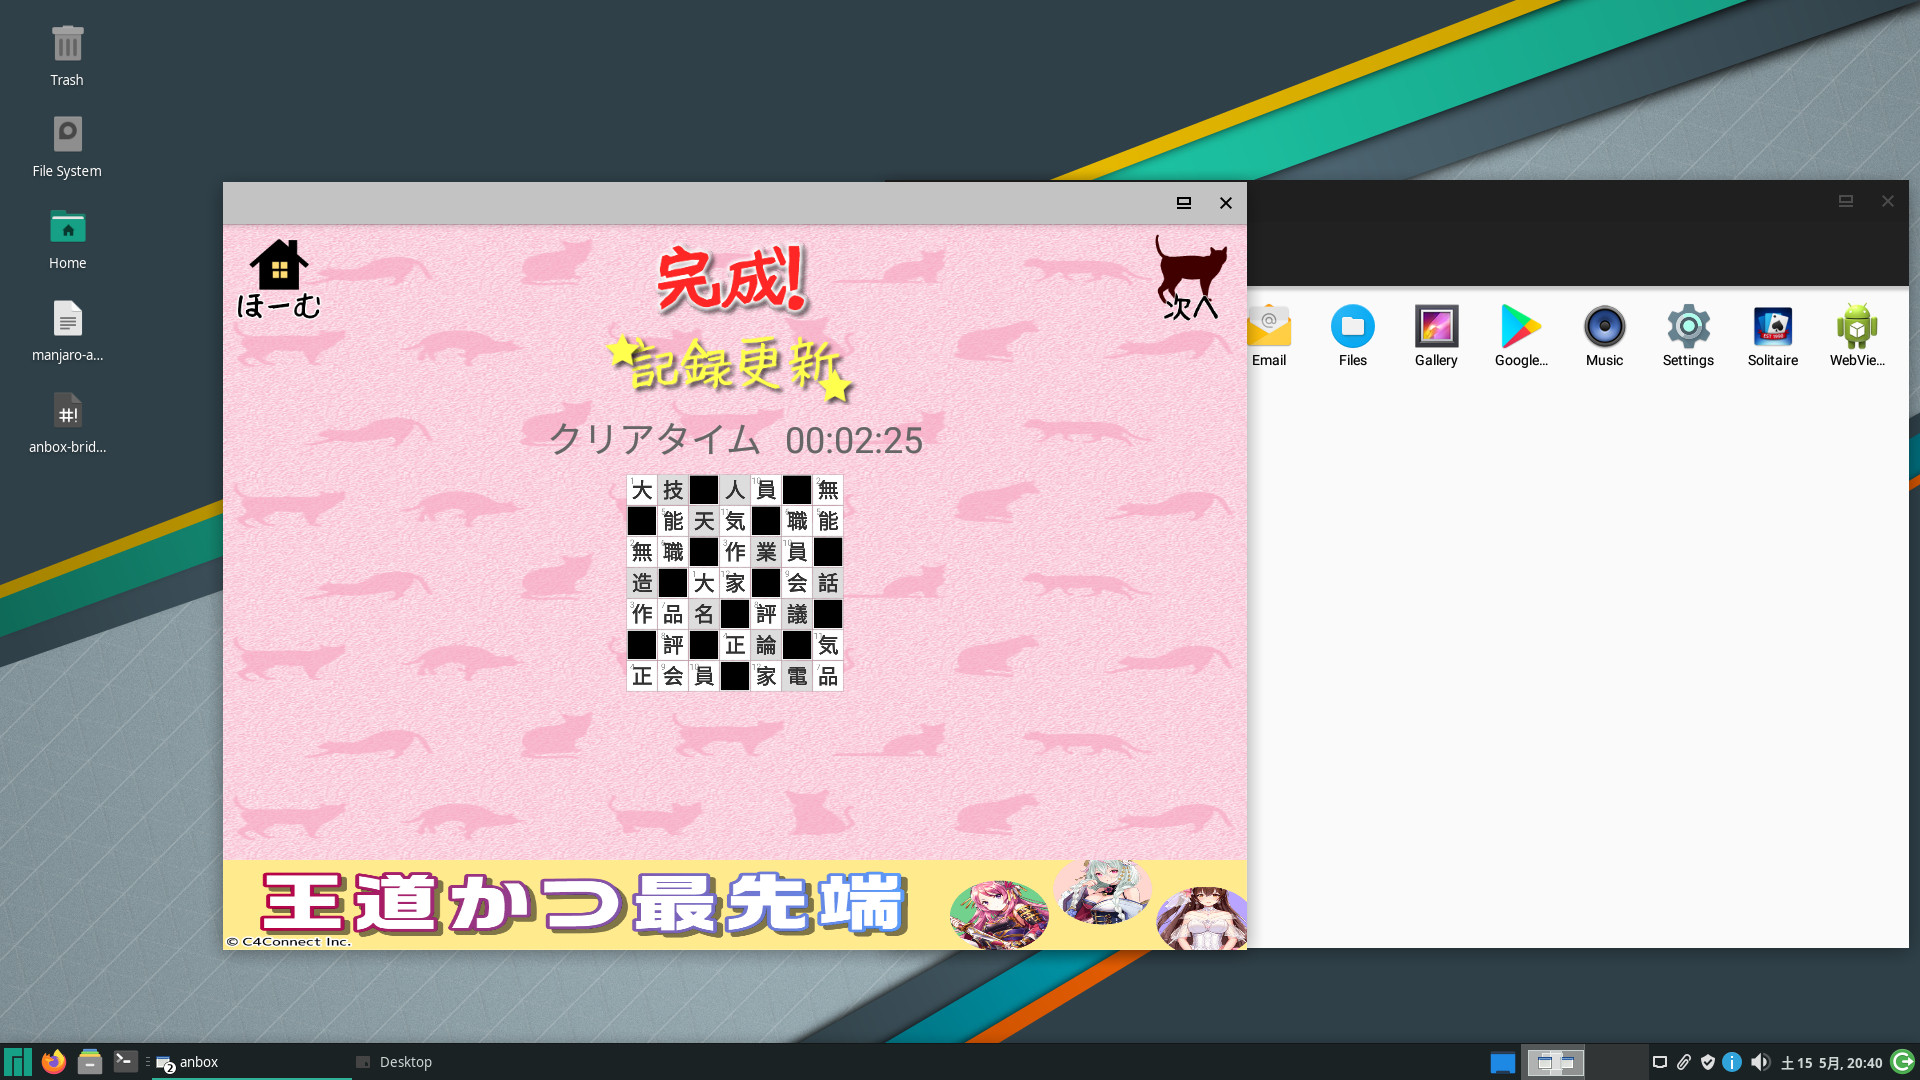
anbox
漢字ナンクロ2
漢字ナンクロ2
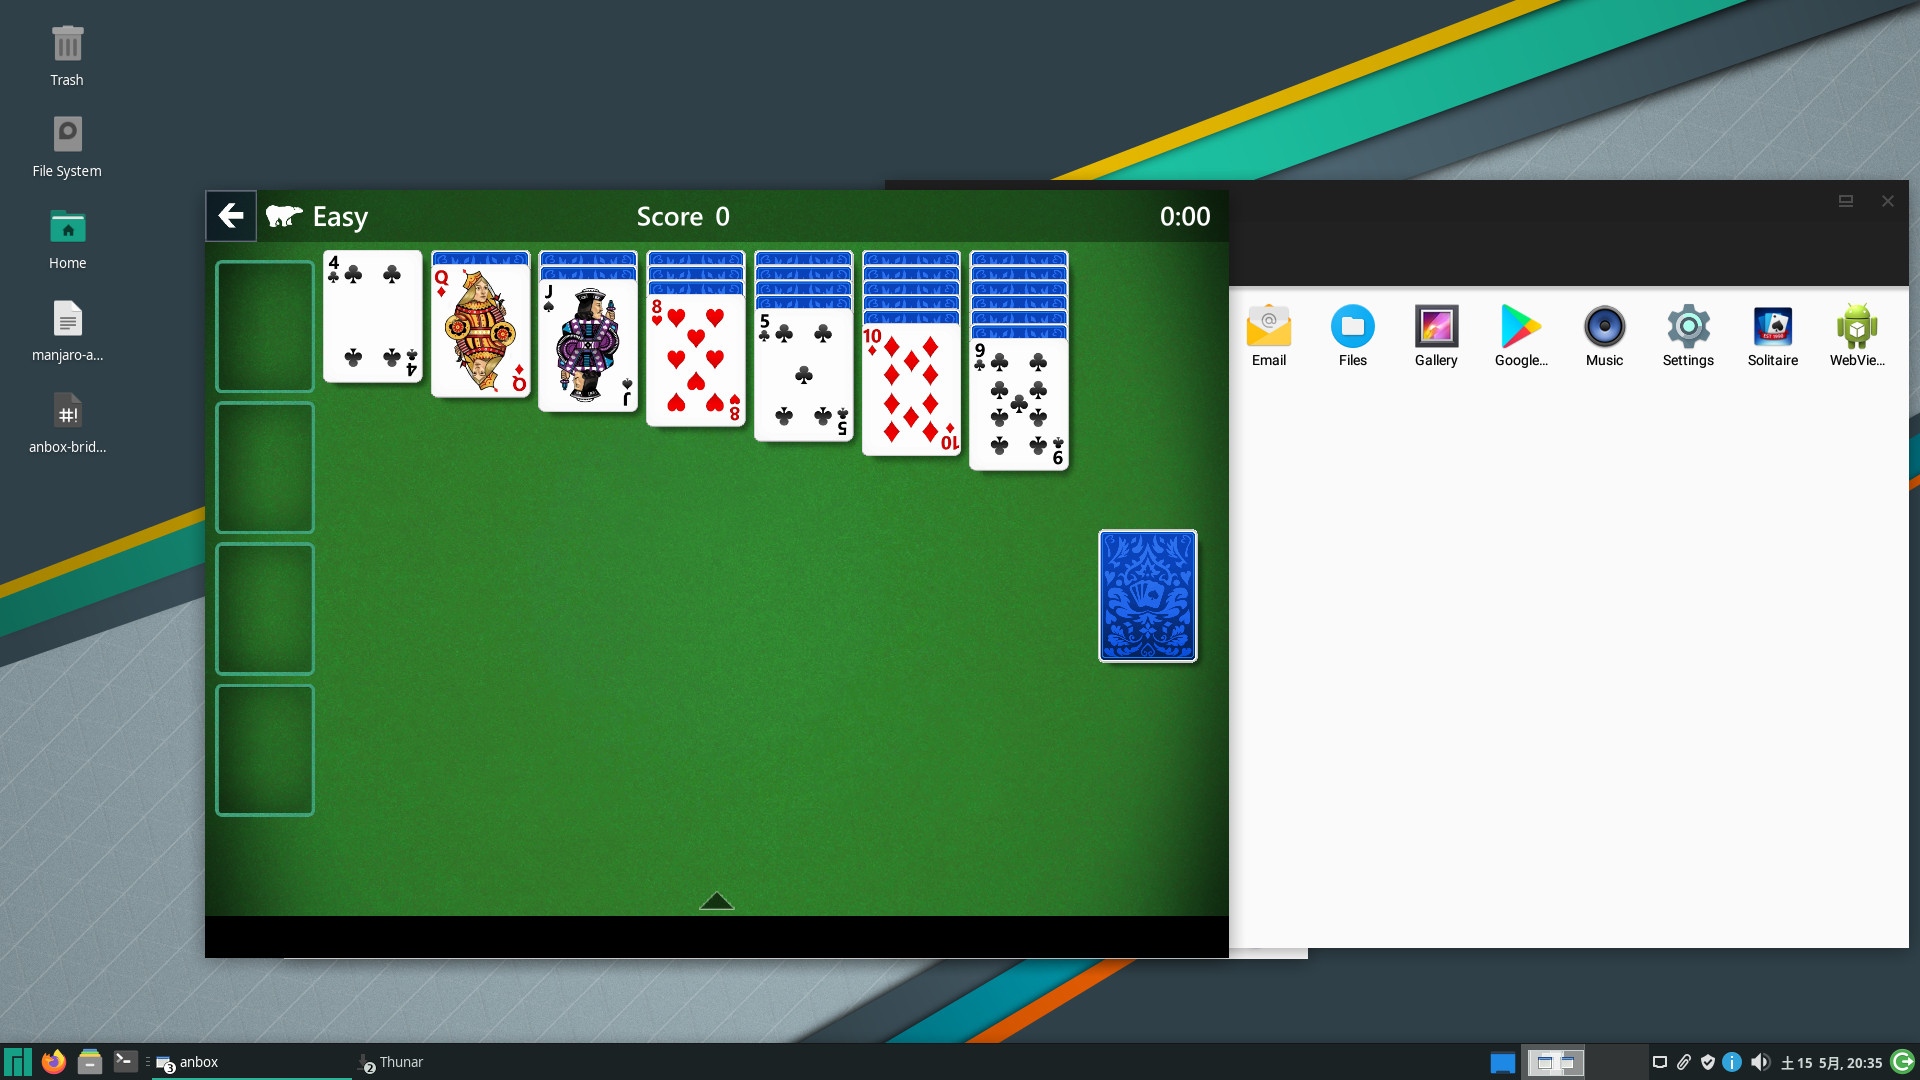
Microsoft Solitaire Collection
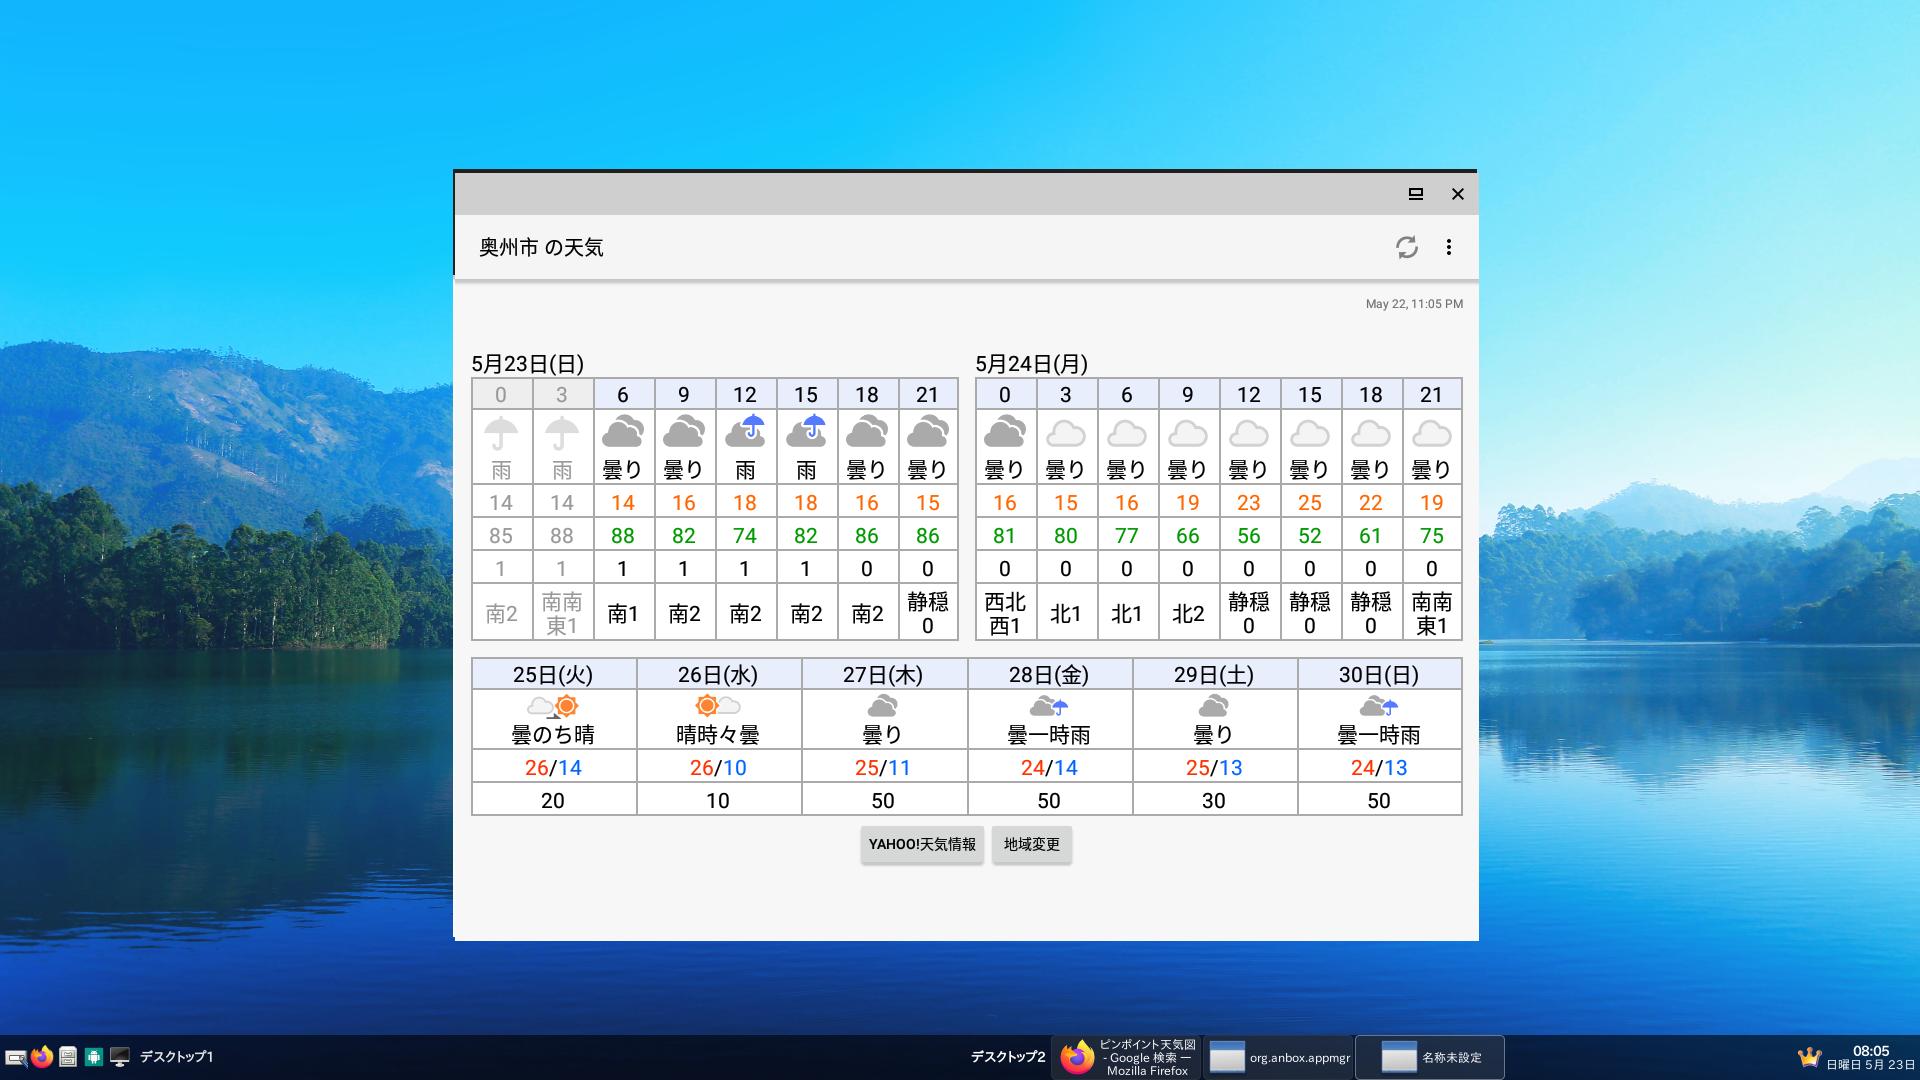
ピンポイント天気 私のお気に入りアプリも起動しました。
ばあちゃんの暦も動いた。
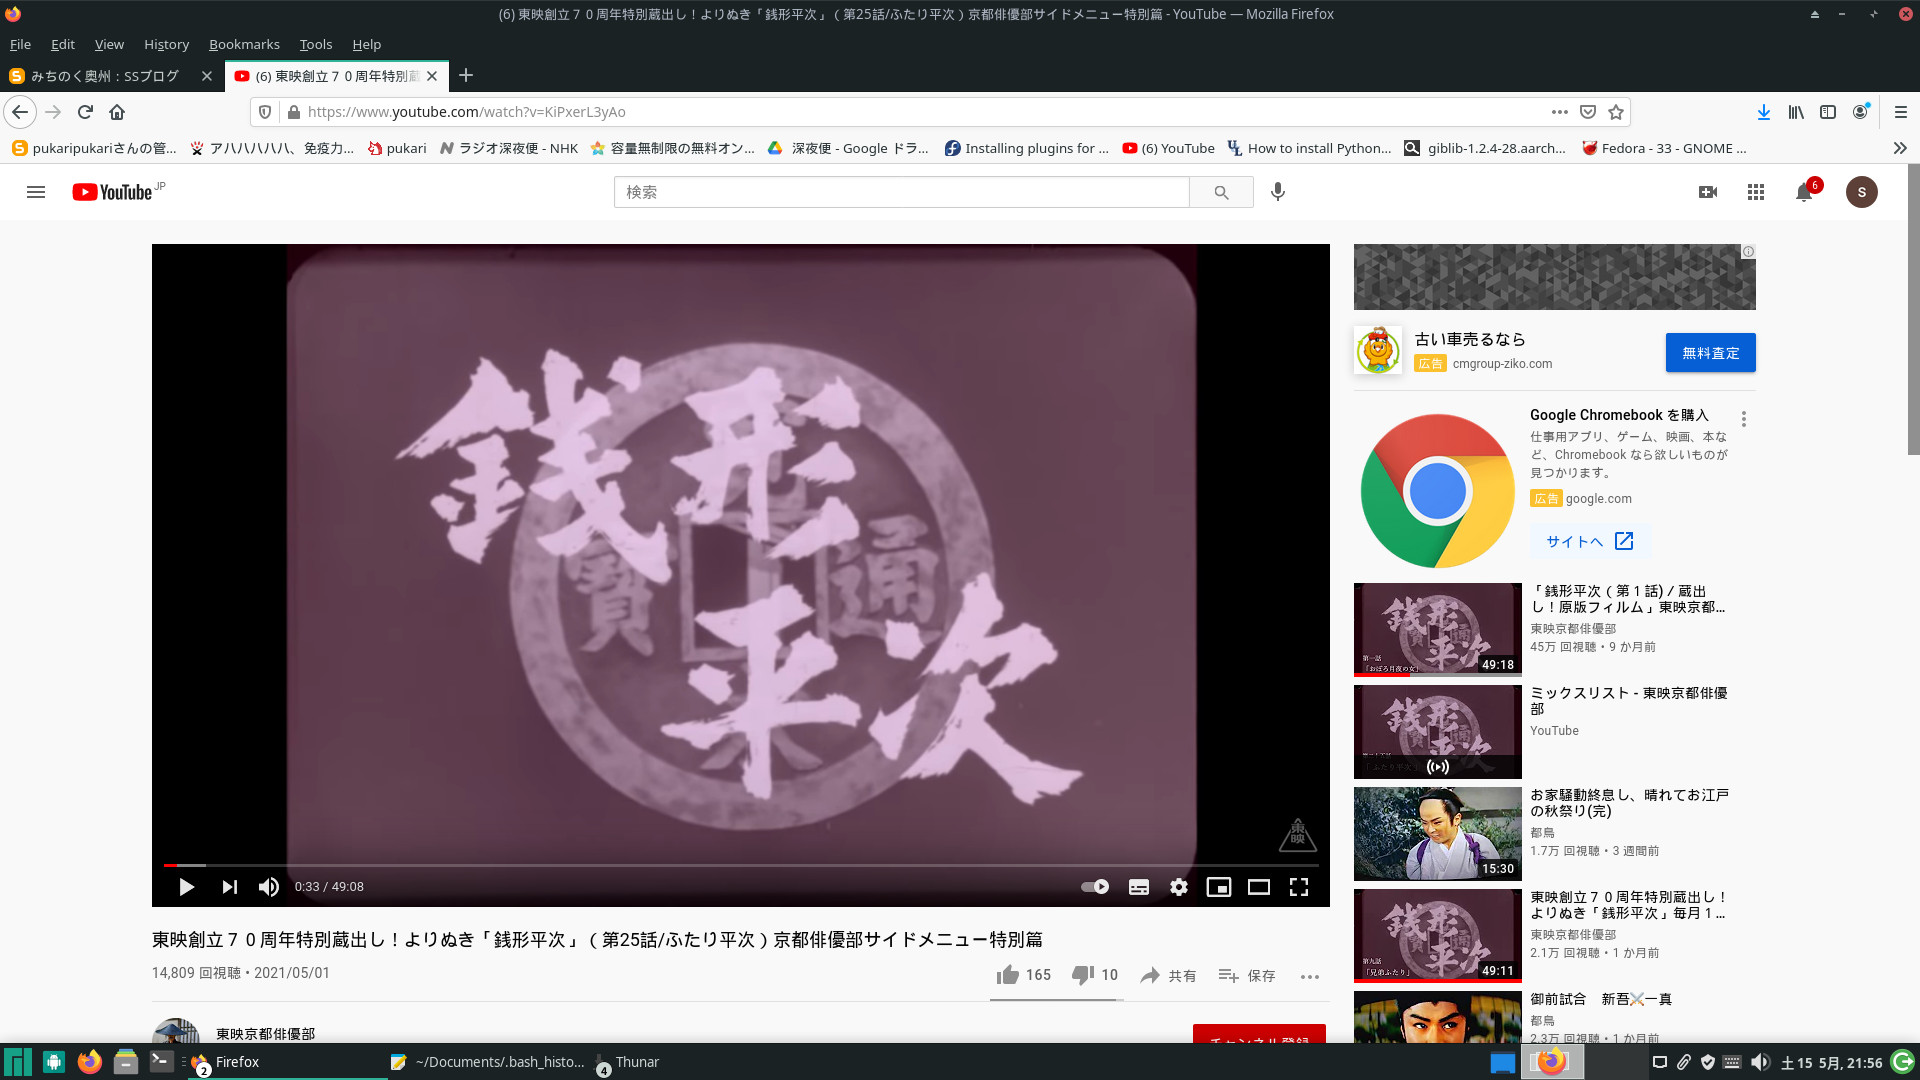
銭形平次
https://www.youtube.com/watch?v=KiPxerL3yAo
manjaro-architect deepin [arch系]
manjaro-architect deepin
お仕事の方はご苦労さまです。
あいもかわらずlinuxであそんでいます。
こんかいの私のパソコン環境 manjaro-deepin
CPU: Intel i7-4790K (8) @ 4.400GHz
GPU: NVIDIA GeForce GT 710
monitor: HDMI接続
manjaro-architect を使って deepin デスクトップをインストールした
manjaro-architect 前回の記事
manjaro-architect
前回の記事とちがうところは 少しだけ。
パーティションはあらかじめ用意しておく。
usbメモリーから起動して、ログインして、
sudo pacman-mirrors -c Japan
sudo pacman -Syy
sudo pacman -S util-linux-libs glibc
setup
ーーーー
ーーーー
1 Prepare Installation
8 Mount Partitions
ーーーー
ーーーー
linux512
deepin
Full
ーーーー
ーーーー
otf-ipafont
all free drivers
ーーーーー
ーーーーー
インストール終了後 起動させると
nvidiaドライバーのこのパソコンは display error でとまっています。
ctrl + alt + F2 で login 画面を出して、先に進む。
sudo pacman-mirrors -c Japan
sudo pacman -Syyu
yay nvidia-390xx
8
sudo bash -c "echo blacklist nouveau > /etc/modprobe.d/blacklist-nvidia-nouveau.conf"
sudo reboot
再起動後、きれいなdeepin になっていました。
トラブったところは、音声がでなかった。わたしはいつもパソコンのヘッドホーン端子から
アンプにつないで音をだしているが、音が出ない。
deepin のコントロールセンターのサウンドという項目で音を調整しなくてはならなかった。
わかってしまえばなぁんだということですが、他のos ではなにもしなくともふつうに音が出るので・・・・。
deepin-file-manager はつかいにくいでしょう。pcmanfm をインストールして使っています。
本家のdeepin も使ってみたがあいもかわらず日本語入力は困難でしょう。
debian sid のリボジトリにかえて、scim-anthy をインストールしてやってみた。
それでも deepin の terminal 、テキストエディッター では日本語入力はできず他のソフトに変えた。
sakura 、geany とか。
manjaro-deepin のほうが良いと思う。
以下参考画像
deepinの画像
neofetchの画像
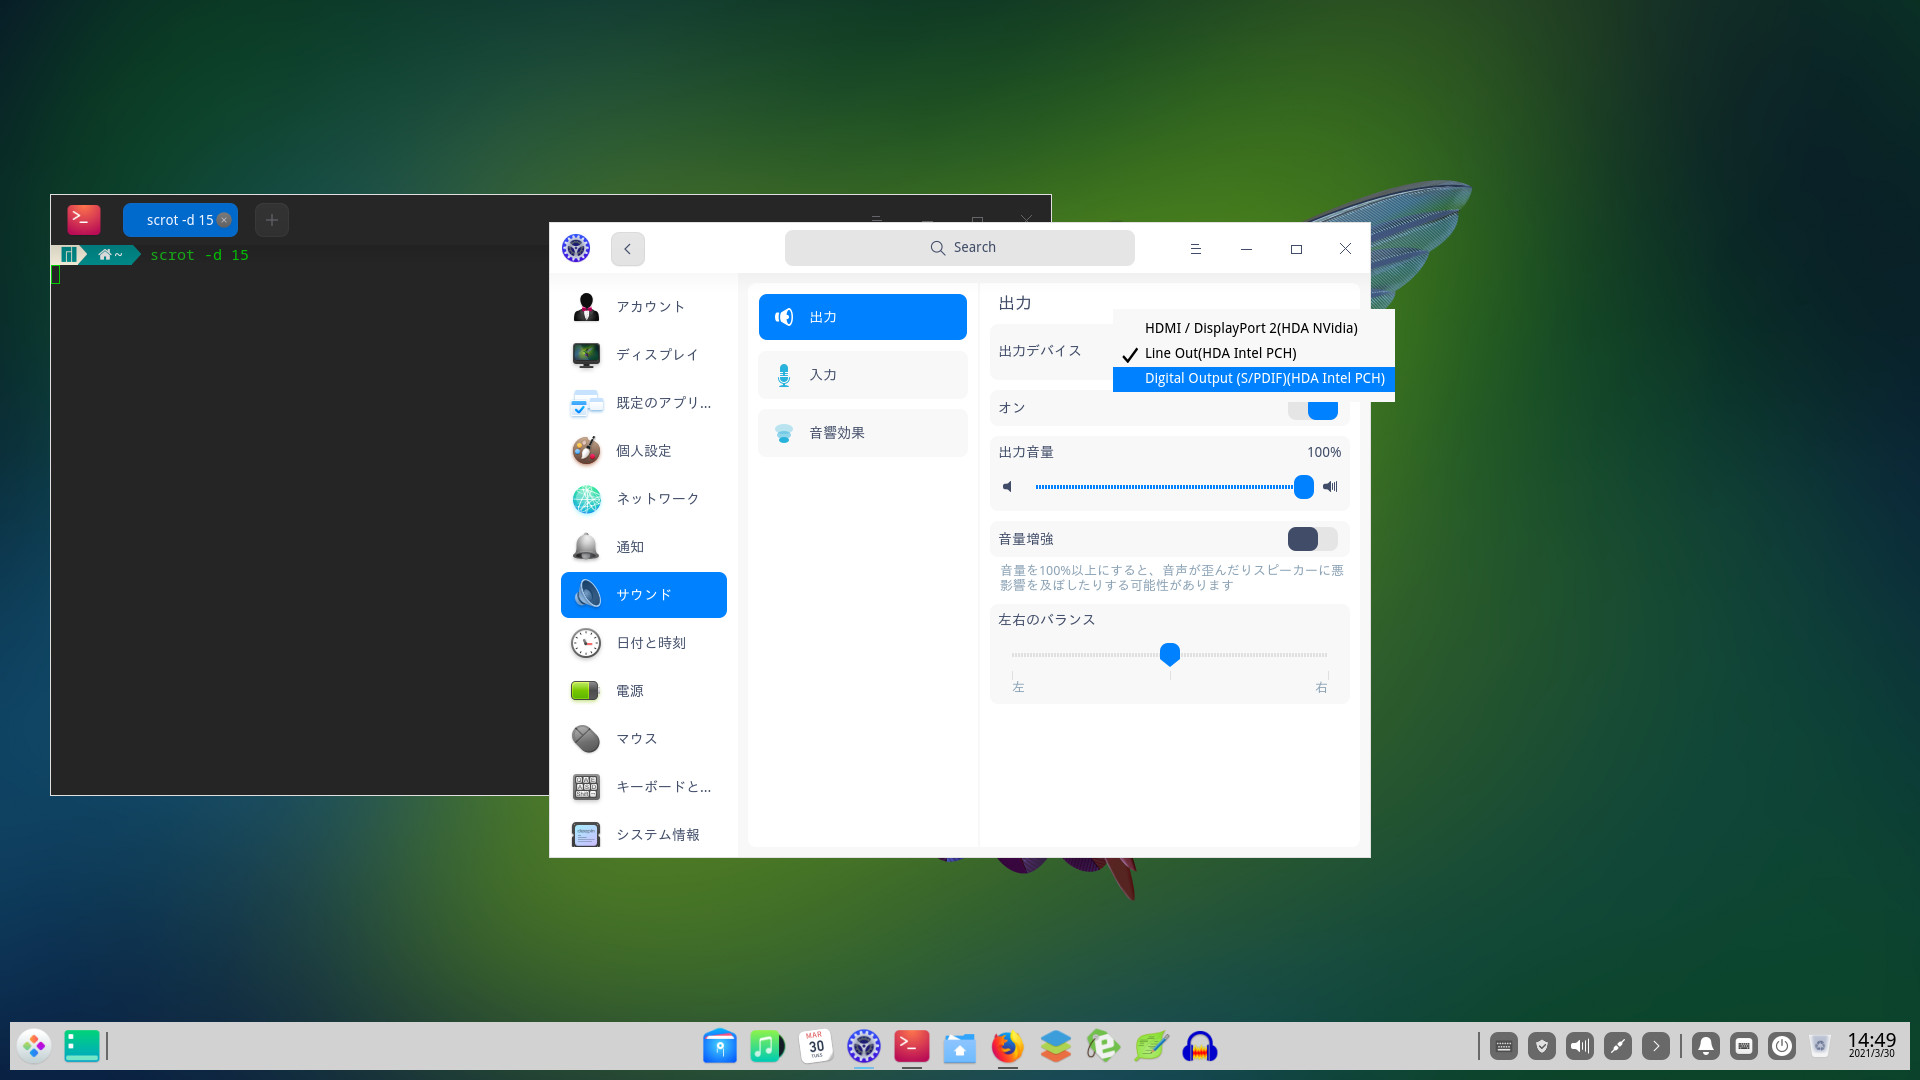
deepin コントロールセンターの画像
花子とアン
https://www.dailymotion.com/video/x7znycn
花子とアン NHKで再放送中。野球とか相撲とか国会中継がないとき。
manjaro-architect 2021 [arch系]
manjaro-architect
お仕事の方はご苦労さまです。
あいもかわらずlinuxであそんでいます。
こんかいの私のパソコン環境 manjaro-openbox
CPU: Intel i7-7700K (8) @ 4.500GHz
GPU: NVIDIA GeForce GT 730
manjaro-architect
manjaro-architect-22.06-development-unstable-220621-linux515.iso
manjaro-architectはテキスト形式でインストールする。
manjaro-architectを利用される方はあまりいないと思われる。
manjaro-architectをusbメモリーに書き込みssdにインストールした。
usbメモリーから起動して、ログインして、setup入力で先に進むのが基本ですが
現在はerrorがでて先に進めないでしょう。
以下はわたしがインストールしたときのメモ
パーティションはあらかじめ用意しておく。
usbメモリーから起動して、ログインして、
sudo pacman-mirrors -c Japan
sudo pacman -Syy
sudo pacman -S util-linux-libs glibc
setup
ーーーー
ーーーー
1 Prepare Installation
8 Mount Partitions
ーーーー
ーーーー
linux59
openbox
Full
ーーーー
ーーーー
sakura otf-ipafont yay
all free drivers
ーーーーー
ーーーーー
インストールのときにsakura otf-ipafont yay
をインストールしたので、localeもja_JP.UTF-8 を選択した。
done インストール終了。
sudo reboot
インストール終了後はじめての起動ではデスクトップの画面はでてこないでしょう。
起動して、ログインして
日本のリポジトリにする
sudo pacman-mirrors -c Japan
sudo pacman -Syyu
yay nvidia-390
9
sudo nano /boot/grub/grub.cfg 編集
135行 ・・・・quiet udev.log_priority=3 nomodeset
sudo systemctl enable lxdm
sudo reboot
やっとデスクトップの画面におめにかかれるでしょう。
ふつうのmanjaro-openboxの最新になっているでしょう。
前回の私の記事を参照されたし
sudo pacman -S neofetch fcitx-im fcitx-mozc fcitx-configtool libvoikko nuspell base-devel vlc easytag audacity gnome-disk-utility onlyoffice-desktopeditors gtk2-perl scrot youtube-dl
nano ~/.xprofile 編集
export XMODIFIERS="@im=fcitx"
export XMODIFIER="@im=fcitx"
export GTK_IM_MODULE=fcitx
export QT_IM_MODULE=fcitx
export DefaultIMModule=fcitx
以下参考画像

neofetchの画像
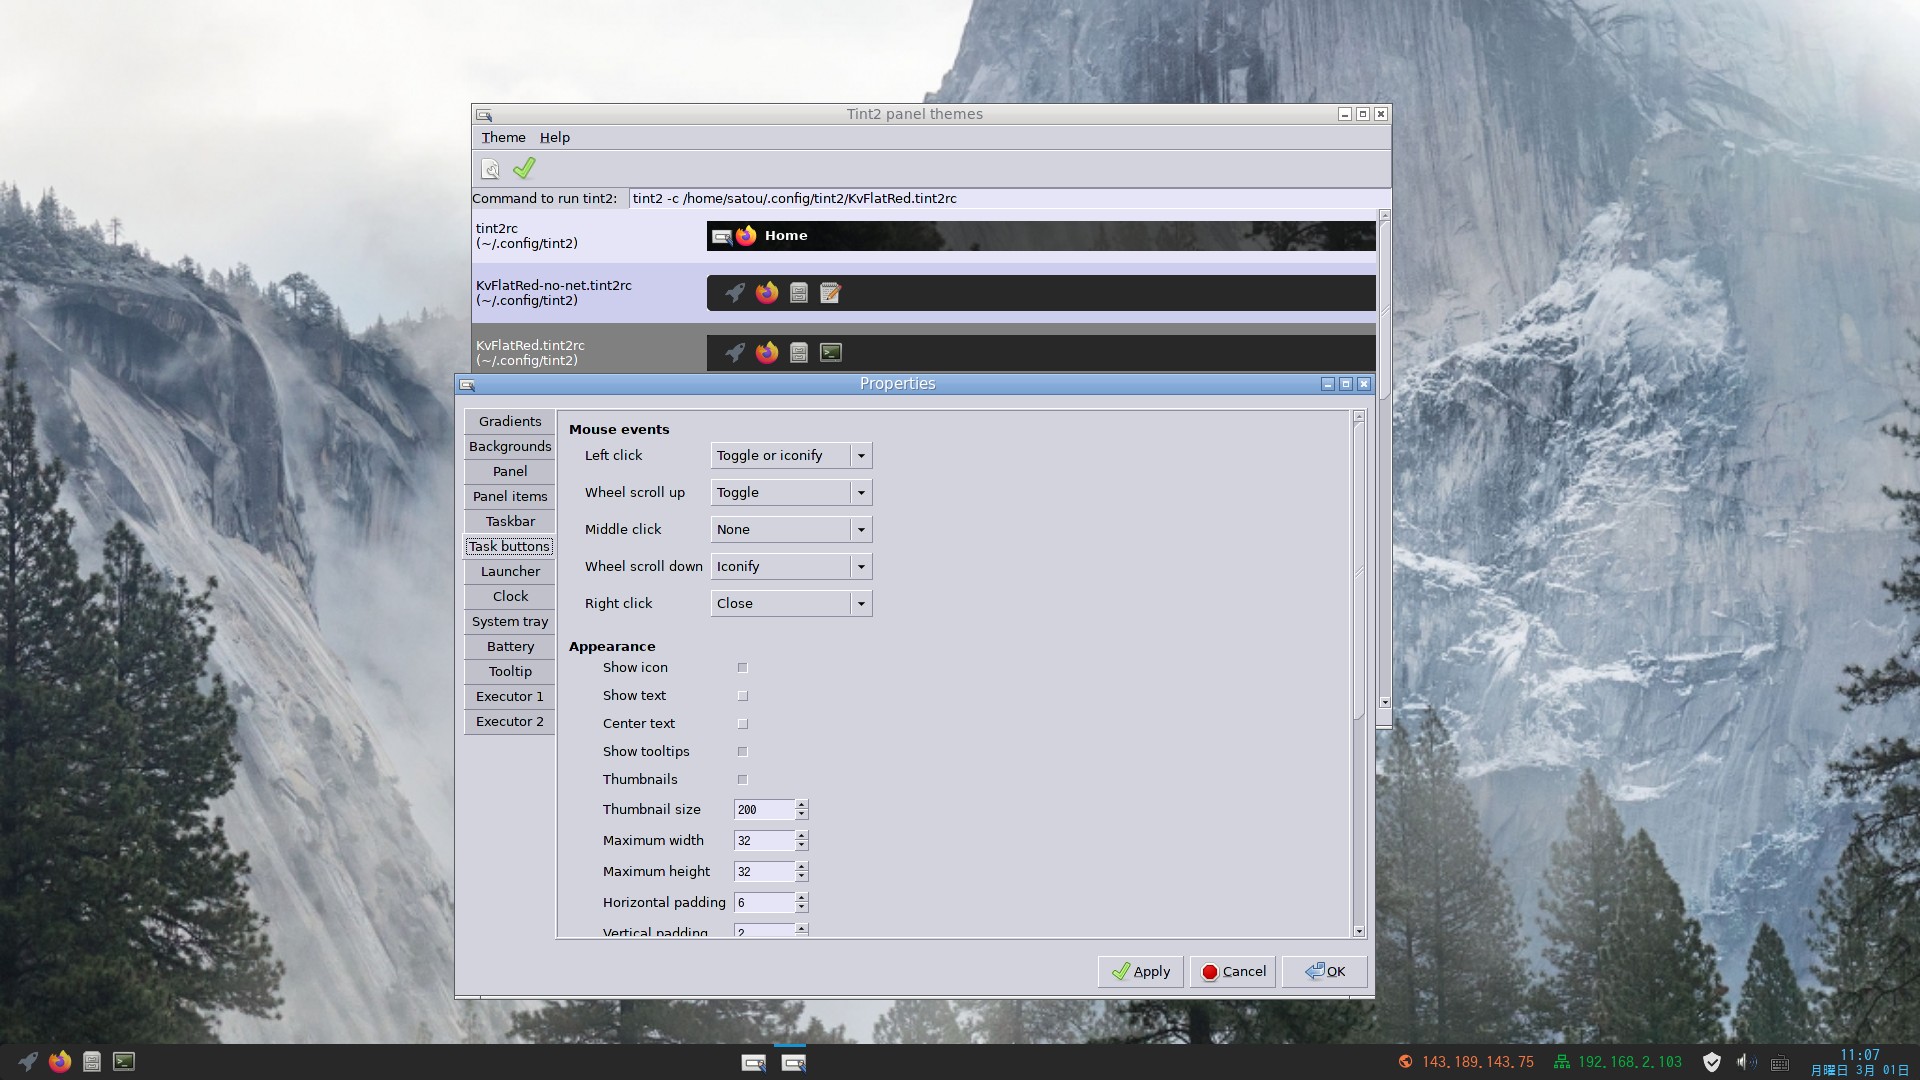
KvFlatRed.tint2rcの編集中 tint2素の設定にもどす。
GYAO&Tver動画ダウンローダ firefox拡張機能 いまさら [arch系]
GYAO&Tver動画ダウンローダ firefox拡張機能 いまさら
あいもかわらずlinuxであそんでいます。
今回のわたしのパソコン環境 openboxウインドーマネージャー
CPU: Intel i7-4770K (8) @ 4.000GHz
GPU: NVIDIA GeForce GTS 250
arch linux
archlinux-2021.02.01-x86_64.iso
arch linux 前回の記事
ひさしぶりにインストールしてみた。前回と同じような手順で行けた。
grub(bios)のインストール
参考サイト様
ーーーーーーーーーーーーーーーーーーーーーーーーーーー
# pacman -S grub
# grub-install --target=i386-pc --recheck /dev/sda
# cp /usr/share/locale/en\@quot/LC_MESSAGES/grub.mo /boot/grub/locale/en.mo
# pacman -S os-prober
# grub-mkconfig -o /boot/grub/grub.cfg
ーーーーーーーーーーーーーーーーーーーーーーーーーーー
fcitx-mozc を使っているのだが、
~/.config/autostart
~/.config/openbox/autostart
両方にスタートするように書き込んでいたら、openboxが動かなくなった。
片方にすべし。
ffmpegは、linuxのos にはたいてい入っているでしょう。
GYAO&Tver動画ダウンローダ firefox拡張機能は、ffmpegで動いているでしょう。
GYAO&Tver動画ダウンローダ firefox拡張機能に追加すると、firefoxの上部に緑色の小さなアイコンが出てきます。
それをクリックして、コピーと書かれているところをクリックする。
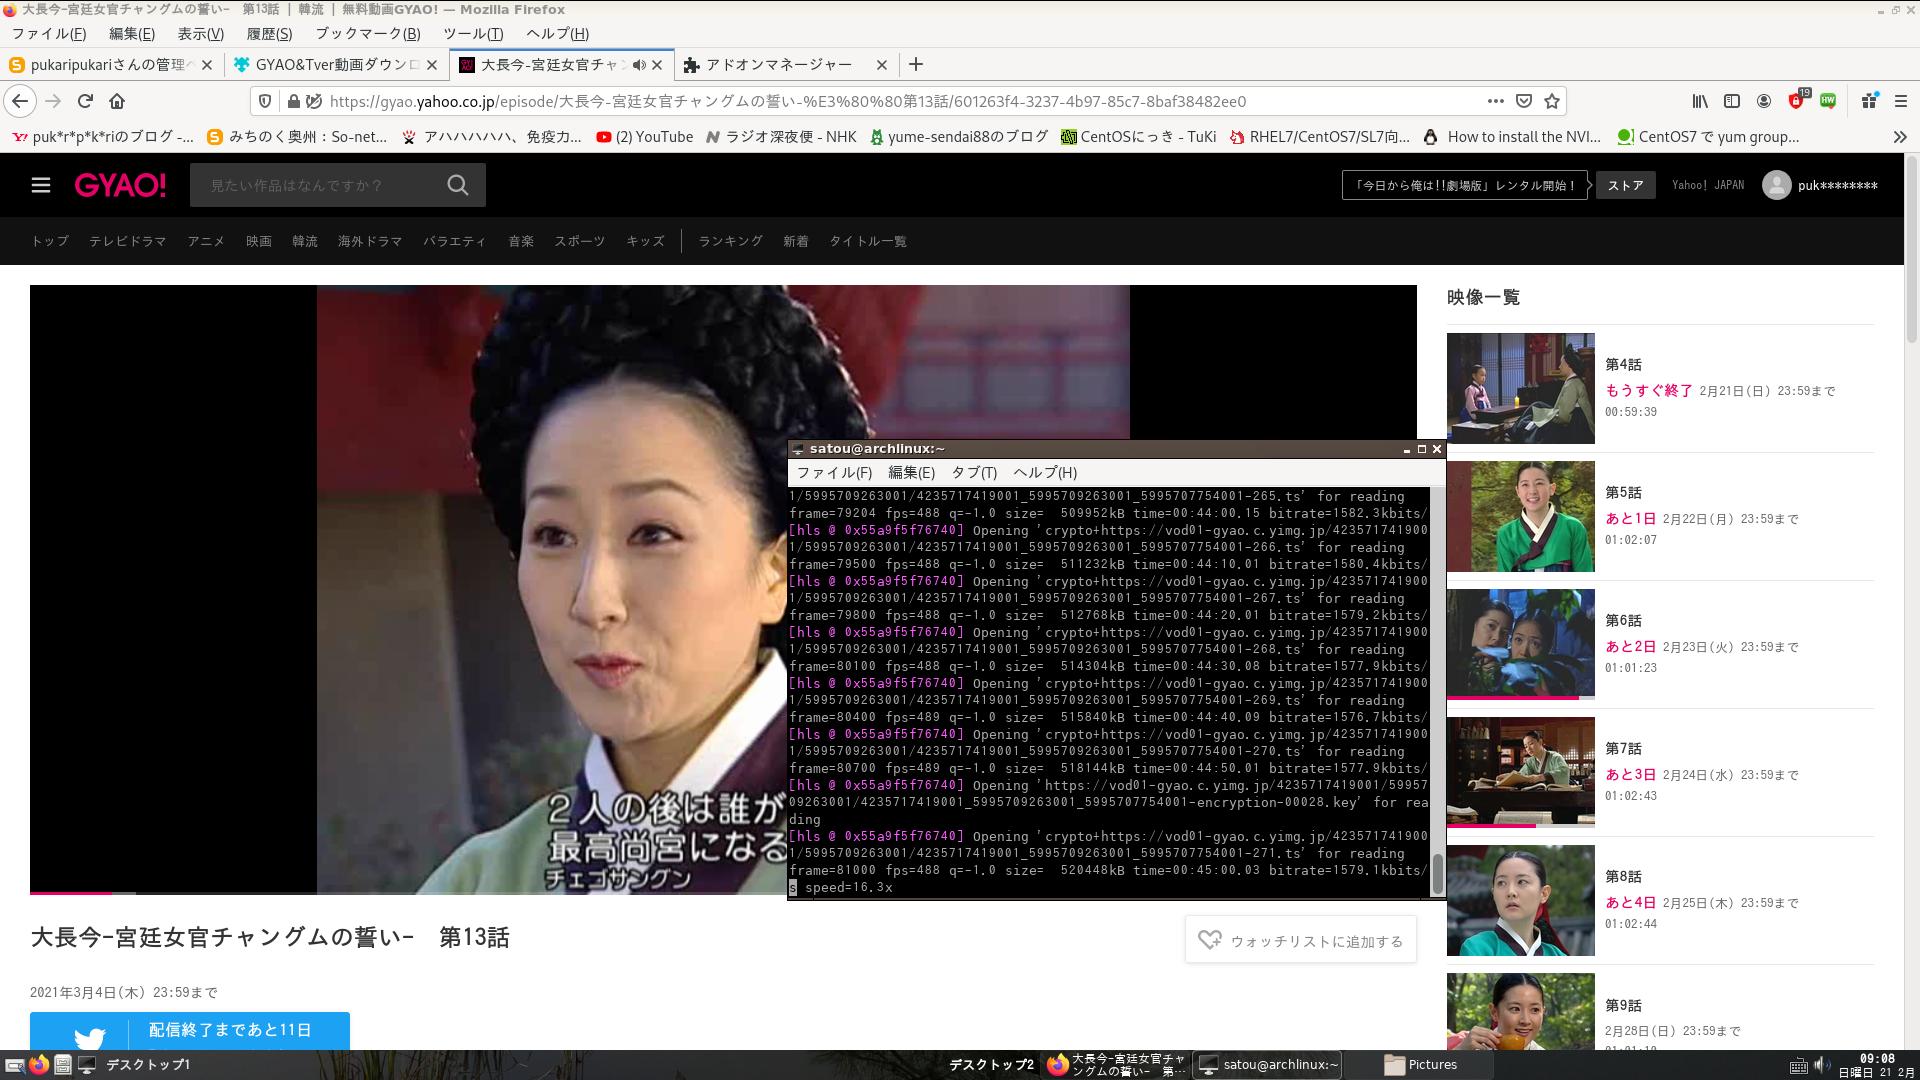
コピーして lxterminal に貼り付けて enterキー で動いた。
以下を試してみた。
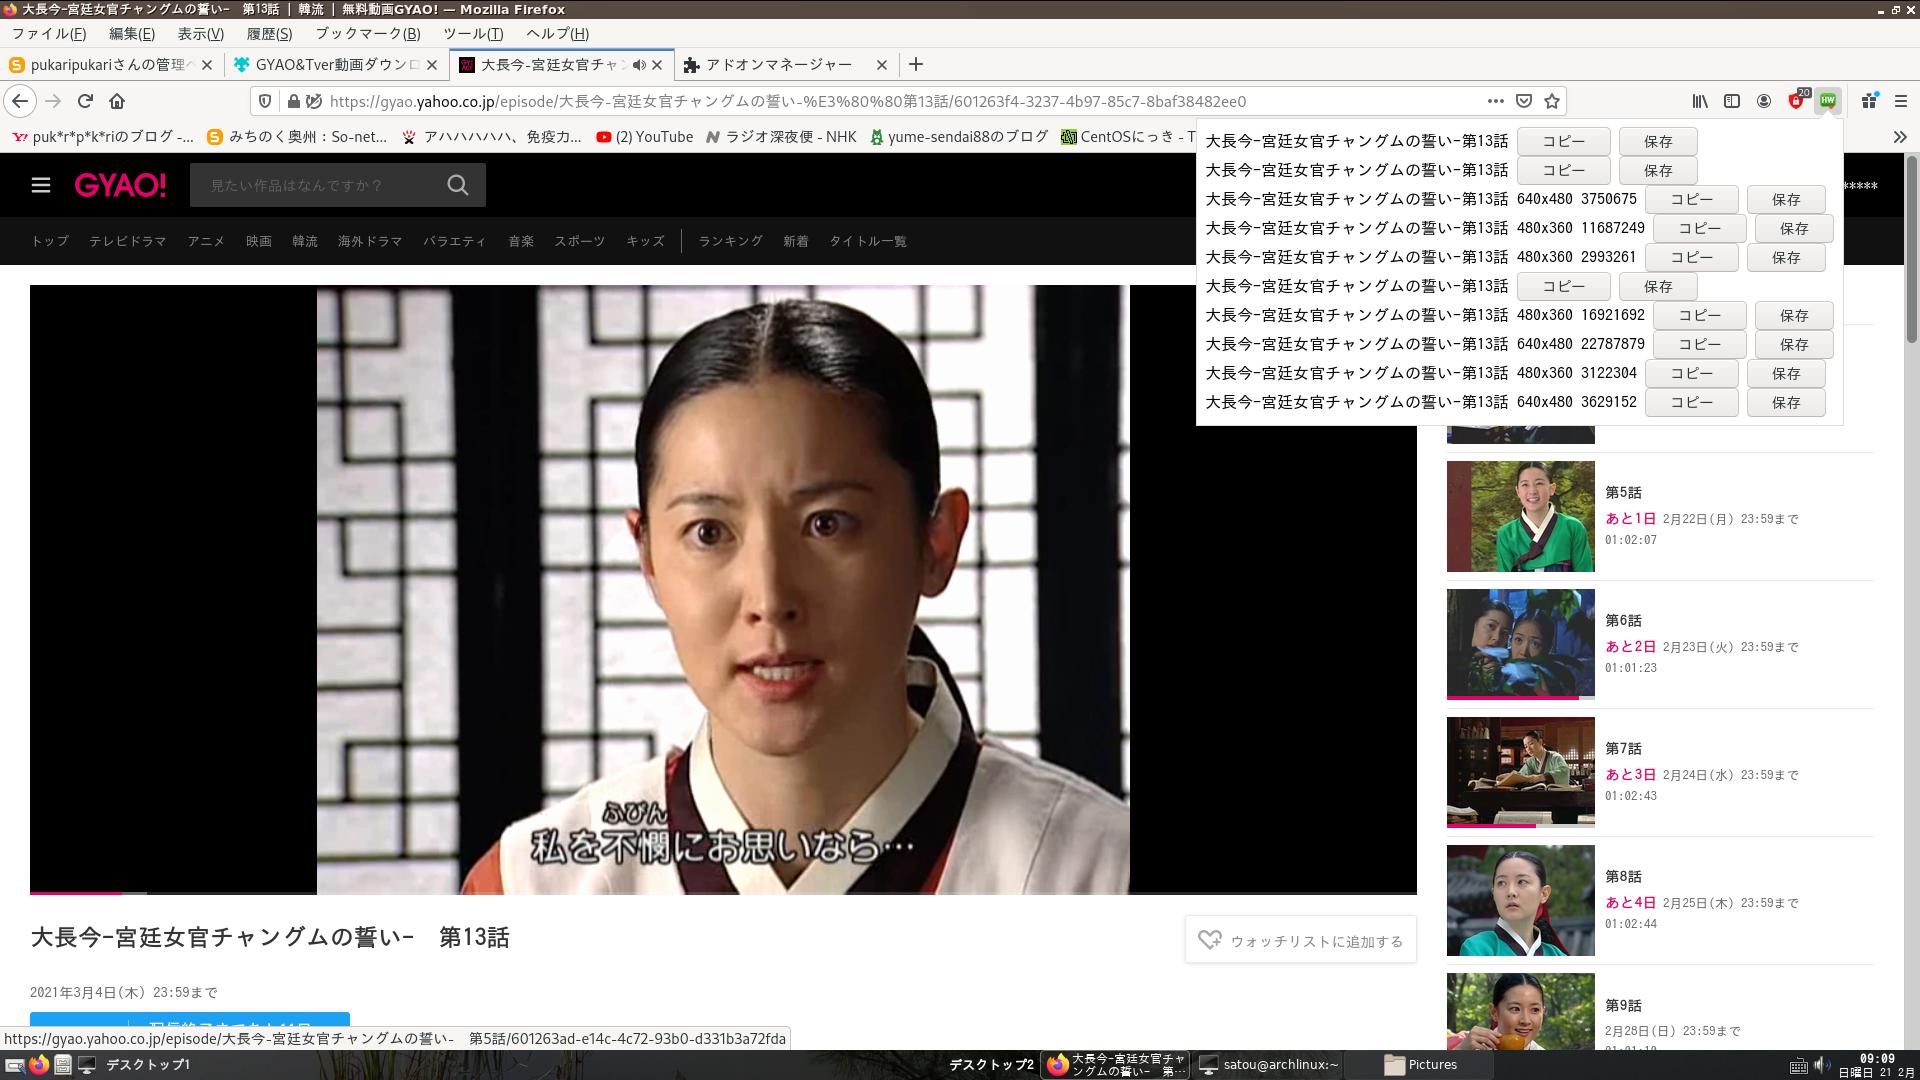
大長今 チャングム
ffmpeg -c copy "大長今-宮廷女官チャングムの誓い-第13話.mp4" -i "https://vod01-gyao.c.yimg.jp/4235717419001/4235717419001_5995706727001_5995707754001.m3u8"
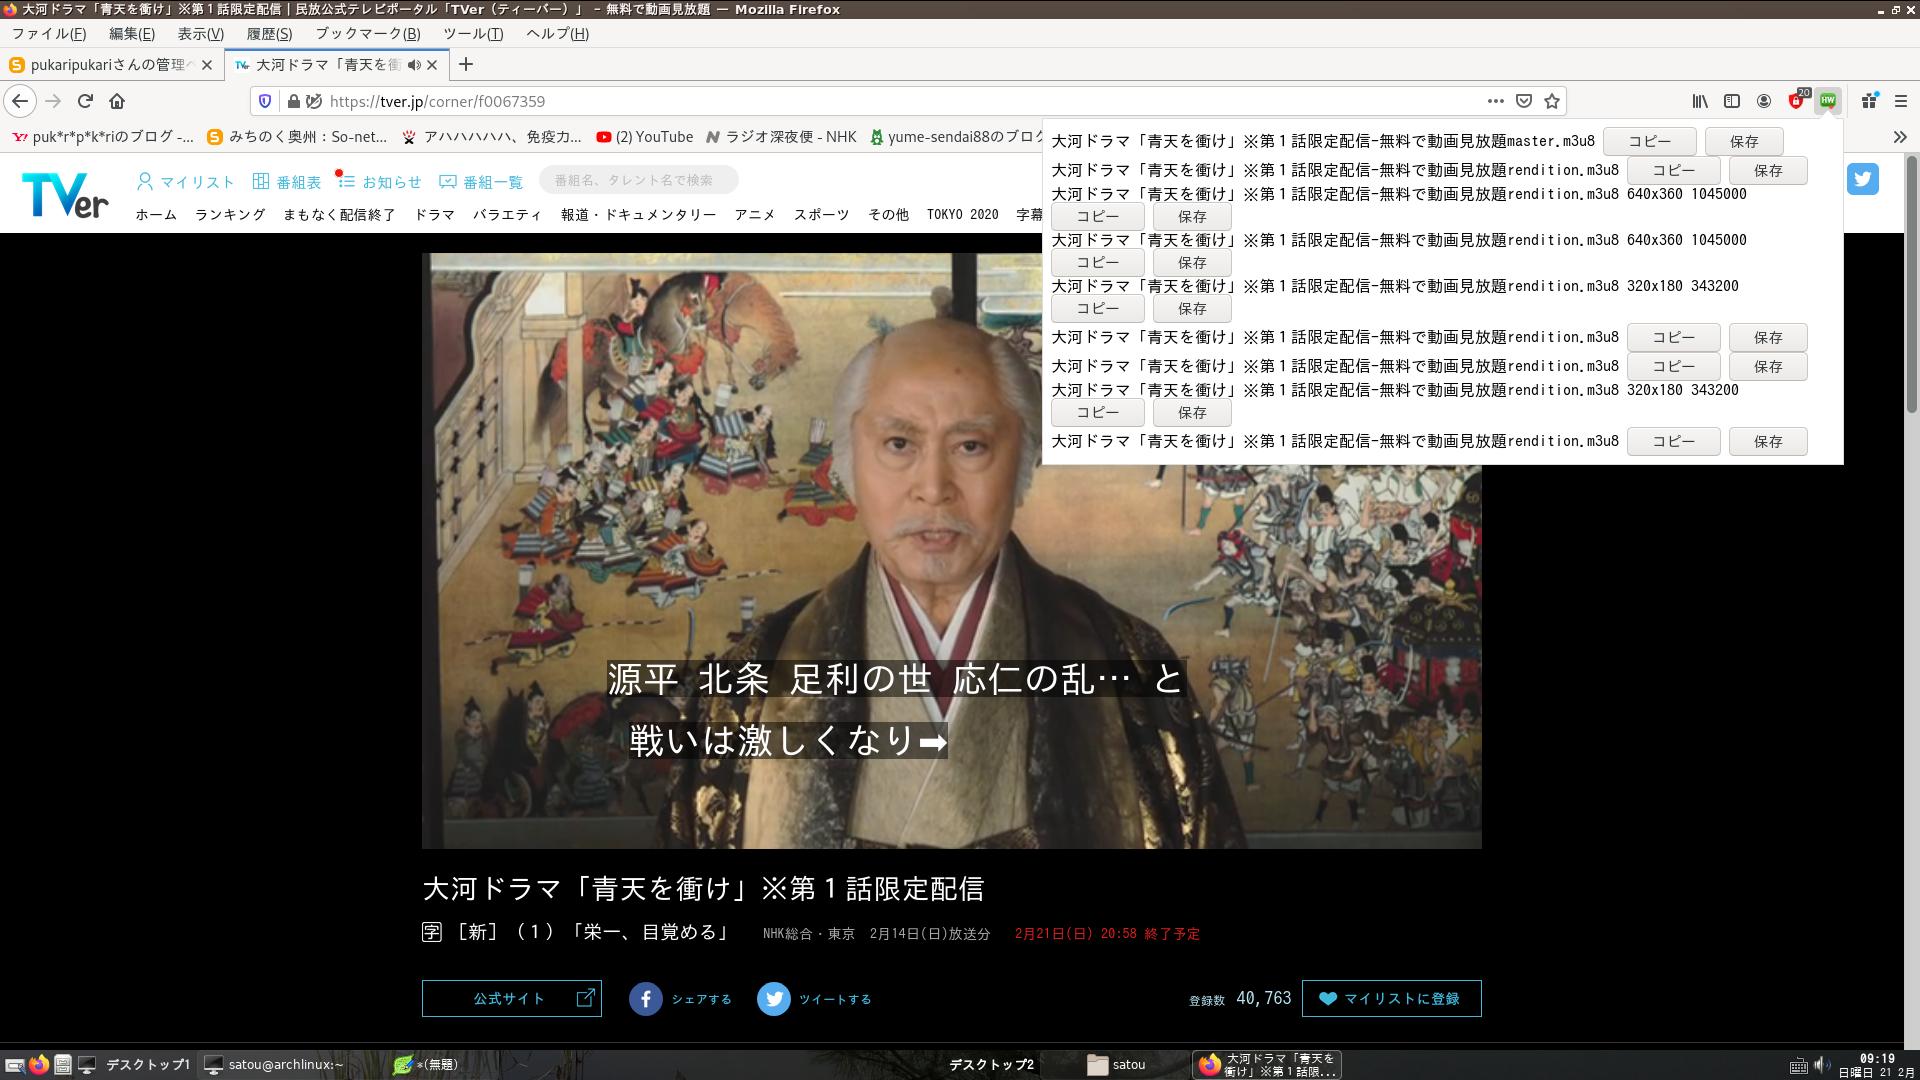
大河ドラマ「青天を衝け」
ffmpeg -c copy "大河ドラマ「青天を衝け」※第1話限定配信-無 料で動画見放題.mp4" -i "https://manifest.prod.boltdns.net/manifest/v1/hls/v5/aes128/5990430582001/2b45e88f-9926-4dd9-b974-41736a1619fa/10s/master.m3u8?fastly_token=NjAzMWI1MjJfZDA0NTg5NDBhYWFjNjUwMGI1NjA4NmUxNDZiZmZhMDFmZWFhZDg4OGVlMjczMGRlNTI4MTI1ZDEyY2Q1YzcyYg%3D%3D"
GYAO&Tver動画ダウンローダ firefox拡張機能 こんなお手軽な方法があったとは・・・・・。
これまでは、windows10 GYAO動画ダウンロードJava を使っていた。
fcitx-mozc を使っているのだが、
~/.config/autostart
~/.config/openbox/autostart
両方にスタートするように書き込んでいたら、openboxが動かなくなった。
片方にすべし。
ffmpegは、linuxのos にはたいてい入っているでしょう。
GYAO&Tver動画ダウンローダ firefox拡張機能は、ffmpegで動いているでしょう。
GYAO&Tver動画ダウンローダ firefox拡張機能に追加すると、firefoxの上部に緑色の小さなアイコンが出てきます。
それをクリックして、コピーと書かれているところをクリックする。
コピーして lxterminal に貼り付けて enterキー で動いた。
以下を試してみた。
大長今 チャングム
ffmpeg -c copy "大長今-宮廷女官チャングムの誓い-第13話.mp4" -i "https://vod01-gyao.c.yimg.jp/4235717419001/4235717419001_5995706727001_5995707754001.m3u8"
大河ドラマ「青天を衝け」
ffmpeg -c copy "大河ドラマ「青天を衝け」※第1話限定配信-無 料で動画見放題.mp4" -i "https://manifest.prod.boltdns.net/manifest/v1/hls/v5/aes128/5990430582001/2b45e88f-9926-4dd9-b974-41736a1619fa/10s/master.m3u8?fastly_token=NjAzMWI1MjJfZDA0NTg5NDBhYWFjNjUwMGI1NjA4NmUxNDZiZmZhMDFmZWFhZDg4OGVlMjczMGRlNTI4MTI1ZDEyY2Q1YzcyYg%3D%3D"
GYAO&Tver動画ダウンローダ firefox拡張機能 こんなお手軽な方法があったとは・・・・・。
これまでは、windows10 GYAO動画ダウンロードJava を使っていた。
追記2021-3 正確にダウロードできません。話数とかでたらめになってます。はぁ~。
neofetchの画像
大長今
青天を衝け
ふつうNHK + でしか見れないのだが、特別なのかTverにもあった。
大長今
manjaro openbox 2021 [arch系]
manjaro openbox 2021
あいもかわらずlinuxであそんでいます。
今回の私のパソコン環境 openboxウインドーマネージャー
CPU: Intel i7-7700K (8) @ 4.500GHz
GPU: NVIDIA GeForce GT 730
monitor: hdmi接続
manjaro-openbox
manjaro-openbox-20.2.1-210130-linux59.iso
manjaro-openboxのインストール時は日本語が文字化けしています。
english でインストールしましょう。後で修正。
manjaro-openboxを私好みにしました。
manjaro-openboxは、tint2 polybar rofi などが使われている。
おしゃれな os になっているでしょう。
使いやすいかというとそれほどでない。
openboxのいじるところはだいたい決まっています。
tint2 nitrogen obmenu-generator oblogout lxdm
以上を私好みにしました。
sudo passwd
sudo pacman -Syu
必要なものをインストールした。nvidiaドライバーも入れた。
sudo pacman -S neofetch sakura otf-ipafont fcitx-im fcitx-mozc fcitx-configtool libvoikko nuspell yay base-devel linux59-headers linux59-nvidia-390xx vlc easytag audacity gnome-disk-utility onlyoffice-desktopeditors gtk2-perl scrot youtube-dl
yay python2-distutils-extra
1
yay oblogout
3
yay mirage
2
yay simplescreenrecorder
3
obmenu-generator -s -i
oblogout
以上でインストール終了
tint2の設定
manjaro-openboxを初めて起動するとtint2は起動しません。未設定なため。
わたしは素のtint2rc を使いたいため sakura を起動して tint2 と入力してから・・・
menu→preferences→tint2→tint2 session から tintrc を選択して ok ボタンをおした。
~/.config/tint2/tint2rc を編集
103行 taskbar_mode = multi_desktop
173行 time2_format = %A %B %d日
ーーーーーーーーーーーーーーーーーーーーーーーーーーーー
tint2/KvFlatRed.tint2rc を使う場合
/home/satou/.config/tint2/KvFlatRed.tint2rc 編集
120行 wm_menu = 0
188行 mouse_middle = none
189行 mouse_right = close
189行 mouse_right = close
ーーーーーーーーーーーーーーーーーーーーーーーーーーーー
nitrogenの設定
~/.config/nitrogen/bg-saved.cfg を編集
以下私の場合 画像ファイル用意。
2行 file=/home/satou/Pictures/arcolinux/ajisai-0005.jpg
obmenu-generatorの設定
メニューのアイコンを表示させた。
~/.config/obmenu-generator/schema.pl を編集
27行から30行 適宜
74行 {item => ['obmenu-generator -s -i', 'Generate a static menu', 'menu-editor']},
78行 {item => ['oblogout', 'Exit Openbox', 'exit']},
lxdmの設定
ふつうのログイン、画像変更
sudo pcmanfm を使って以下のフォルダに好みの画像ファイルを入れる。
/usr/share/backgrounds/PacBang
sudo nano /etc/lxdm/lxdm.conf 編集
3行 autologin=
40行 bg=/usr/share/backgrounds/PacBang/kiku_1280_1024.jpg
70行 disable=0
manjaro-openboxは、アブリ数が少ないでしょう
マイブームのonlyoffice-desktopeditors simplescreenrecorder easytag audacity などをいれても
920個におさまっていた。
nano ~/.xinitrc 最初のほうに記入。
xrandr --setprovideroutputsource modesetting NVIDIA-0
以下参考画像
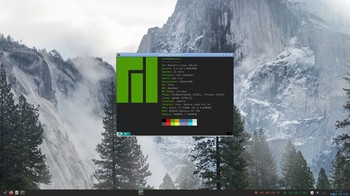
以下参考画像

openboxのメニュー
neofetchの画像
https://www.youtube.com/watch?v=1vJE8OqDiVI
youtube-dlを使ったらerror が出た。
zshの場合引用符で囲わなくてはならなかった。
youtube-dl 'https://www.youtube.com/watch?v=1vJE8OqDiVI'
manjaro + pantheon [arch系]
manjaro + pantheon
大阪なおみさん優勝しちゃった。おめでとうございます。2020-9-13
あいもかわらずlinuxであそんでいます。
今回のわたしのパソコン環境 os manjaro pantheonデスクトップ
CPU: Intel i7-4790K (8) @ 4.400GHz
GPU: NVIDIA GeForce GT 710
monitor: HDMI接続
manjaro-xfce-20.1-200911-linux58.iso
nvidiaドライバーのインストール
pacman -S base base-devel otf-ipafont yay
exit
yay nvidia-390xx
8
新規作成
nano /etc/modprobe.d/blacklist-nouveau.conf
blacklist nouveau
reboot
日本語入力 pantheonで動くようにするため、ちよっとよけいなものもいれています。
pacman -S hspell aspell fcitx-im fcitx-mozc fcitx-configtool
exit
新規作成
nano ~/.xprofile
export XMODIFIERS="@im=fcitx"
export XMODIFIER="@im=fcitx"
export GTK_IM_MODULE=fcitx
export QT_IM_MODULE=fcitx
export DefaultIMModule=fcitx
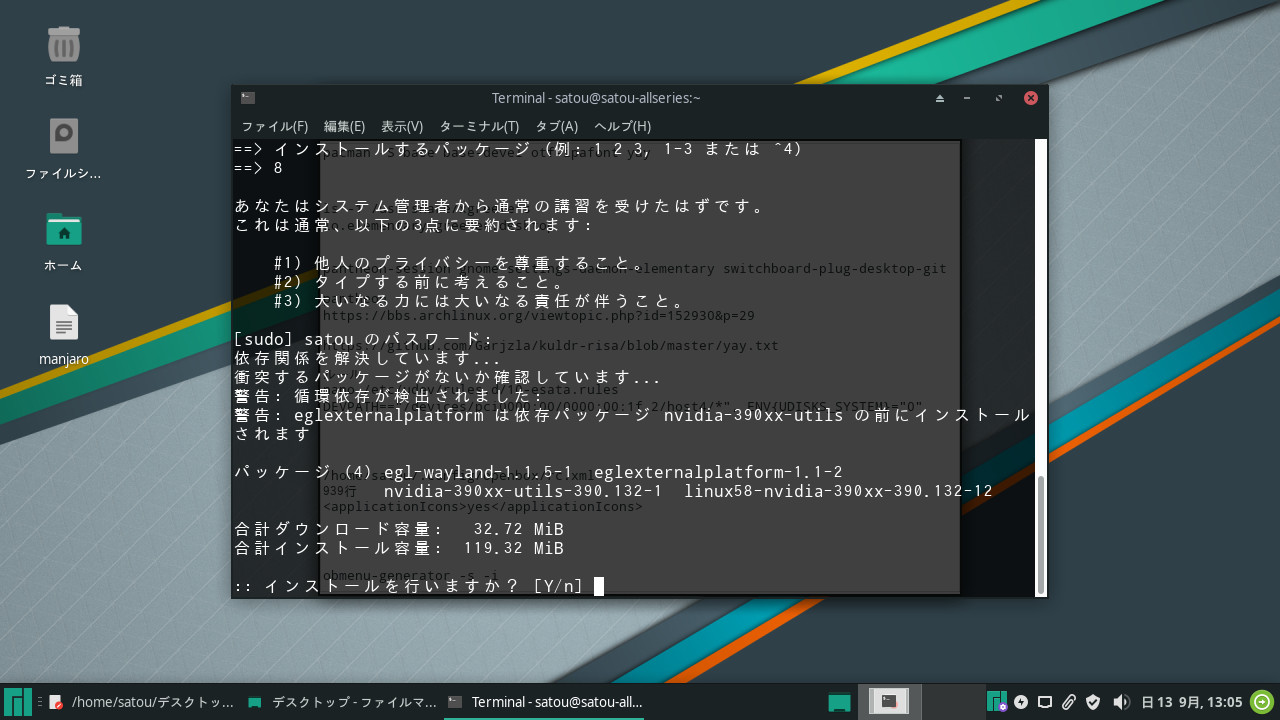
(pantheonのインストールのおしまいのほうで
ソフトウェアの追加と削除をつかって ibusを削除した。switchboard-plug-keyboardも一緒に削除される。あとでもう一度インストールした
yay switchboard-plug-keyboard)
以上majaro の設定終了
ーーーーーーーーーーーーーーーーーーーーーーーーーーーーーーーーーーーーーーーーーーーーーーー
manjaroには、元々2015年pantheonのデスクトップがあった。
それ以降メンテナンスされていない。
ご本家のarchも、メンテナンスされていない模様。
よってarch系のpantheonデスクトップの情報はすくない。
Garjzla/kuldr-risa: A script that installs the Elementary ... - GitHub
以下、参考サイト様をみてゴチャゴチャやってみました。
インストール
pacman -S pantheon
52 個のパッケージがグループ pantheon に存在します
エラーもでていますが。そのまま、保留。
オーバーライドファイル“/usr/share/glib-2.0/schemas/20_elementary.pantheon.wm.gschema.override”で指定されたスキーマ“org.gnome.mutter:Pantheon”のキー“button-layout”がありません。このキーのオーバーライドを無視します。
オーバーライドファイル“/usr/share/glib-2.0/schemas/20_elementary.pantheon.wm.gschema.override”で指定されたスキーマ“org.gnome.mutter:Pantheon”のキー“enable-animations”がありません。このキーのオーバーライドを無視します。
上記の pacman -S pantheon で足らないと思われるものを追加インストールした。
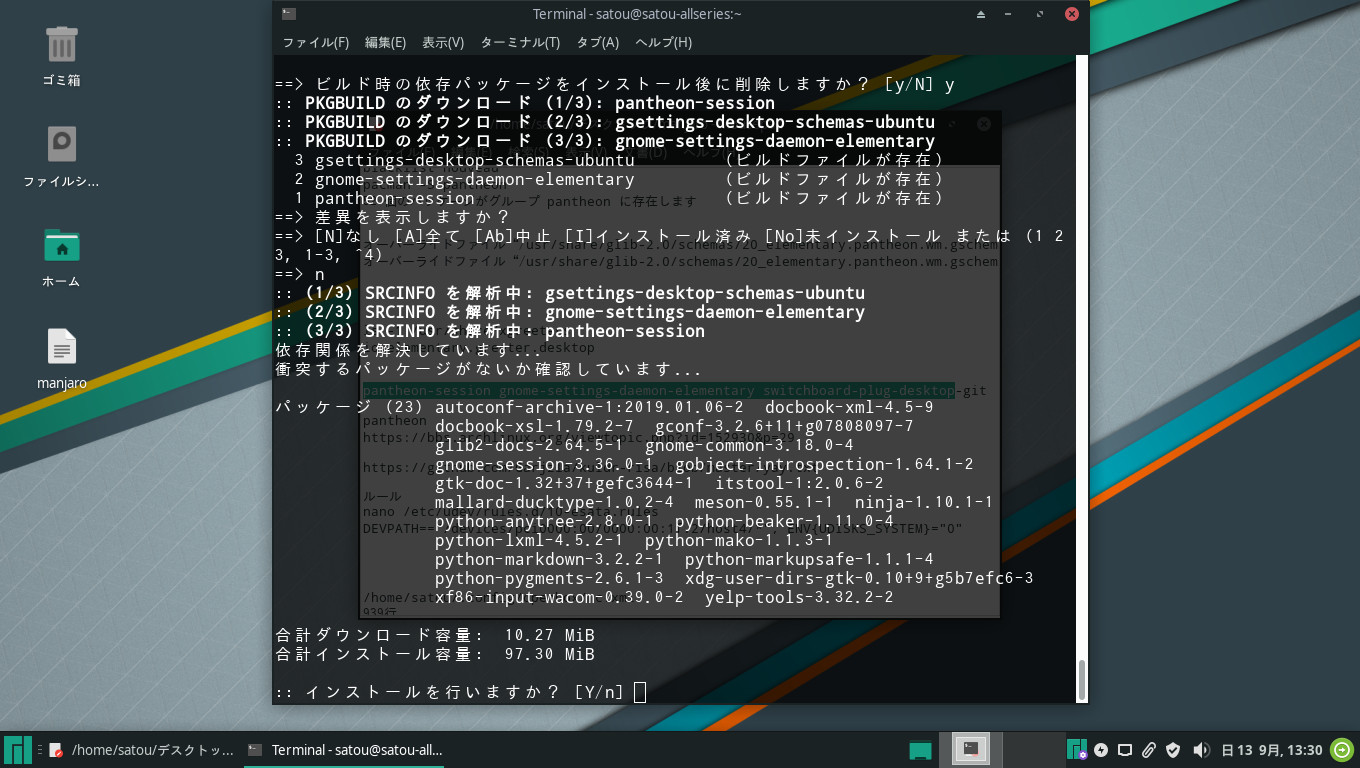
yay -S pantheon-session gnome-settings-daemon-elementary switchboard-plug-desktop-git switchboard-plug-display pantheon-default-settings-git switchboard-plug-security-privacy switchboard-plug-elementary-tweaks-git
pantheon-default-settings-git がインストールするとターミナルの表示が変になった。保留。
lightdmの設定
ls -1 /usr/share/xgreeters
io.elementary.greeter.desktop
nano /etc/lightdm/lightdm.conf 編集
greeter-session=io.elementary.greeter
~/.config/autostart フォルダに追加
plank と fcitxを起動するようにした。
nano ~/.config/autostart/plank.desktop
ーーーーーーーーーーーーーーーーーーーーーーーーーーーーー
[Desktop Entry]
Name=Plank
Comment=Stupidly simple.
Exec=plank
Icon=plank
Terminal=false
Type=Application
Categories=Utility;
NoDisplay=true
X-GNOME-Autostart-Notify=false
X-GNOME-AutoRestart=true
X-GNOME-Autostart-enabled=true
X-GNOME-Autostart-Phase=Panel
OnlyShowIn=Pantheon;
ーーーーーーーーーーーーーーーーーーーーーーーーーーーー
nano ~/.config/autostart/fcitx.desktop
ーーーーーーーーーーーーーーーーーーーーーーーーーーーー
[Desktop Entry]
Name=Fcitx
Name[ja]=Fcitx
GenericName[ja]=入力メソッド
Comment[ja]=入力メソッドを開始
Exec=fcitx -start
Icon=fcitx
Terminal=false
Type=Application
Categories=System;Utility;
StartupNotify=false
X-GNOME-AutoRestart=false
X-GNOME-Autostart-Notify=false
X-KDE-autostart-after=panel
X-KDE-StartupNotify=false
ーーーーーーーーーーーーーーーーーーーーーーーーー
キーボードの設定が日本語キーにならいないので 以下に追記してみた。
nano /home/satou/.bashrc
setxkbmap jp &
ログアウトに時間がかかる。保留
以上終了
以下参考画像。
大阪なおみさん優勝しちゃった。おめでとうございます。2020-9-13
あいもかわらずlinuxであそんでいます。
今回のわたしのパソコン環境 os manjaro pantheonデスクトップ
CPU: Intel i7-4790K (8) @ 4.400GHz
GPU: NVIDIA GeForce GT 710
monitor: HDMI接続
manjaro-xfce-20.1-200911-linux58.iso
nvidiaドライバーのインストール
pacman -S base base-devel otf-ipafont yay
exit
yay nvidia-390xx
8
新規作成
nano /etc/modprobe.d/blacklist-nouveau.conf
blacklist nouveau
reboot
日本語入力 pantheonで動くようにするため、ちよっとよけいなものもいれています。
pacman -S hspell aspell fcitx-im fcitx-mozc fcitx-configtool
exit
新規作成
nano ~/.xprofile
export XMODIFIERS="@im=fcitx"
export XMODIFIER="@im=fcitx"
export GTK_IM_MODULE=fcitx
export QT_IM_MODULE=fcitx
export DefaultIMModule=fcitx
(pantheonのインストールのおしまいのほうで
ソフトウェアの追加と削除をつかって ibusを削除した。switchboard-plug-keyboardも一緒に削除される。あとでもう一度インストールした
yay switchboard-plug-keyboard)
以上majaro の設定終了
ーーーーーーーーーーーーーーーーーーーーーーーーーーーーーーーーーーーーーーーーーーーーーーー
manjaroには、元々2015年pantheonのデスクトップがあった。
それ以降メンテナンスされていない。
ご本家のarchも、メンテナンスされていない模様。
よってarch系のpantheonデスクトップの情報はすくない。
Garjzla/kuldr-risa: A script that installs the Elementary ... - GitHub
以下、参考サイト様をみてゴチャゴチャやってみました。
インストール
pacman -S pantheon
52 個のパッケージがグループ pantheon に存在します
エラーもでていますが。そのまま、保留。
オーバーライドファイル“/usr/share/glib-2.0/schemas/20_elementary.pantheon.wm.gschema.override”で指定されたスキーマ“org.gnome.mutter:Pantheon”のキー“button-layout”がありません。このキーのオーバーライドを無視します。
オーバーライドファイル“/usr/share/glib-2.0/schemas/20_elementary.pantheon.wm.gschema.override”で指定されたスキーマ“org.gnome.mutter:Pantheon”のキー“enable-animations”がありません。このキーのオーバーライドを無視します。
上記の pacman -S pantheon で足らないと思われるものを追加インストールした。
yay -S pantheon-session gnome-settings-daemon-elementary switchboard-plug-desktop-git switchboard-plug-display pantheon-default-settings-git switchboard-plug-security-privacy switchboard-plug-elementary-tweaks-git
pantheon-default-settings-git がインストールするとターミナルの表示が変になった。保留。
lightdmの設定
ls -1 /usr/share/xgreeters
io.elementary.greeter.desktop
nano /etc/lightdm/lightdm.conf 編集
greeter-session=io.elementary.greeter
~/.config/autostart フォルダに追加
plank と fcitxを起動するようにした。
nano ~/.config/autostart/plank.desktop
ーーーーーーーーーーーーーーーーーーーーーーーーーーーーー
[Desktop Entry]
Name=Plank
Comment=Stupidly simple.
Exec=plank
Icon=plank
Terminal=false
Type=Application
Categories=Utility;
NoDisplay=true
X-GNOME-Autostart-Notify=false
X-GNOME-AutoRestart=true
X-GNOME-Autostart-enabled=true
X-GNOME-Autostart-Phase=Panel
OnlyShowIn=Pantheon;
ーーーーーーーーーーーーーーーーーーーーーーーーーーーー
nano ~/.config/autostart/fcitx.desktop
ーーーーーーーーーーーーーーーーーーーーーーーーーーーー
[Desktop Entry]
Name=Fcitx
Name[ja]=Fcitx
GenericName[ja]=入力メソッド
Comment[ja]=入力メソッドを開始
Exec=fcitx -start
Icon=fcitx
Terminal=false
Type=Application
Categories=System;Utility;
StartupNotify=false
X-GNOME-AutoRestart=false
X-GNOME-Autostart-Notify=false
X-KDE-autostart-after=panel
X-KDE-StartupNotify=false
ーーーーーーーーーーーーーーーーーーーーーーーーー
キーボードの設定が日本語キーにならいないので 以下に追記してみた。
nano /home/satou/.bashrc
setxkbmap jp &
ログアウトに時間がかかる。保留
以上終了
以下参考画像。
yay nvidia-390xxの画像

pacman -S pantheon の画像
yay -S pantheon-session gnome-settings-daemon-elementary switchboard-plug-desktop-git switchboard-plug-display pantheon-default-settings-git の画像
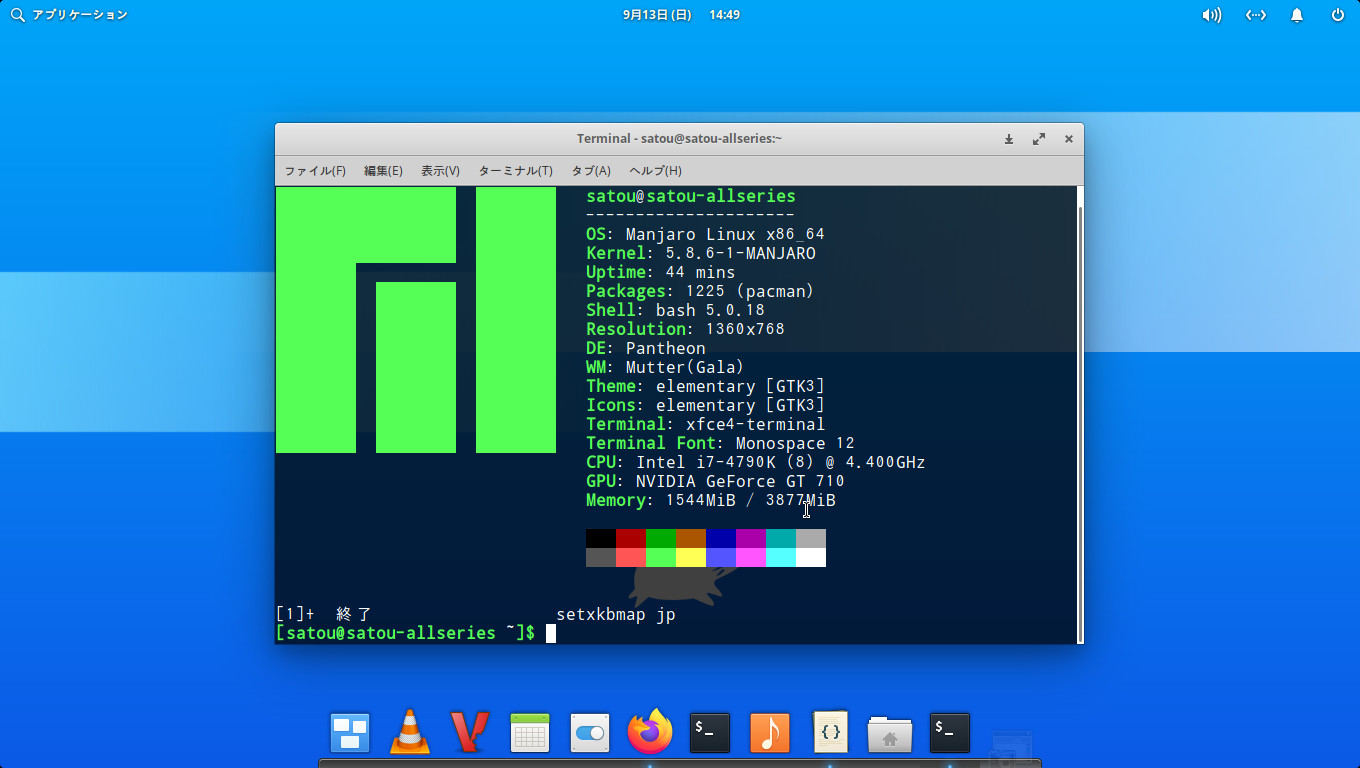
neofetchの画像
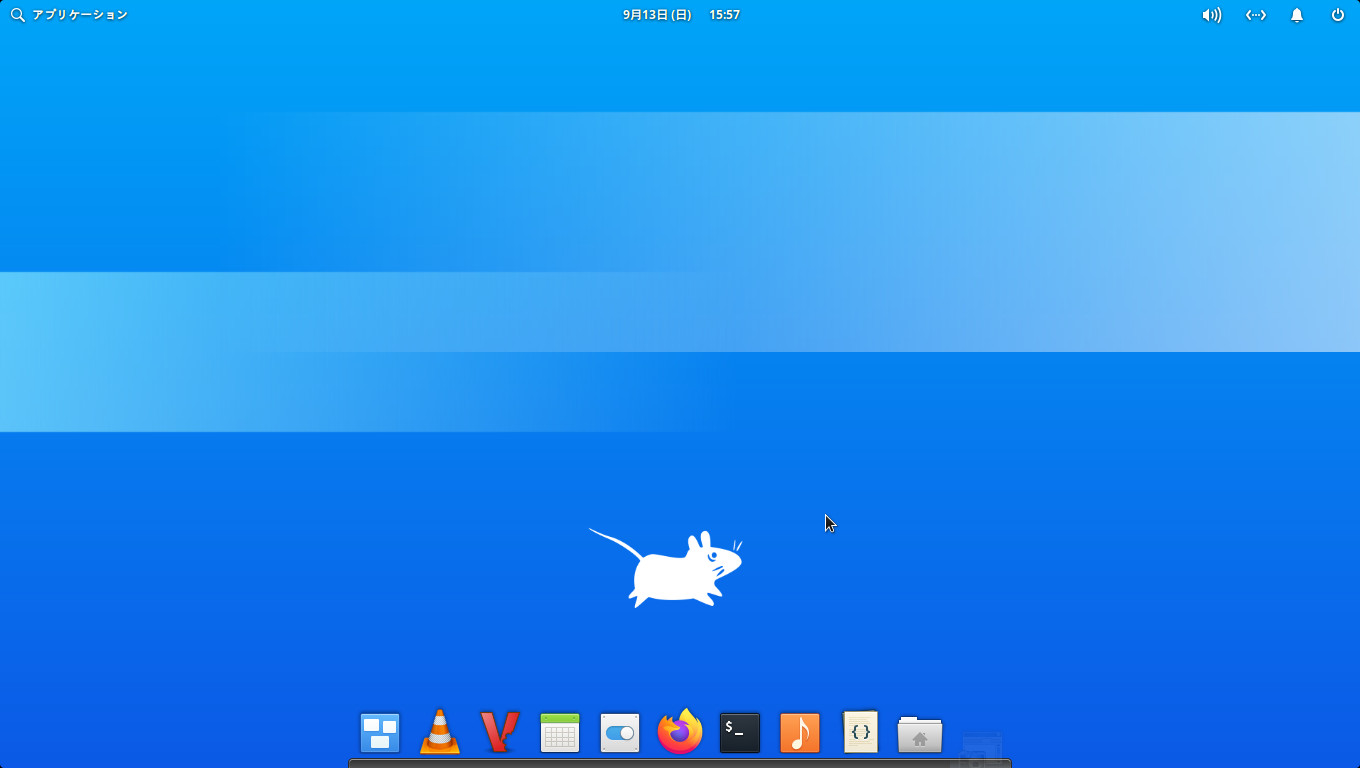
pantheonの画像
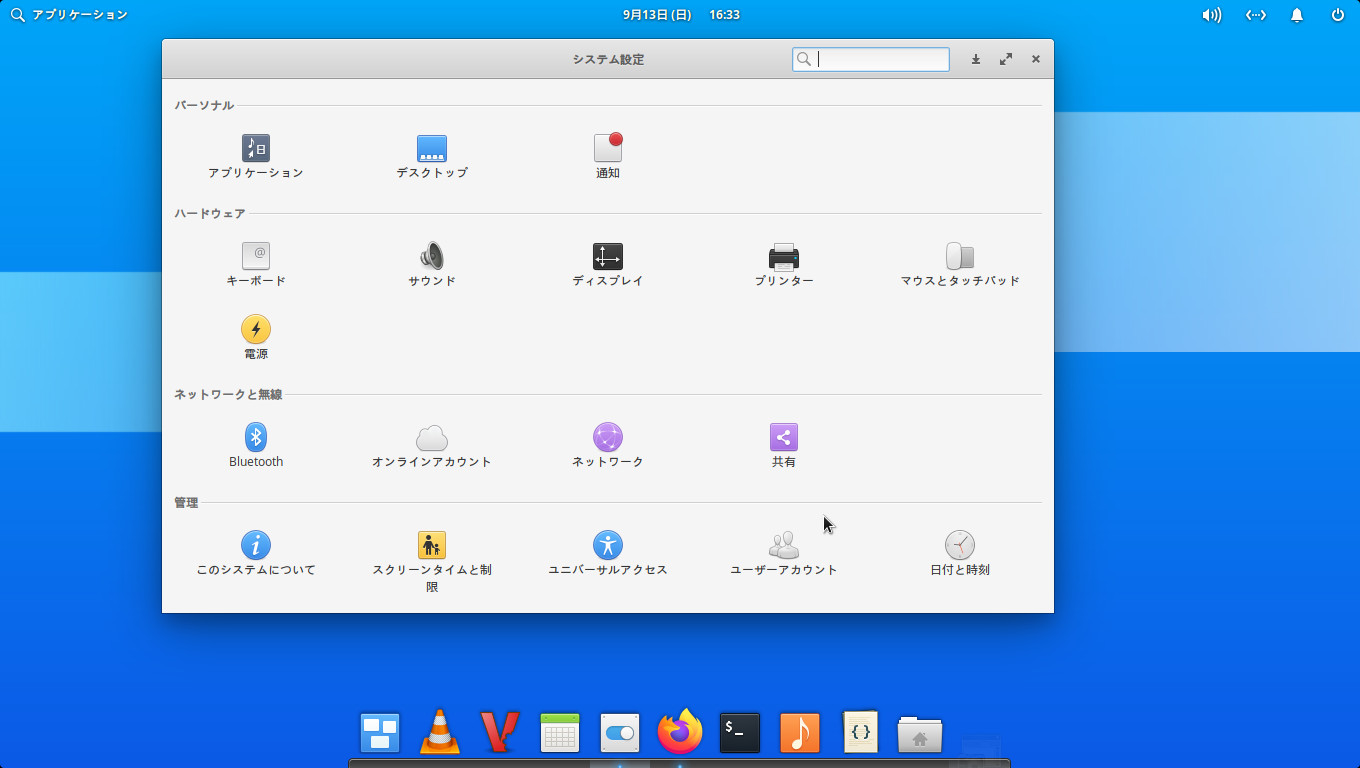
システム設定の画像
pantheonの場合 switchboard とも言う
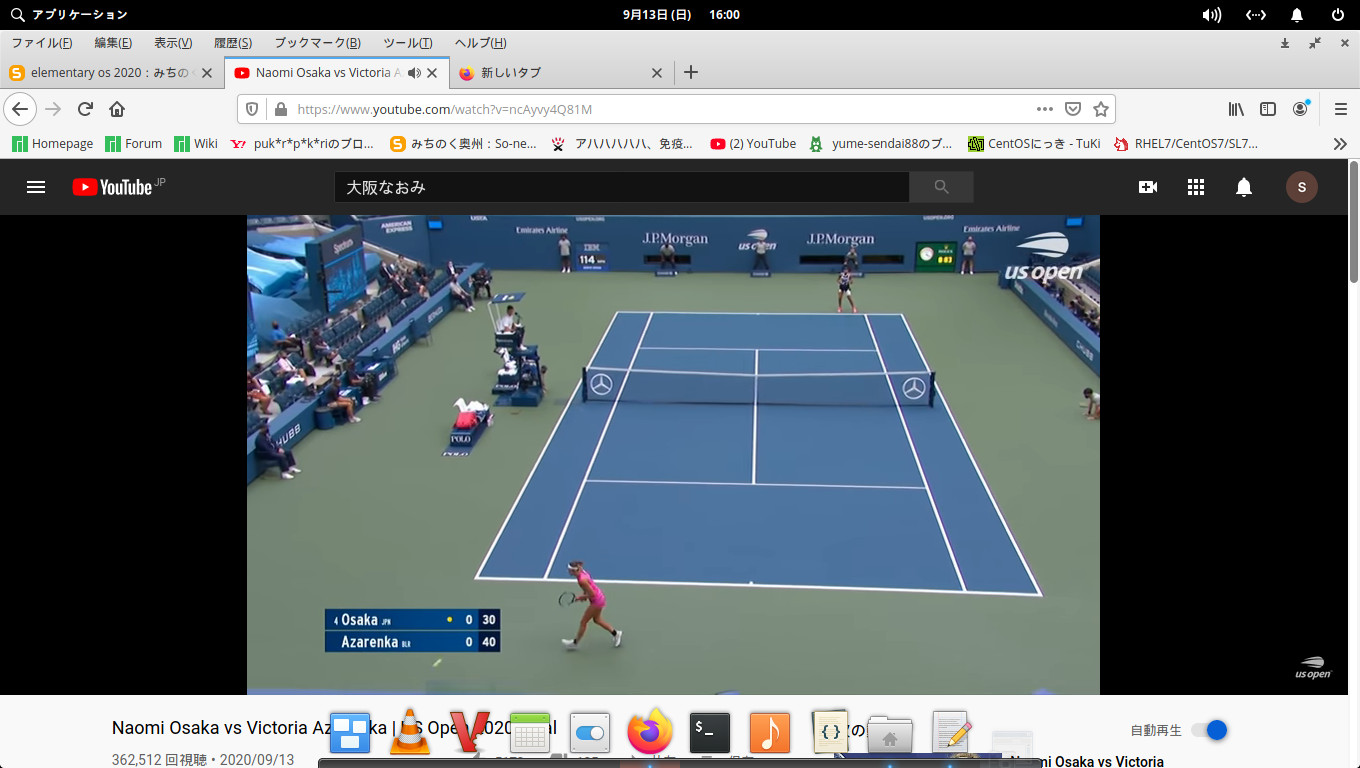
大阪なおみさん
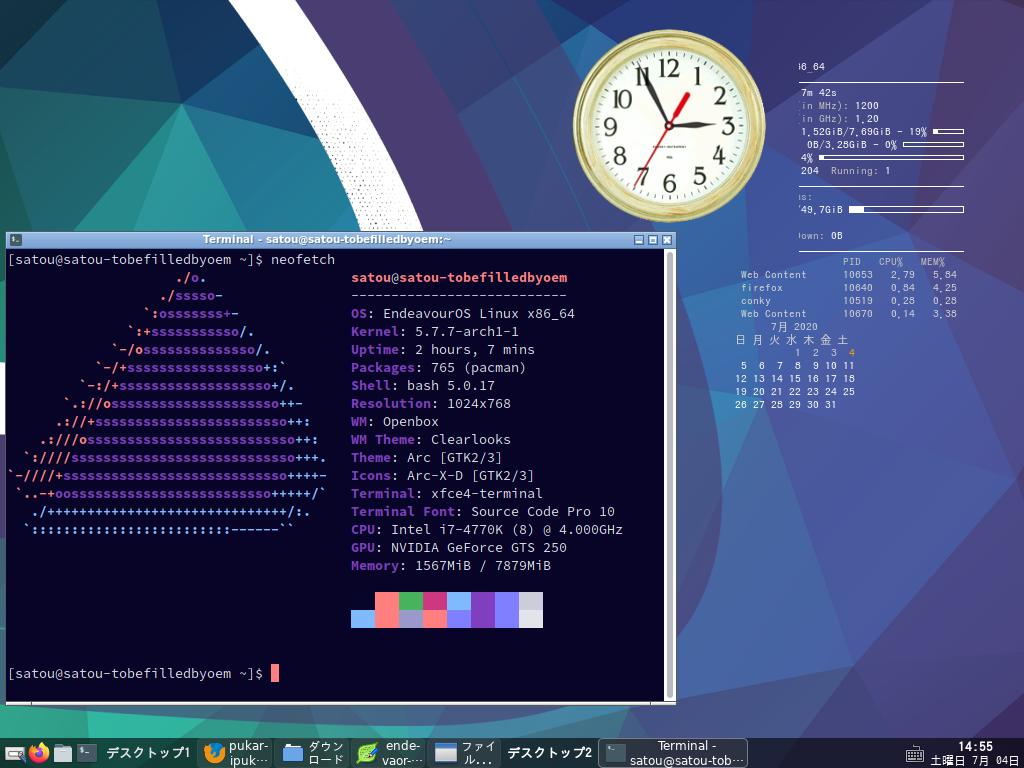
EndeavourOS i3-wm 2020 [arch系]
EndeavourOS i3-wm 2020
熊本県球磨川氾濫・・・・大変なことになっています。なんとも。2020-7-4
あいもかわらずlinuxであそんでいます。
今回のわたしのパソコン環境 EndeavourOS i3wmウインドーマネージャー
CPU: Intel i7-4770K (8) @ 4.000GHz
GPU: NVIDIA GeForce GTS 250
monitor: アナログRGB D-Sub 15
熊本県球磨川氾濫・・・・大変なことになっています。なんとも。2020-7-4
あいもかわらずlinuxであそんでいます。
今回のわたしのパソコン環境 EndeavourOS i3wmウインドーマネージャー
CPU: Intel i7-4770K (8) @ 4.000GHz
GPU: NVIDIA GeForce GTS 250
monitor: アナログRGB D-Sub 15
EndeavourOS は、antergos linuxの後継。オランダ製。
インストールのとき
i3デスクトップ
nvidia-driver
をチェックした。
インストール終了後
起動させたが古いnvidia-driverのパソコンでは起動できなかった。
なぜなら最新のnvidia-driver440が入っていた。
このパソコンの場合
grubメニューのとき、eキーをおして
nomodeset と入力して起動させた。
最新のnvidia-driver440削除
nvidia-340xxのインストールした。
su
pacman -R nvidia
exit
yay nvidia-340xx
1
n
n
passwd:
su
reboot
i3-wmが起動したら、キーボードのF9 を押してみよう。
i3-wmのアプリの一覧がでるでしょう。キーボード↑↓で選択して起動できるでしょう。
素の設定では、winキー+c でそれぞれのアプリが閉じます。
i3-wm – EndeavourOSサイト
i3のショットカットと設定を少し変えた。
nano ~/.config/i3/config 編集
ーーーーーーーーーーーーーーーーーーーーーーーーーーーーーーーーーーーーーーーーーーーーーーー
56行目追記 閉じる
bindsym mod1+F4 kill
105行目、106行目 ログアウト
#bindsym $mod+Shift+e layout toggle split
bindsym $mod+Shift+e exec pkill i3
136行目 スタートアップターミナルをとめる
#exec --no-startup-id sleep 2 && xfce4-terminal -e "glances --percpu"
155行目、156行目 スタートアップアップデートとめる
#exec --no-startup-id sleep 15 && eos-update-notifier
#exec --no-startup-id sleep 15 && eos-welcome
192行目、193行目 閉じる
#bindsym $mod+Shift+q exec "i3-nagbar -t warning -m 'You pressed the exit shortcut. Do you really want to exit i3? This will end your X session.' -b 'Yes, exit i3' 'i3-msg exit'"
bindsym $mod+Shift+q kill
312行目、313行目 追記 firefoxとpcmanfm 私の好み
bindsym $mod+Shift+F11 exec "/usr/bin/firefox"
bindsym $mod+Shift+F12 exec "/usr/bin/pcmanfm"
140行目 追記
exec --no-startup-id fcitx -d
ーーーーーーーーーーーーーーーーーーーーーーーーーーーーーーーーーーーーーーーーーーーーーーー
i3-wmオリジナルには、使用中のアプリを任意のデスクトップに移動できる機能があります。
$mod+Shift+数字キー
EndeavourOS i3-wm では、移動しない。
/home/satou/.config/i3/config 追記、編集
i3-wmオリジナルの設定にもどします。
# switch to workspace
bindsym $mod+1 workspace 1
bindsym $mod+2 workspace 2
bindsym $mod+3 workspace 3
bindsym $mod+4 workspace 4
bindsym $mod+5 workspace 5
bindsym $mod+6 workspace 6
bindsym $mod+7 workspace 7
bindsym $mod+8 workspace 8
bindsym $mod+9 workspace 9
bindsym $mod+0 workspace 10
# move focused container to workspace
bindsym $mod+Shift+1 move container to workspace 1
bindsym $mod+Shift+2 move container to workspace 2
bindsym $mod+Shift+3 move container to workspace 3
bindsym $mod+Shift+4 move container to workspace 4
bindsym $mod+Shift+5 move container to workspace 5
bindsym $mod+Shift+6 move container to workspace 6
bindsym $mod+Shift+7 move container to workspace 7
bindsym $mod+Shift+8 move container to workspace 8
bindsym $mod+Shift+9 move container to workspace 9
bindsym $mod+Shift+0 move container to workspace 10
EndeavourOS i3-wm のswitch to workspace 6行は# でコメントアウトした。
#bind program to workspace 126行目付近6行も# でコメントアウトした。
ーーーーーーーーーーーーーーーーーーーーーーーーーーーーーーーーーーーーーーーー
EndeavourOS i3-wmには、shutdown_menu スクリプトというものがある。
それを使ってみる。一個インストールしてから
yay i3lock-fancy
nano ~/.config/i3/scripts/shutdown_menu 編集
41行目 大きさと、位置の変更
ROFI_OPTIONS=(${ROFI_OPTIONS:--width 21 -location 1 -hide-scrollbar -bw 2})
122行目、123行目
[Lock]="i3lock-fancy"
[Logout]="pkill i3"
nano ~/.config/i3/config 追記 適当な行に。winキー+x でログアウトメニューがでるでしょう。
bindsym $mod+x exec ~/.config/i3/scripts/shutdown_menu
ーーーーーーーーーーーーーーーーーーーーーーーーーーーーーーーーーーーーーーー
日本語入力は、fcitx-mozcにした。
pacman -S fcitx-im fcitx-configtool fcitx-mozc otf-ipafont
nano /etc/profile 追記
export GTK_IM_MODULE=fcitx
export QT_IM_MODULE=fcitx
export XMODIFIERS=”@im=fcitx”
fcitxは動いたが、i3barにアイコンが表示されなかった。
EndeavourOSのi3statusの設定でおかしくなっていると思われる。保留。
mozcの設定をかな入力にした。
$ /usr/lib/mozc/mozc_tool --mode=config_dialog
EndeavourOSの素の設定では、
i3wmのオリジナルショットカットがきかなくなっていてあせった。
$mod+Shift+q 閉じる
$mod+Shift+e ログアウト
EndeavourOSのi3-wmは、アプリの数も最小におさえられている。快適なosでしょう。
設定終了
ーーーーーーーーーーーーーーーーーーーーーーーーーーーーーーーーーーーーーーーーーーー
マイブームopenbox
su
pacman -S openbox obconf tint2 pcmanfm adwaita-icon-theme mirage
exit
yay obmenu-generator
yay gtk2-perl
yay oblogout
cp -r /etc/xdg/openbox ~/.config/
obmenu-generator -s -i
openboxの設定
nano ~/.config/openbox/autostart 編集
nitrogen --restore &
sleep 3
conky &
tint2 &
fcitx -d &
~/.conky/analog_clock1/analog.sh &
obmenu-generatorの設定
nano ~/.config/obmenu-generator/schema.pl 編集
105行目
#{exit => ['Exit', 'application-exit']},
108行目
{item => ['oblogout', 'Exit', 'application-exit']},
tint2の設定
nano ~/.config/tint2/tint2rc 編集
103行目
taskbar_mode = multi_desktop
172行目
time2_format = %A %B %d日
ーーーーーーーーーーーーーーーーーーーーーーーーーーーーーーーーーー
conkyのアナログ時計
su
pacman -S file-roller
exit
yay conky-lua
conkyclock2_1.0.1_all.deb
https://debiandog.github.io/xenialdog/Packages/Extra/
上記のファイルを$ file-roller などで解凍して
手動でそれぞれの場所に配置する。
conkyclock2_1.0.1_all.deb 解凍
data.tar.xz 二度目の解凍
usrフォルダがでてきます。
このフォルダの中の配置のとおりに希望osに配置する。
sudo pcmanfm
obmenu-generator -s -i
openboxメニュー→アクセサリー→conky clock v2
~/.conky/analog_clock1/analog.shを使いopenboxのautostartから起動させる。
conkyの設定
~/.conky/analog_clock1/.conkyrc_analog1 編集
own_window_type override
cp /usr/share/doc/conky-1.11.5_pre/conky.conf ~/.conkyrc
nano /home/satou/.conkyrc 編集、追記
28行目
alignment = 'top_right',
41行目
font = 'Monospace:size=11',
55行目
own_window_transparent = true,
末尾 カレンダー追記
${execpi 60 DJS=`date +%_d`; cal | sed s/"\(^\|[^0-9]\)$DJS"'\b'/'\1${color orange}'"$DJS"'$color'/}
]]
EndeavourOS i3-wmは、インストールのときにi3-wmを選択するだけです。
容易にインストールすることができるでしょう。
以下参考画像
i3-wmの画像
F9キーを押したときの画像
openboxの画像
oblogoutの画像
熊本県
https://www.youtube.com/watch?v=d_IwHqKg-dU
arcolinux 2020 [arch系]
arcolinux 2020
お仕事の方はごくろうさまです。
あいもかわらずlinuxであそんでいます。
今回のわたしのパソコン環境 os arcolinux i3ウインドーマネージャー
CPU: Intel i7-4790K (8) @ 4.400GHz
GPU: NVIDIA GeForce GT 710
monitor: HDMI接続
arcolinux-v20.6.5.iso
arcolinuxは、 arch系、ベルギー製。
上記のarcolinux.isoは、# gnome-disks でusbメモリーに書き込み、ssdにインストールした。
前回の私の記事も参照されたし。
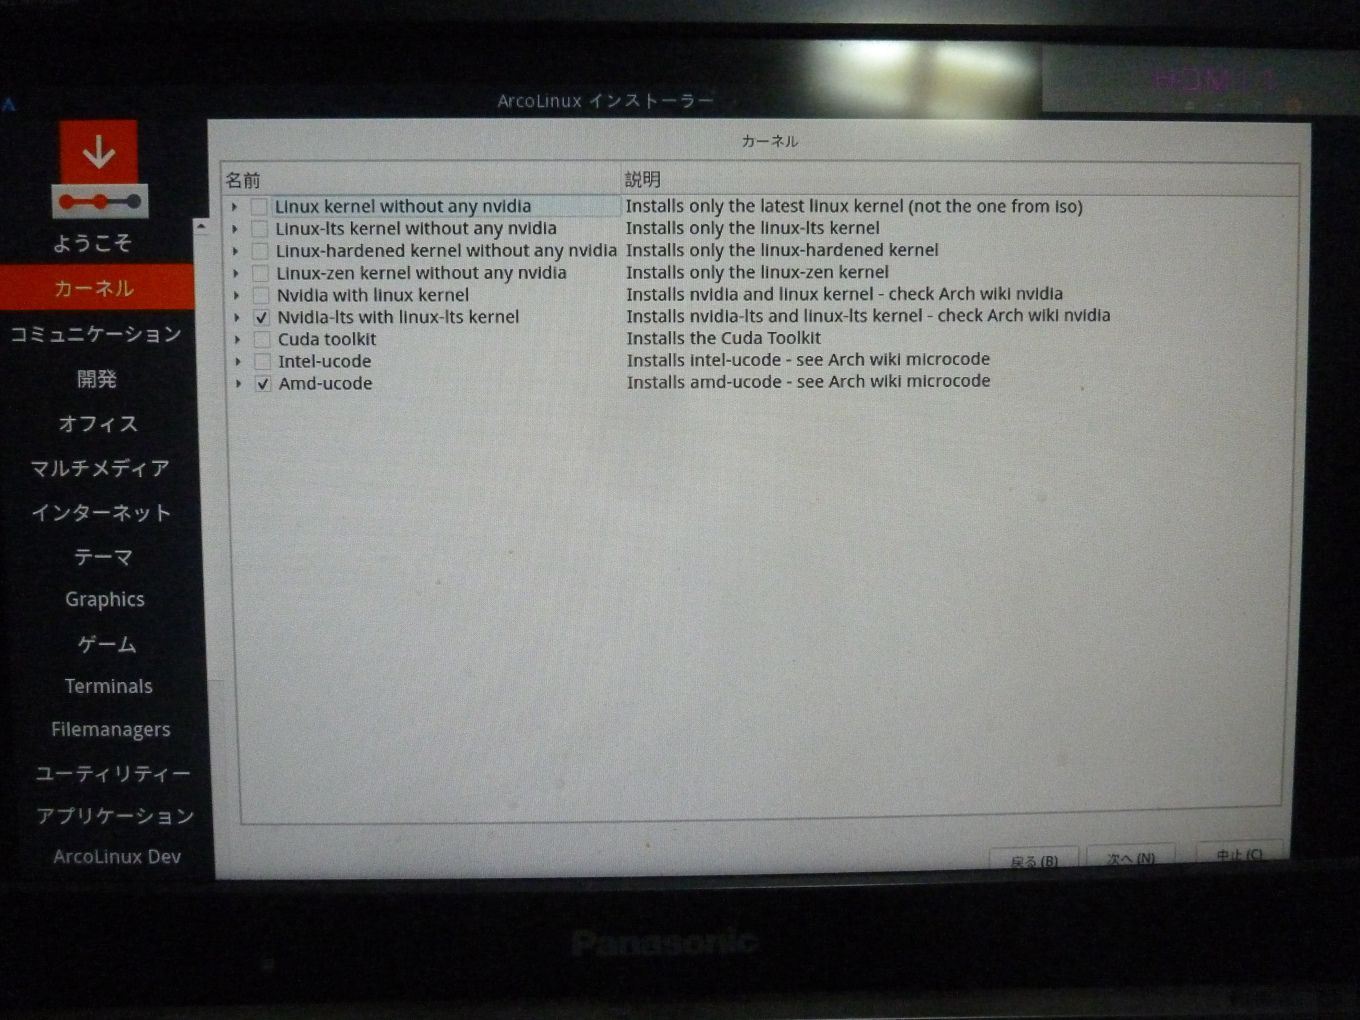
インストールは、カーネル選択を nvidia-lts・・・・check wikiと amd ucode の二箇所
にチェックをいれればnvidiaドライバーが自動で入ります。
そしてその後の選択画面では任意でよいでしょう。
i3ウインドーマネージャーは、ショットカットキーを多様します。
ショットカットキーをあまり使わない方は違和感を感じるでしょう。
上記のarcolinuxには、xfce4デスクトップ openbox i3 ウインドーマネージャーと
3つがすでにインストールされていました。
というわけでわたしは久しぶりにi3ウインドーマネージャーにふれてみた。
pacman -Syu
HDMI接続で、i3ウインドーマネージャー起動はてこづるでしょう。私は以下のようにしています。
画面の解像度xrandrとそれからの壁紙の設定fehに時間差をかけています。
nano /home/satou/.config/i3/config 編集
お仕事の方はごくろうさまです。
あいもかわらずlinuxであそんでいます。
今回のわたしのパソコン環境 os arcolinux i3ウインドーマネージャー
CPU: Intel i7-4790K (8) @ 4.400GHz
GPU: NVIDIA GeForce GT 710
monitor: HDMI接続
arcolinux-v20.6.5.iso
arcolinuxは、 arch系、ベルギー製。
上記のarcolinux.isoは、# gnome-disks でusbメモリーに書き込み、ssdにインストールした。
前回の私の記事も参照されたし。
インストールは、カーネル選択を nvidia-lts・・・・check wikiと amd ucode の二箇所
にチェックをいれればnvidiaドライバーが自動で入ります。
そしてその後の選択画面では任意でよいでしょう。
i3ウインドーマネージャーは、ショットカットキーを多様します。
ショットカットキーをあまり使わない方は違和感を感じるでしょう。
上記のarcolinuxには、xfce4デスクトップ openbox i3 ウインドーマネージャーと
3つがすでにインストールされていました。
というわけでわたしは久しぶりにi3ウインドーマネージャーにふれてみた。
pacman -Syu
HDMI接続で、i3ウインドーマネージャー起動はてこづるでしょう。私は以下のようにしています。
画面の解像度xrandrとそれからの壁紙の設定fehに時間差をかけています。
nano /home/satou/.config/i3/config 編集
exec --no-startup-id xrandr --right-of HDMI-0
exec --no-startup-id xrandr -s 1360x768
exec --no-startup-id fcitx -d &
470行目 壁紙
exec --no-startup-id sleep 4 && feh --bg-fill /home/satou/Pictures/wallpaper/2967306316-kabekin.jpg &
わたしの好みによる設定。
exec --no-startup-id xrandr -s 1360x768
exec --no-startup-id fcitx -d &
470行目 壁紙
exec --no-startup-id sleep 4 && feh --bg-fill /home/satou/Pictures/wallpaper/2967306316-kabekin.jpg &
わたしの好みによる設定。
conky をとめる。
463行目
#exec --no-startup-id conky -c ~/.config/i3/system-overview
463行目
#exec --no-startup-id conky -c ~/.config/i3/system-overview
素の設定をできるだけ変えないようにした。
500行目 lxterminal
bindsym $mod+Return exec --no-startup-id lxterminal;focus
以下は、winキー+page downキー デスクトップ移動
いっぱいデスクトップを開いているときに便利です。
bindsym $mod+Prior workspace prev
bindsym $mod+Next workspace next
ショットカットキーは、よくわすれる。
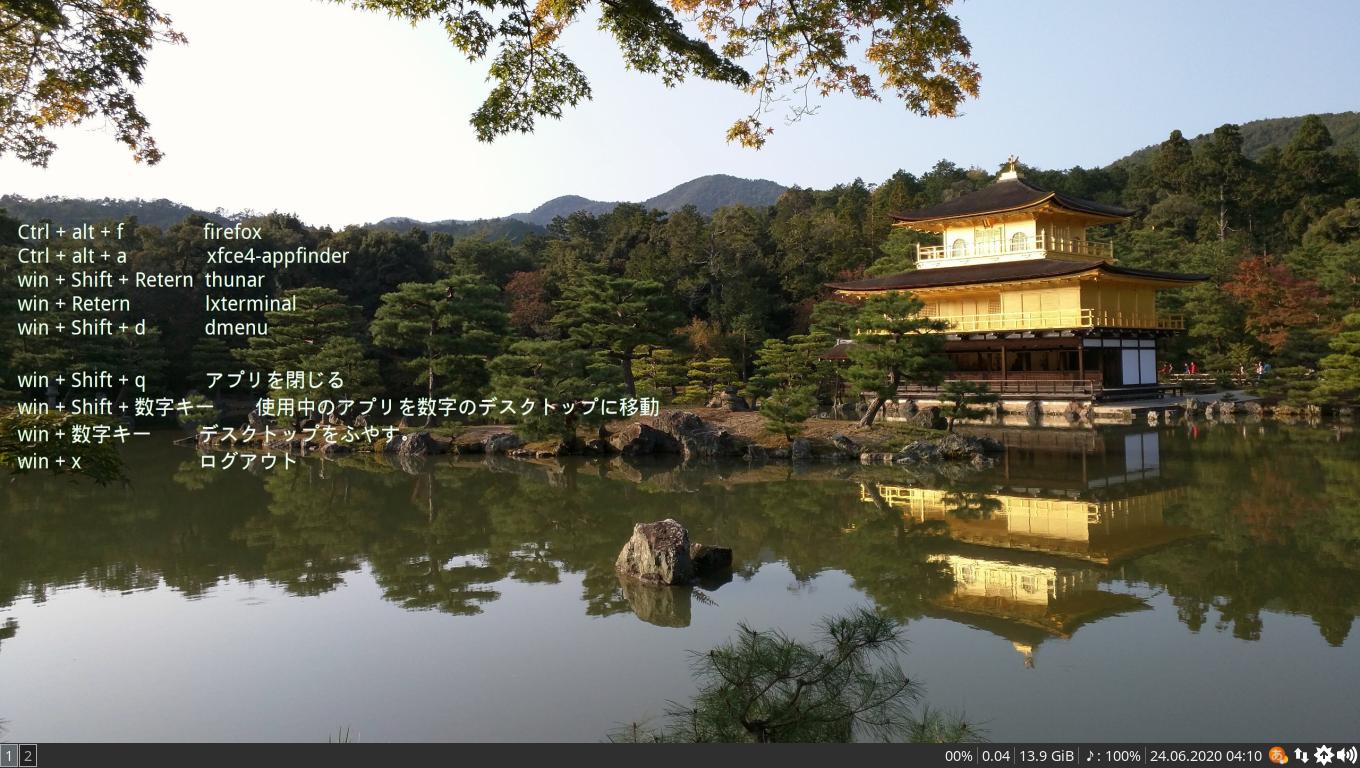
壁紙にgimp を使いテキストファイルを書き出してみた。
文字色は白、フォントサイズ38 ピクセル
Ctrl + alt + f firefox
Ctrl + alt + a xfce4-appfinder
win + Shift + Return thunar
win + Return lxterminal
win + Shift + d dmenu
win + Shift + q アプリを閉じる
win + Shift + 数字キー 使用中のアプリを数字のデスクトップに移動
win + 数字キー デスクトップをふやす。
win + x ログアウト
デスクトップのtheme変える。
$ lxappearance
xfce4のときは
メニュー→設定→マウスとタッチバット カーソル変更
arcolinuxは、xfce4 openbox i3 のショットカットキーがほぼ一緒。 ◯
日本語入力は、fcitx-mozcにした。
pacman -S fcitx-im fcitx-configtool fcitx-mozc otf-ipafont
nano /etc/profile 追記
export GTK_IM_MODULE=fcitx
export QT_IM_MODULE=fcitx
export XMODIFIERS=”@im=fcitx”
arcolinuxは、使いやすいos でしょう。
以下参考画像
500行目 lxterminal
bindsym $mod+Return exec --no-startup-id lxterminal;focus
以下は、winキー+page downキー デスクトップ移動
いっぱいデスクトップを開いているときに便利です。
bindsym $mod+Prior workspace prev
bindsym $mod+Next workspace next
ショットカットキーは、よくわすれる。
壁紙にgimp を使いテキストファイルを書き出してみた。
文字色は白、フォントサイズ38 ピクセル
Ctrl + alt + f firefox
Ctrl + alt + a xfce4-appfinder
win + Shift + Return thunar
win + Return lxterminal
win + Shift + d dmenu
win + Shift + q アプリを閉じる
win + Shift + 数字キー 使用中のアプリを数字のデスクトップに移動
win + 数字キー デスクトップをふやす。
win + x ログアウト
デスクトップのtheme変える。
$ lxappearance
xfce4のときは
メニュー→設定→マウスとタッチバット カーソル変更
arcolinuxは、xfce4 openbox i3 のショットカットキーがほぼ一緒。 ◯
日本語入力は、fcitx-mozcにした。
pacman -S fcitx-im fcitx-configtool fcitx-mozc otf-ipafont
nano /etc/profile 追記
export GTK_IM_MODULE=fcitx
export QT_IM_MODULE=fcitx
export XMODIFIERS=”@im=fcitx”
arcolinuxは、使いやすいos でしょう。
以下参考画像

xfce4の画像
openboxの画像
i3の画像

logoutの画像
mirror list 設定画像
インストールのとき カーネル選択画像
大山捨松
https://www.youtube.com/watch?v=T4Fax4k6f3A&t=12s
audiophile linux + openbox [arch系]
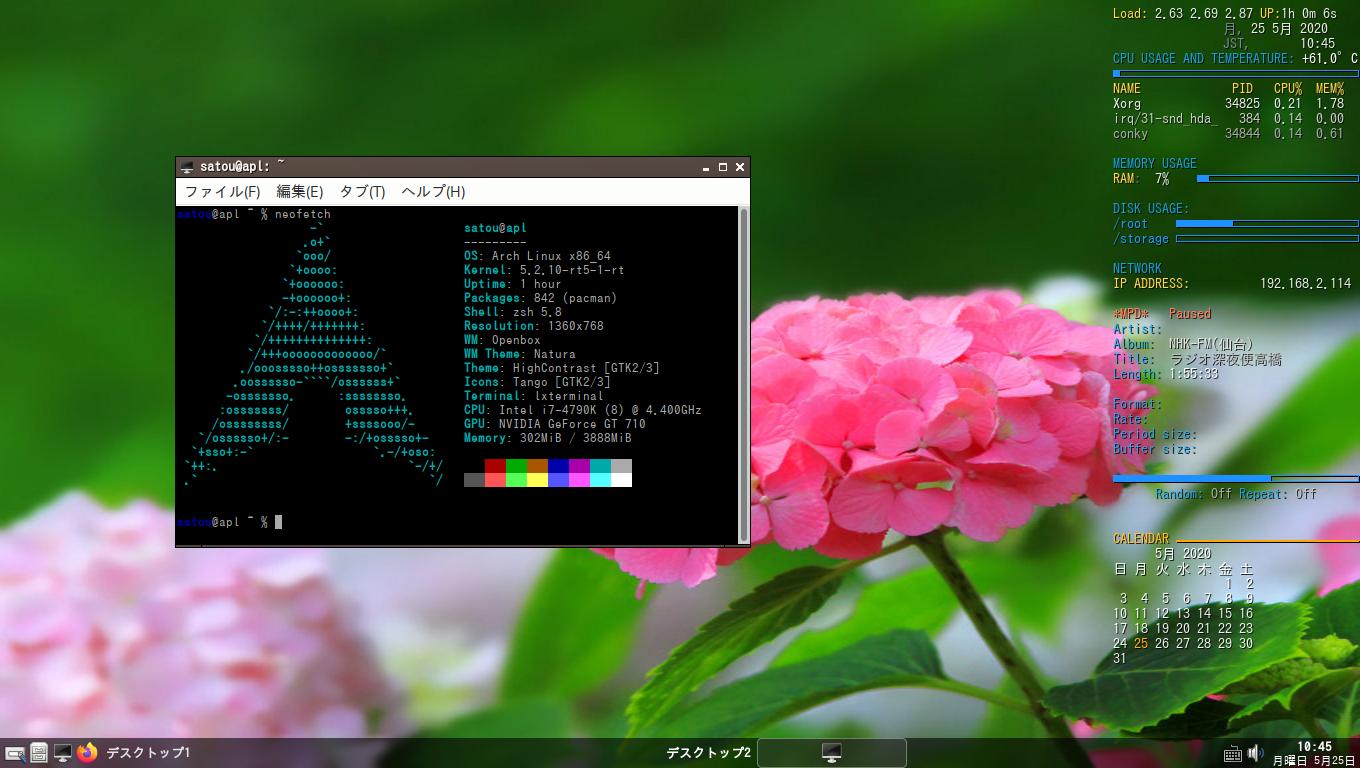
audiophile linux + openbox
お仕事の方はご苦労さまです。
あいもかわらずlinuxであそんでいます。
わたしのパソコン環境 os audiophile openboxウインドウマネージャー
CPU: Intel i7-4790K (8) @ 4.400GHz
GPU: NVIDIA GeForce GT 710
monitor: HDMI接続 (インストール終了後)
AP-Linux-V.5.0.1-x86_64.iso
インストールは、わたしの前回の記事を参照されたし。省略。
AP-Linux-V.5リリースされてから五ヶ月がたちました。upgradeしてみると
500個ぐらいのソフトがアップデートされるでしょう。
audiophile linux 改悪、マイブームのopenboxウインドウマネージャー。
$、# 記号省略。
最初にpacman が動くようにする。
pacman-key --init
pacman-key --populate archlinux
pacman -Sy
pacman -S archlinux-keyring
nano /etc/pacman.d/mirrorlist 追記
Server = http://ftp.jaist.ac.jp/pub/Linux/ArchLinux/$repo/os/$arch
Server = http://ftp.tsukuba.wide.ad.jp/Linux/archlinux/$repo/os/$arch
yayをインストール。
pacman -Syu
pacman -S git base base-devel
pacman -S pcmanfm lxterminal leafpad
git clone https://aur.archlinux.org/yay.git
cd yay
makepkg -si
必要なものをインストール。
pacman -S fcitx-im fcitx-configtool fcitx-mozc neofetch scrot volumeicon otf-ipafont
pacman -S openbox obconf tint2 hsetroot
pacman -S vlc
yay obmenu-generator
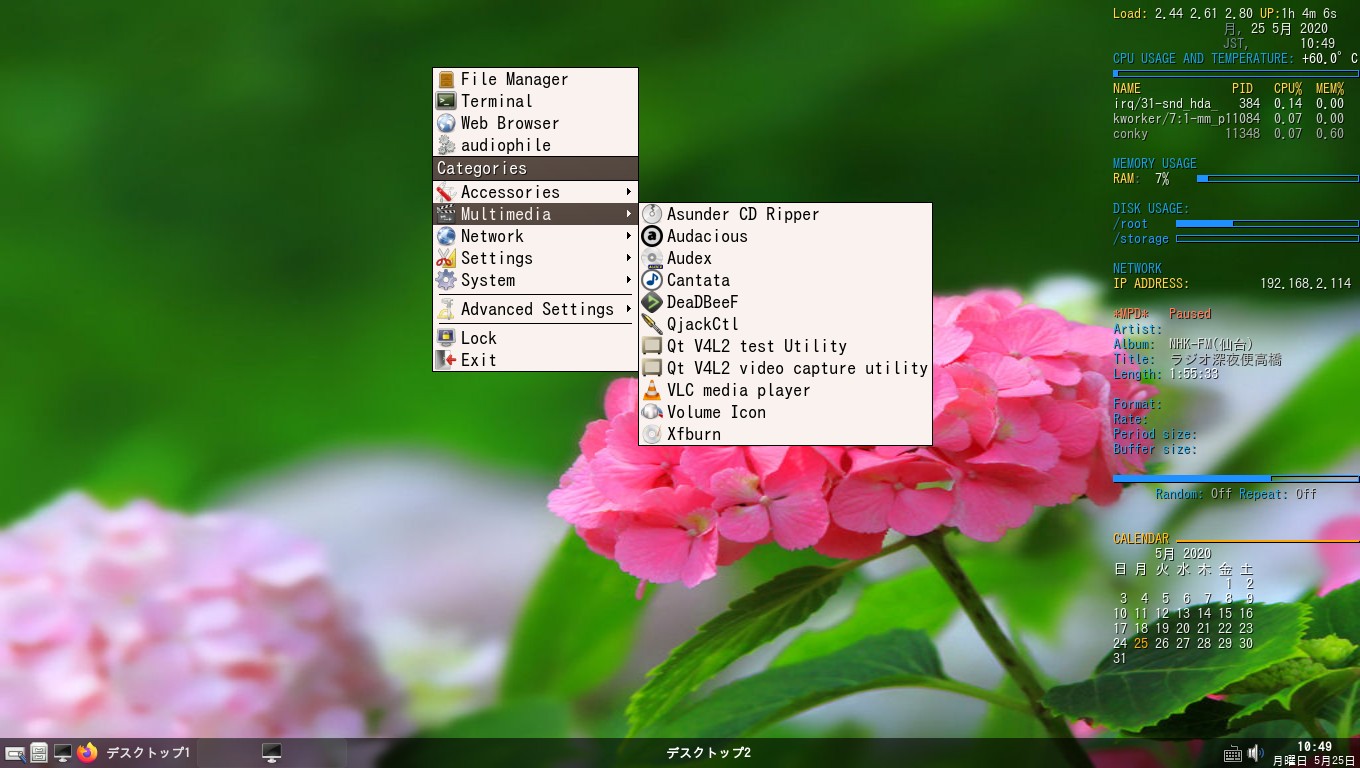
yay oblogout
yay xdgmenumaker
yay mirage
obmenu-generatorとoblogoutが
yayでインストールできたので相当手間が省ける。
設定
cp -r /etc/xdg/openbox ~/.config/
openboxが起動するようにする。 好みの画像を壁紙に。
nano /home/satou/.fluxbox/startup 編集 openboxが起動するようにする。
ーーーーーーーーーーーーーーーーーーーーーーーーーーー
xrandr -s 1360x768
sleep 5
setxkbmap -layout jp&
xset m 1 2&
xset -b&
xset dpms 600 1200 12000&
volumeicon&
fcitx -d &
tint2 &
hsetroot -fill /home/satou/Pictures/arcolinux/ajisai-0005.jpg&
conky&
exec openbox
ーーーーーーーーーーーーーーーーーーーーーーーーーーーー
上記のnano /home/satou/.fluxbox/startupの末尾を
exec fluxbox
と書き換えれば元のfluxboxが起動するでしょう。
注意、tint2をつかっているので
タスクバーの設定をかえる必要があるでしょう。
デスクトップの数も変えた。
nano /home/satou/.fluxbox/init fluxboxの設定。
session.screen0.toolbar.visible: false
session.screen0.workspaces: 2
tint2の設定
nano /home/satou/.config/tint2/tint2rc 編集
103行目
taskbar_mode = multi_desktop
172行目
time2_format = %A %B%d日
obmenu-generatorの設定
nano /home/satou/.config/obmenu-generator/schema.pl 編集
33〜36行目 適宜
{item => ['pcmanfm', 'File Manager', 'system-file-manager']},
{item => ['lxterminal', 'Terminal', 'utilities-terminal']},
{item => ['firefox', 'Web Browser', 'web-browser']},
{item => ['gmrun', 'audiophile', 'system-run']},
105行目
#{exit => ['Exit', 'application-exit']},
108目目
{item => ['oblogout', 'Exit', 'application-exit']},
conkyの設定
nano /home/satou/.conkyrc 追記
xftfont ipag:size=10
末尾に
${color orange}CALENDAR ${hr 2}$color
${execpi 60 DJS=`date +%_d`; cal | sed s/"\(^\|[^0-9]\)$DJS"'\b'/'\1${color orange}'"$DJS"'$color'/}
openboxのショットカットキー プリントキー
nano /home/satou/.config/openbox/rc.xml 編集
<keybind key="Print">
<action name="Execute">
<startupnotify>
<enabled>true</enabled>
<name>scrot</name>
</startupnotify>
<command>scrot '%Y-%m-%d-%T_$wx$h_scrot.jpg' -e 'mv $f /home/satou/Pictures'</command>
</action>
</keybind>
fluxbox メニュー自動作成
nano /home/satou/.fluxbox/menu 追記
77〜78行目
[include] (~/.fluxbox/xdg_menu)
[exec] (Update Fluxbox Menu) {xdgmenumaker -n -i -f fluxbox > ~/.fluxbox/xdg_menu}
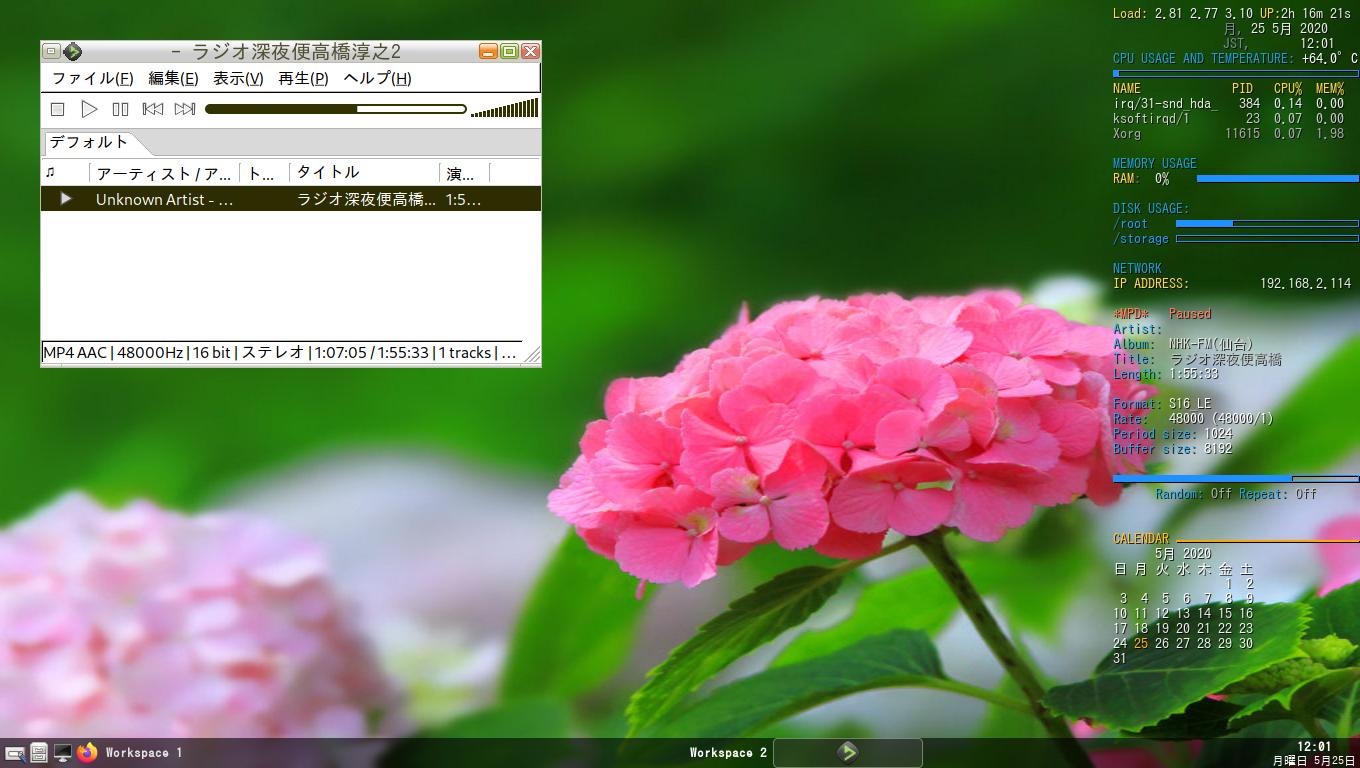
audiophile linuxのcantataは、音楽フォルダを設定するだけで、簡単に繋がりました。
他のosでは、cantataの接続で必ずつまづくでしょう。
audiophile linuxのfluxboxのタスクバーをtint2に変えるだけでもすごく使いやすくなるでしょう。
以下参考画像
お仕事の方はご苦労さまです。
あいもかわらずlinuxであそんでいます。
わたしのパソコン環境 os audiophile openboxウインドウマネージャー
CPU: Intel i7-4790K (8) @ 4.400GHz
GPU: NVIDIA GeForce GT 710
monitor: HDMI接続 (インストール終了後)
AP-Linux-V.5.0.1-x86_64.iso
インストールは、わたしの前回の記事を参照されたし。省略。
AP-Linux-V.5リリースされてから五ヶ月がたちました。upgradeしてみると
500個ぐらいのソフトがアップデートされるでしょう。
audiophile linux 改悪、マイブームのopenboxウインドウマネージャー。
$、# 記号省略。
最初にpacman が動くようにする。
pacman-key --init
pacman-key --populate archlinux
pacman -Sy
pacman -S archlinux-keyring
nano /etc/pacman.d/mirrorlist 追記
Server = http://ftp.jaist.ac.jp/pub/Linux/ArchLinux/$repo/os/$arch
Server = http://ftp.tsukuba.wide.ad.jp/Linux/archlinux/$repo/os/$arch
yayをインストール。
pacman -Syu
pacman -S git base base-devel
pacman -S pcmanfm lxterminal leafpad
git clone https://aur.archlinux.org/yay.git
cd yay
makepkg -si
必要なものをインストール。
pacman -S fcitx-im fcitx-configtool fcitx-mozc neofetch scrot volumeicon otf-ipafont
pacman -S openbox obconf tint2 hsetroot
pacman -S vlc
yay obmenu-generator
yay oblogout
yay xdgmenumaker
yay mirage
obmenu-generatorとoblogoutが
yayでインストールできたので相当手間が省ける。
設定
cp -r /etc/xdg/openbox ~/.config/
openboxが起動するようにする。 好みの画像を壁紙に。
nano /home/satou/.fluxbox/startup 編集 openboxが起動するようにする。
ーーーーーーーーーーーーーーーーーーーーーーーーーーー
xrandr -s 1360x768
sleep 5
setxkbmap -layout jp&
xset m 1 2&
xset -b&
xset dpms 600 1200 12000&
volumeicon&
fcitx -d &
tint2 &
hsetroot -fill /home/satou/Pictures/arcolinux/ajisai-0005.jpg&
conky&
exec openbox
ーーーーーーーーーーーーーーーーーーーーーーーーーーーー
上記のnano /home/satou/.fluxbox/startupの末尾を
exec fluxbox
と書き換えれば元のfluxboxが起動するでしょう。
注意、tint2をつかっているので
タスクバーの設定をかえる必要があるでしょう。
デスクトップの数も変えた。
nano /home/satou/.fluxbox/init fluxboxの設定。
session.screen0.toolbar.visible: false
session.screen0.workspaces: 2
tint2の設定
nano /home/satou/.config/tint2/tint2rc 編集
103行目
taskbar_mode = multi_desktop
172行目
time2_format = %A %B%d日
obmenu-generatorの設定
nano /home/satou/.config/obmenu-generator/schema.pl 編集
33〜36行目 適宜
{item => ['pcmanfm', 'File Manager', 'system-file-manager']},
{item => ['lxterminal', 'Terminal', 'utilities-terminal']},
{item => ['firefox', 'Web Browser', 'web-browser']},
{item => ['gmrun', 'audiophile', 'system-run']},
105行目
#{exit => ['Exit', 'application-exit']},
108目目
{item => ['oblogout', 'Exit', 'application-exit']},
conkyの設定
nano /home/satou/.conkyrc 追記
xftfont ipag:size=10
末尾に
${color orange}CALENDAR ${hr 2}$color
${execpi 60 DJS=`date +%_d`; cal | sed s/"\(^\|[^0-9]\)$DJS"'\b'/'\1${color orange}'"$DJS"'$color'/}
openboxのショットカットキー プリントキー
nano /home/satou/.config/openbox/rc.xml 編集
<keybind key="Print">
<action name="Execute">
<startupnotify>
<enabled>true</enabled>
<name>scrot</name>
</startupnotify>
<command>scrot '%Y-%m-%d-%T_$wx$h_scrot.jpg' -e 'mv $f /home/satou/Pictures'</command>
</action>
</keybind>
fluxbox メニュー自動作成
nano /home/satou/.fluxbox/menu 追記
77〜78行目
[include] (~/.fluxbox/xdg_menu)
[exec] (Update Fluxbox Menu) {xdgmenumaker -n -i -f fluxbox > ~/.fluxbox/xdg_menu}
audiophile linuxのcantataは、音楽フォルダを設定するだけで、簡単に繋がりました。
他のosでは、cantataの接続で必ずつまづくでしょう。
audiophile linuxのfluxboxのタスクバーをtint2に変えるだけでもすごく使いやすくなるでしょう。
以下参考画像
openboxの画像
fluxboxの画像
feadbeefの画像
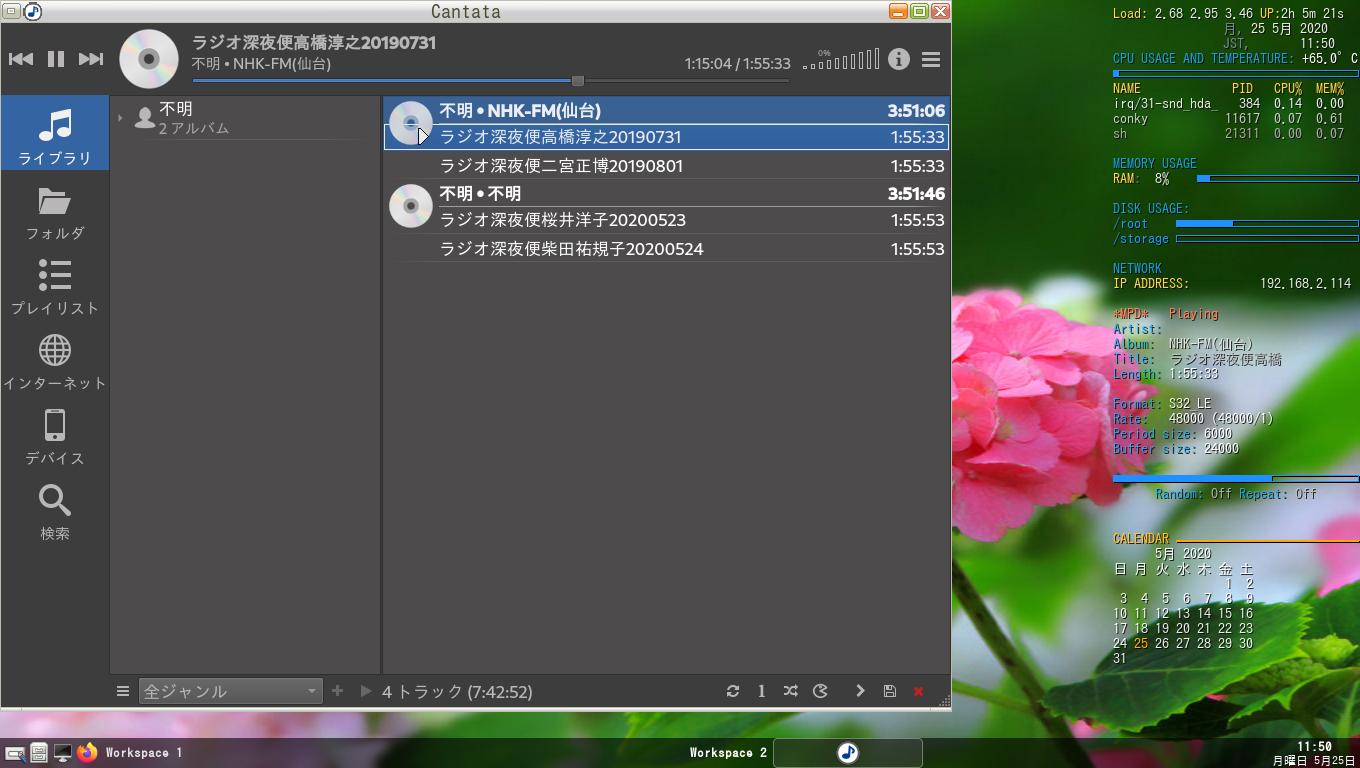
cantataの画像
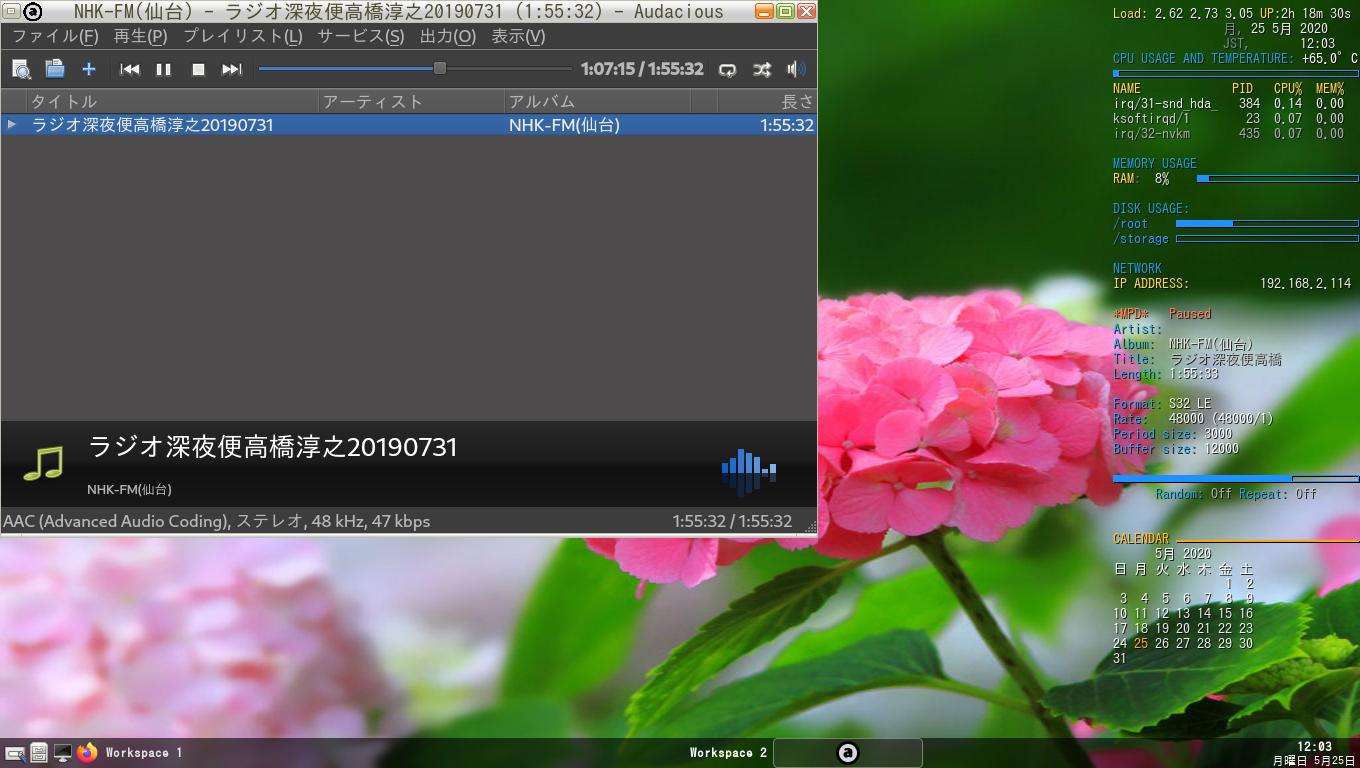
audaciousの画像

黒川検事長の辞任で幕引きはかる安倍政権(20/05/21)
週刊文春砲がまたやってくれました。


