austrumi 4.1.6 linux [slackware,puppy系]
austrumi 4.1.6 linux
あいもかわらずlinuxであそんでいます。
今回の私のパソコン環境は os ausyrumi fvwmウインドーマネージャー
CPU Intel Core i7-7700K
GPU GeForce GT 730
austrumi64-4.1.6.iso
ftp://austrumi.ru.lv/
austrumi linux は 2004年に初リリースされている。歴史あるos と言えよう。slackware系、ラトビア製。
austrumi linux installerをusb で起動させるために、ubuntu linuxのunetbootinアプリを使用した。
austrumi linux installerのgrubメニューで superuser の項目を選択して先に進んで、ssd にインストールした。
austrumi linux は lilo で起動させるようになっている。
わたしのようなひとつのパソコンに複数のos をいれている変人にとってやっかいなしろものです。
lilo のインストール先は root を選択して あとで ubuntu linux から起動させるようにした。
以下参考サイト様。
Austrumi1.8.5が起動できない
Linuxメモ [Austrumi] Austrumi を HDD インスト
austrumi linux インストールしたパーテション/boot に、ubuntu の /boot/grub フォルダを、
そのまま移植して環境にあわせて、grub.cfgを編集した。
以下の同じ内容でubuntuの/boot/grub/grub.cfg にも直接記入する。
以下私の grub.cfg の内容。
ーーーーーーーーーーーーーーーーーーーーーーーーーーーーーーーーーーーーーーーーーーーーーーーーーーー
menuentry 'austrumi linux (on /dev/sda6)' --class neon --class gnu-linux --class gnu --class os $menuentry_id_option 'osprober-gnulinux-simple-b5b4deac-fd95-4d5f-85ca-1a7c25f2e608' {
savedefault
insmod part_msdos
insmod ext2
set root='hd0,msdos6'
if [ x$feature_platform_search_hint = xy ]; then
search --no-floppy --fs-uuid --set=root --hint-bios=hd0,msdos6 --hint-efi=hd0,msdos6 --hint-baremetal=ahci0,msdos6 b5b4deac-fd95-4d5f-85ca-1a7c25f2e608
else
search --no-floppy --fs-uuid --set=root b5b4deac-fd95-4d5f-85ca-1a7c25f2e608
fi
linux /boot/vmlinuz root=/dev/sda6 ro quiet rw 4 init=/boot/linuxrc
}
ーーーーーーーーーーーーーーーーーーーーーーーーーーーーーーーーーーーーーーーーーーーーーーーーー
インストール終了後 上記のubuntu のgrubメニューからaustrumi linuxを起動させた。
nvidiaドライバー使用のパソコンでもなにもしなくても起動するでしょう。
起動させるとログイン画面でとまるでしょう。
user: root
passwd: austrumi
最初左上のメニュー→settings(工具のアイコン)→ language (なにかの旗が) → English を選択。
これで、なにもしなくても日本語で web が見れる状態です。日本語入力を必要としなければこれでもう完成形でしょう。
austrumi linuxの日本語化は 素人には敷居が高いでしょう。
日本語化した方がおられます。二年前のものですが。
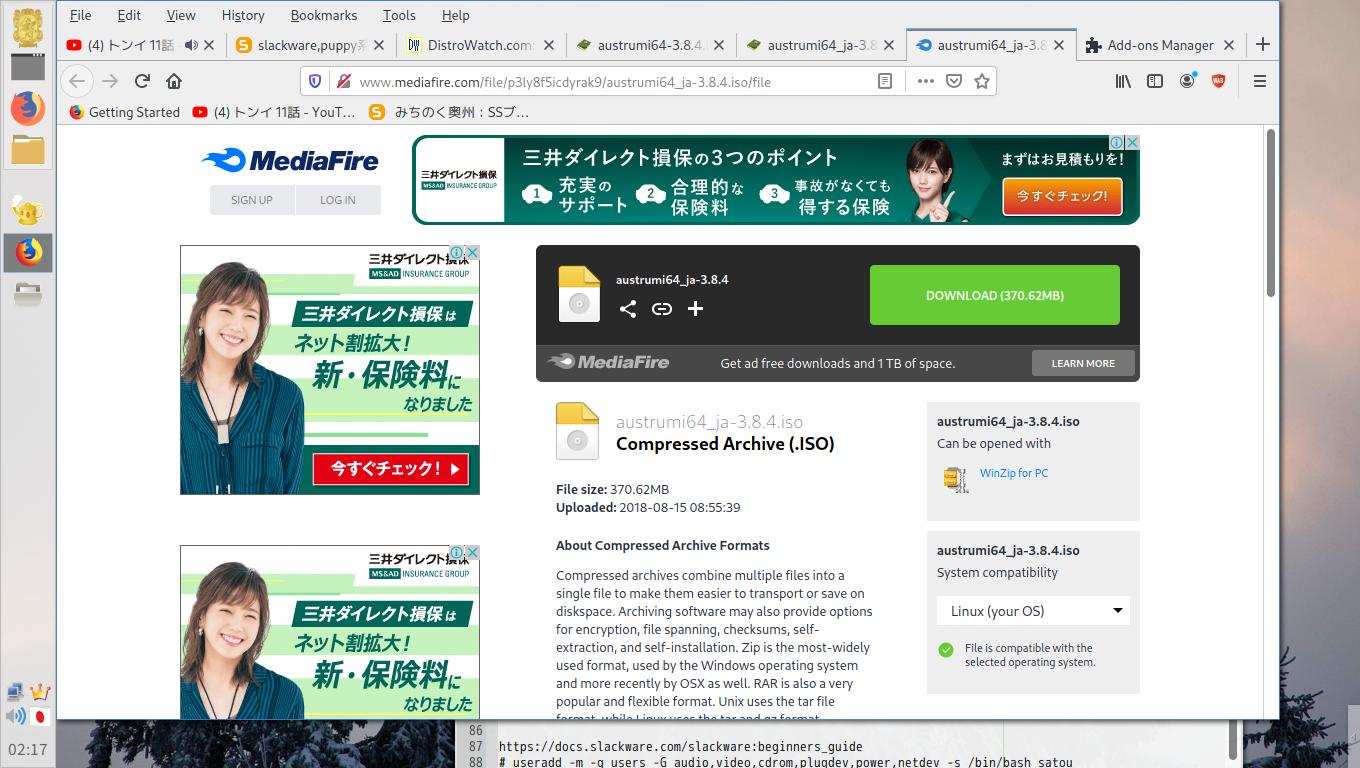
firefox webmail Ad Blocker add on を追加してから 以下をダウンロードする
http://www.mediafire.com/file/p3ly8f5icdyrak9/austrumi64_ja-3.8.4.iso
上記のaustrumi64_ja-3.8.4.isoを参考にして
austrumi 4.1.6 linux の日本語化に挑戦してみました。
ユーザー追加。
# useradd -m -g users -G audio,video,cdrom,plugdev,power,netdev -s /bin/bash satou
keyboard の設定をできるようにする。移植はusbからsuperuserで起動させた
austrumi64_ja-3.8.4.iso から
インストールしたaustrumiパーティションに直接アクセスできる。
/mnt/sd6 とかにアクセスする。
移植したファイルは動くようにパーミッション(アクセス権)に気をつける。
/usr/local/bin/config_keyboard 上記のaustrumi64_ja-3.8.4.iso64_ja-3.8.4.isoから移植
/etc/X11/xkb/symbols/ja 上記のaustrumi64_ja-3.8.4.isoから移植
/usr/share/icons/SVG 上記のaustrumi64_ja-3.8.4.isoから移植
langurge の変更
/usr/local/bin/switch_lang 上記のaustrumi64_ja-3.8.4.isoから移植
/usr/share/locale/ja_JP 上記のaustrumi64_ja-3.8.4.isoから移植
/usr/share/locale/ja 上記のaustrumi64_ja-3.8.4.isoから移植
scim のインストール
メニュー→system-tool→package manager
scim
scim-anthy
anthy-9100
/etc/profile.d/scim.csh 削除
/etc/profile.d/scim.sh 削除
ーーーーーーーーーーーーーーーーーーーーーーーーーーーーーーーーーーー
geany /home/satou/.xprofile 新規作成
if [ -x /usr/bin/scim ] && echo $LANG| grep -qi '.utf'; then
export XMODIFIERS='@im=SCIM'
export GTK_IM_MODULE='scim'
export QT_IM_MODULE='scim'
export LC_CTYPE=$LANG
[ -x /usr/bin/scim-bridge ] && export GTK_IM_MODULE='scim-bridge'
ls /tmp/scim-helper-manager-socket* &>/dev/null || /usr/bin/scim -d
fi
ーーーーーーーーーーーーーーーーーーーーーーーーーーーーーーーーーーーーー
ーーーーーーーーーーーーーーーーーーーーーーーーーーーーーーーーーーーーー
geany /usr/lib64/gtk-2.0/2.10.0/immodules.cache 変更箇所の内容
"/usr/lib64/gtk-2.0/2.10.0/immodules/im-scim.so"
"scim" "SCIM Input Method" "scim" "/usr/share/locale" "ja:ko:zh:en"
geany /usr/lib64/gtk-3.0/3.0.0/immodules.cache 変更箇所の内容
"/usr/lib64/gtk-3.0/3.0.0/immodules/im-scim.so"
"scim" "SCIM Input Method" "scim" "/usr/share/locale" "ja:ko:zh:en"
ーーーーーーーーーーーーーーーーーーーーーーーーーーーーーーーーーーーーーーーーー
geany /home/satou/.xxkbrc 変更箇所の内容
XXkb.mainwindow.image.1: ja.xpm
XXkb.mainwindow.label.text.1: JP
ーーーーーーーーーーーーーーーーーーーーーーーーーーーーーーーーーーーー
geany /home/satou/.xinitrc 変更箇所の内容
あいもかわらずlinuxであそんでいます。
今回の私のパソコン環境は os ausyrumi fvwmウインドーマネージャー
CPU Intel Core i7-7700K
GPU GeForce GT 730
austrumi64-4.1.6.iso
ftp://austrumi.ru.lv/
austrumi linux は 2004年に初リリースされている。歴史あるos と言えよう。slackware系、ラトビア製。
austrumi linux installerをusb で起動させるために、ubuntu linuxのunetbootinアプリを使用した。
austrumi linux installerのgrubメニューで superuser の項目を選択して先に進んで、ssd にインストールした。
austrumi linux は lilo で起動させるようになっている。
わたしのようなひとつのパソコンに複数のos をいれている変人にとってやっかいなしろものです。
lilo のインストール先は root を選択して あとで ubuntu linux から起動させるようにした。
以下参考サイト様。
Austrumi1.8.5が起動できない
Linuxメモ [Austrumi] Austrumi を HDD インスト
austrumi linux インストールしたパーテション/boot に、ubuntu の /boot/grub フォルダを、
そのまま移植して環境にあわせて、grub.cfgを編集した。
以下の同じ内容でubuntuの/boot/grub/grub.cfg にも直接記入する。
以下私の grub.cfg の内容。
ーーーーーーーーーーーーーーーーーーーーーーーーーーーーーーーーーーーーーーーーーーーーーーーーーーー
menuentry 'austrumi linux (on /dev/sda6)' --class neon --class gnu-linux --class gnu --class os $menuentry_id_option 'osprober-gnulinux-simple-b5b4deac-fd95-4d5f-85ca-1a7c25f2e608' {
savedefault
insmod part_msdos
insmod ext2
set root='hd0,msdos6'
if [ x$feature_platform_search_hint = xy ]; then
search --no-floppy --fs-uuid --set=root --hint-bios=hd0,msdos6 --hint-efi=hd0,msdos6 --hint-baremetal=ahci0,msdos6 b5b4deac-fd95-4d5f-85ca-1a7c25f2e608
else
search --no-floppy --fs-uuid --set=root b5b4deac-fd95-4d5f-85ca-1a7c25f2e608
fi
linux /boot/vmlinuz root=/dev/sda6 ro quiet rw 4 init=/boot/linuxrc
}
ーーーーーーーーーーーーーーーーーーーーーーーーーーーーーーーーーーーーーーーーーーーーーーーーー
インストール終了後 上記のubuntu のgrubメニューからaustrumi linuxを起動させた。
nvidiaドライバー使用のパソコンでもなにもしなくても起動するでしょう。
起動させるとログイン画面でとまるでしょう。
user: root
passwd: austrumi
最初左上のメニュー→settings(工具のアイコン)→ language (なにかの旗が) → English を選択。
これで、なにもしなくても日本語で web が見れる状態です。日本語入力を必要としなければこれでもう完成形でしょう。
austrumi linuxの日本語化は 素人には敷居が高いでしょう。
日本語化した方がおられます。二年前のものですが。
firefox webmail Ad Blocker add on を追加してから 以下をダウンロードする
http://www.mediafire.com/file/p3ly8f5icdyrak9/austrumi64_ja-3.8.4.iso
上記のaustrumi64_ja-3.8.4.isoを参考にして
austrumi 4.1.6 linux の日本語化に挑戦してみました。
ユーザー追加。
# useradd -m -g users -G audio,video,cdrom,plugdev,power,netdev -s /bin/bash satou
keyboard の設定をできるようにする。移植はusbからsuperuserで起動させた
austrumi64_ja-3.8.4.iso から
インストールしたaustrumiパーティションに直接アクセスできる。
/mnt/sd6 とかにアクセスする。
移植したファイルは動くようにパーミッション(アクセス権)に気をつける。
/usr/local/bin/config_keyboard 上記のaustrumi64_ja-3.8.4.iso64_ja-3.8.4.isoから移植
/etc/X11/xkb/symbols/ja 上記のaustrumi64_ja-3.8.4.isoから移植
/usr/share/icons/SVG 上記のaustrumi64_ja-3.8.4.isoから移植
langurge の変更
/usr/local/bin/switch_lang 上記のaustrumi64_ja-3.8.4.isoから移植
/usr/share/locale/ja_JP 上記のaustrumi64_ja-3.8.4.isoから移植
/usr/share/locale/ja 上記のaustrumi64_ja-3.8.4.isoから移植
scim のインストール
メニュー→system-tool→package manager
scim
scim-anthy
anthy-9100
/etc/profile.d/scim.csh 削除
/etc/profile.d/scim.sh 削除
ーーーーーーーーーーーーーーーーーーーーーーーーーーーーーーーーーーー
geany /home/satou/.xprofile 新規作成
if [ -x /usr/bin/scim ] && echo $LANG| grep -qi '.utf'; then
export XMODIFIERS='@im=SCIM'
export GTK_IM_MODULE='scim'
export QT_IM_MODULE='scim'
export LC_CTYPE=$LANG
[ -x /usr/bin/scim-bridge ] && export GTK_IM_MODULE='scim-bridge'
ls /tmp/scim-helper-manager-socket* &>/dev/null || /usr/bin/scim -d
fi
ーーーーーーーーーーーーーーーーーーーーーーーーーーーーーーーーーーーーー
ーーーーーーーーーーーーーーーーーーーーーーーーーーーーーーーーーーーーー
geany /usr/lib64/gtk-2.0/2.10.0/immodules.cache 変更箇所の内容
"/usr/lib64/gtk-2.0/2.10.0/immodules/im-scim.so"
"scim" "SCIM Input Method" "scim" "/usr/share/locale" "ja:ko:zh:en"
geany /usr/lib64/gtk-3.0/3.0.0/immodules.cache 変更箇所の内容
"/usr/lib64/gtk-3.0/3.0.0/immodules/im-scim.so"
"scim" "SCIM Input Method" "scim" "/usr/share/locale" "ja:ko:zh:en"
ーーーーーーーーーーーーーーーーーーーーーーーーーーーーーーーーーーーーーーーーー
geany /home/satou/.xxkbrc 変更箇所の内容
XXkb.mainwindow.image.1: ja.xpm
XXkb.mainwindow.label.text.1: JP
ーーーーーーーーーーーーーーーーーーーーーーーーーーーーーーーーーーーー
geany /home/satou/.xinitrc 変更箇所の内容
#export LANG=C
export LANG=ja_JP.utf8
case $1 in
FVWM) setxkbmap -option grp:alt_shift_toggle,terminate:ctrl_alt_bksp -layout "jp(106)";
exec /etc/X11/xinit/xinitrc.fvwm;;
REBOOT) /etc/rc.d/rc.6;;
SHUTDOWN) /etc/rc.d/rc.0;;
*) setxkbmap -option grp:alt_shift_toggle,terminate:ctrl_alt_bksp -layout "jp(106)";
exec /etc/X11/xinit/xinitrc.fvwm;;
esac
ーーーーーーーーーーーーーーーーーーーーーーーーーーーーーーーーーーーーーーーーーーーーー
geany /home/satou/.profile 変更箇所の内容
#export LANG=C
export LANG=ja_JP.utf8
setxkbmap -option grp:alt_shift_toggle,terminate:ctrl_alt_bksp -layout "jp(106)";
ーーーーーーーーーーーーーーーーーーーーーーーーーーーーーーーーーーーーーーーーーーーーー
/home/satou/.bashrc 変更箇所の内容
#LC_ALL=UTF-8
#export LANG=C
export LANG=ja_JP.utf8
#export G_FILENAME_ENCODING=UTF-8
ーーーーーーーーーーーーーーーーーーーーーーーーーーーーーーーーーーーーーーーーーーーーー
geany /etc/sudoers 追記
satou ALL=(ALL) ALL
firefox スタート表示をかえる。
geany /usr/share/tint2/2-web-browser.desktop 編集 # sudo emelfm2 で操作。
Exec=firefox
インストールしたもの # sudo emelfm2 をつかう。 選択し右クリックで上部にinstall の項目がでてくる。
VLGothic-20130510-noarch-P2.txz
nano-2.6.0-x86_64-1.txz
Print キーをちょっと変える。
/usr/share/fvwm/fvwm2rc_5 変更箇所の内容
512 行目
Key Print A A Exec scrot '%Y-%m-%d-%T_$wx$h_scrot.jpg' -e 'mv $f /home/satou/Pictures'
export LANG=ja_JP.utf8
setxkbmap -option grp:alt_shift_toggle,terminate:ctrl_alt_bksp -layout "jp(106)";
ーーーーーーーーーーーーーーーーーーーーーーーーーーーーーーーーーーーーーーーーーーーーー
/home/satou/.bashrc 変更箇所の内容
#LC_ALL=UTF-8
#export LANG=C
export LANG=ja_JP.utf8
#export G_FILENAME_ENCODING=UTF-8
ーーーーーーーーーーーーーーーーーーーーーーーーーーーーーーーーーーーーーーーーーーーーー
geany /etc/sudoers 追記
satou ALL=(ALL) ALL
firefox スタート表示をかえる。
geany /usr/share/tint2/2-web-browser.desktop 編集 # sudo emelfm2 で操作。
Exec=firefox
インストールしたもの # sudo emelfm2 をつかう。 選択し右クリックで上部にinstall の項目がでてくる。
VLGothic-20130510-noarch-P2.txz
nano-2.6.0-x86_64-1.txz
Print キーをちょっと変える。
/usr/share/fvwm/fvwm2rc_5 変更箇所の内容
512 行目
Key Print A A Exec scrot '%Y-%m-%d-%T_$wx$h_scrot.jpg' -e 'mv $f /home/satou/Pictures'
mpd + ncmpc で音楽再生
austrumi linux には mpd + ncmpc で音楽再生できます。
ーーータイトル日本語は文字化けだけど。
mpdの設定などしなくても再生できます。mpd + ncmpc は、mp3 専用のようです。
ーーー他の形式の音楽は mpv で再生できます。
再生させたい音楽(mp3)をMusic フォルダにいれる。
最初に mpd を、ルートから起動させる。
$ sudo mpd
さらに
$ mpd
準備終了。
メニュー→muitimedia→MPD client
ーーーーーー2 キーは、fm ストリーミング局が聞ける。
3 キー
曲を選択して enter キー
ストップ s キー
終了 ctrl キー + c キー
ーーー他の形式の音楽は mpv で再生できます。
再生させたい音楽(mp3)をMusic フォルダにいれる。
最初に mpd を、ルートから起動させる。
$ sudo mpd
さらに
$ mpd
準備終了。
メニュー→muitimedia→MPD client
ーーーーーー2 キーは、fm ストリーミング局が聞ける。
3 キー
曲を選択して enter キー
ストップ s キー
終了 ctrl キー + c キー
austrumi 4.1.6 linux はなにもしなくとも十分快適にうごくos です。日本語入力にこだわらなくとも・・・・・。
austrumi 4.1.6 linux file-managerの emelfm2 なれればそれなりに使えるでしょう。
上部にあるアイコン 左端 (H の文字に斜線) をクリックすると 隠しファイルが表示されます。
file-managerの emelfm2 右側のコーナーの上部のアイコン 右端 隠れていて見えない (H の文字に斜線) がある。
file-manager pcmanfm も入っている。
xfce4-terminalのインストール
メニュー→system-tool→package manager を使って
xfce4-terminalをインストール。
その後、依存ファイルを自力でいれる
依存ファイルも、package manager でいれることができた。
$ xfce4-terminal
error
を解決してゆくーーーーー10個ぐらい必要。
以下参考画像。
メニュー→system-tool→package manager を使って
xfce4-terminalをインストール。
その後、依存ファイルを自力でいれる
依存ファイルも、package manager でいれることができた。
$ xfce4-terminal
error
を解決してゆくーーーーー10個ぐらい必要。
以下参考画像。

ネットの設定 メニュー→setting →network manager
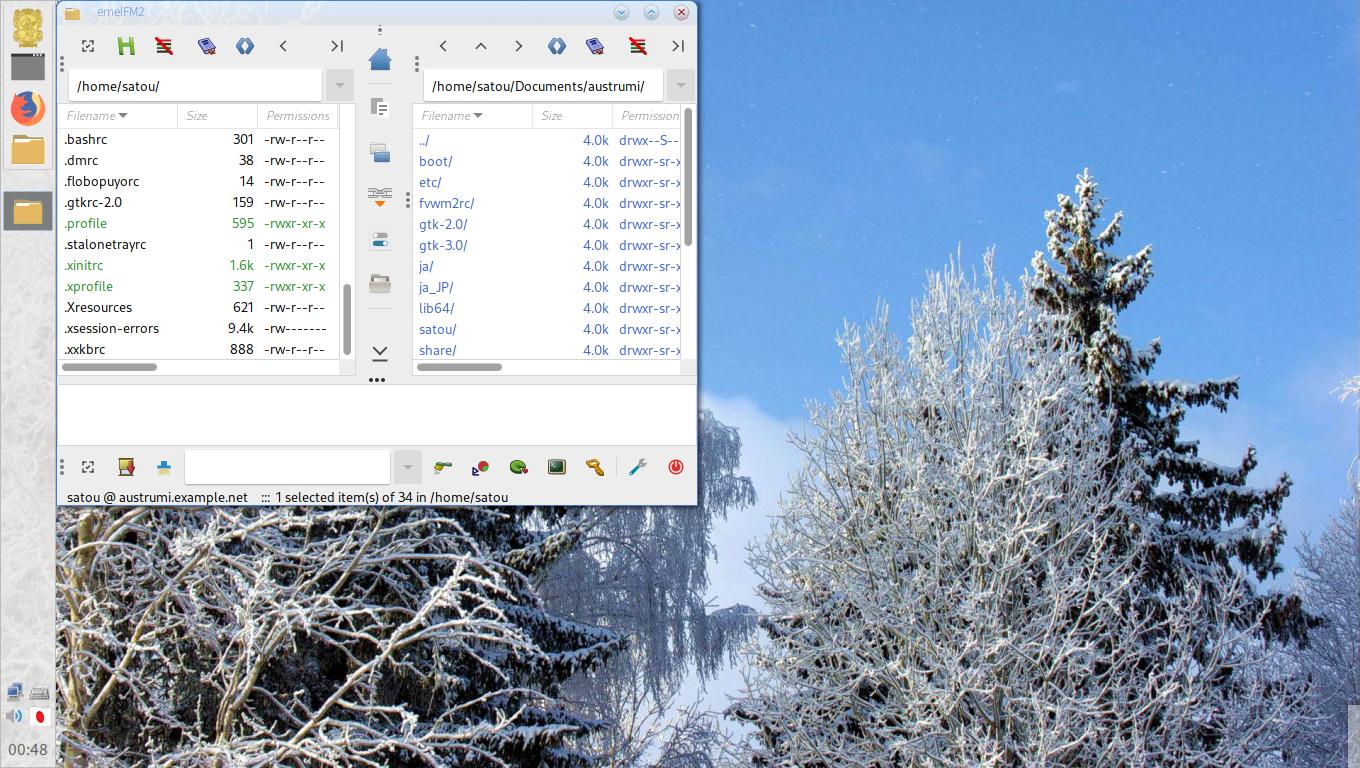
emelfm2の画像
上記のページになかなかたどりつけないでしょう。がんばれ。
強敵コロナウィルス。たがいにがんばろう。
ubuntu studio19.10 + mpd + cantata [ubuntu,debian系]
ubuntu studio + mpd + cantata
お仕事の方はごくろうさまです。
あいもかわらずlinuxであそんでいます。
今回のわたしのパソコン環境は os ubuntu studio xfce4デスクトップ
CPU: Intel i7 860 (8) @ 2.801GHz
GPU: NVIDIA GeForce GT 240
ubuntustudio-19.10-dvd-amd64.iso.torrent
ubuntu studio よく知られているos でしょう。
grubで、nomodeset 記入でインストーラーをきどうしています。
ssdにインストール終わってみれば、5.3.0-29-lowlatency のカーネルで起動していました。
とりあえずこのパソコンの場合、nvidia-340 ドライバーをいれた。
sudo passwd
sudo apt update
sudo apt upgrade
sudo apt install nvidia-340 mesa-common-dev freeglut3-dev
sudo nano /etc/default/grub 編集
nomodeset を削除
sudo grub-update
sudo reboot
今回は、mpd cantata をインストールしてみました。
Music Player Daemon - ArchWiki
上記の参考サイトさまのとおりにやってみた。
sudo apt install cantata mpd
もうおわかりでしょう。このパソコンのuser name は satou となっています。
sudo gpasswd -a mpd satou
sudo gpasswd -a mpd audio
chmod 710 /home/satou
mkdir /home/satou/.mpd 新規作成
mkdir /home/satou/.mpd/playlists 新規作成(空白)
nano /home/satou/.mpd/pid 新規作成(空白)
sudo nano /etc/xdg/autostart/mpd.desktop 編集
Exec=[ ! -s /home/satou/.mpd ] && mpd
mkdir /home/satou/music 新規作成
sudo nano /etc/mpd.conf 編集
このファイルの項目はいっぱいある。
現在有効になっているのはこれだけ。
注 hostnameのところはこのパソコンのipアドレスを記入しています。
ifconfig と端末に記入すればしることができます。
私の場合は bind_to_address "192.168.2.111" と記入しています。
alsaでうごくように記入しています。
ーーーーーーーーーーーーーーーーーーーーーーーーーーーーーーーーーーーーーー
music_directory "/home/satou/music"
playlist_directory "/home/satou/.mpd/playlists"
db_file "/home/satou/.mpd/tag_cache"
log_file "/home/satou/.mpd/mpd.log"
pid_file "/home/satou/.mpd/pid"
state_file "/home/satou/.mpd/state"
group "audio"
port "6600"
bind_to_address "192.168.2.111"
input {
plugin "curl"
# proxy "proxy.isp.com:8080"
# proxy_user "user"
# proxy_password "password"
}
audio_output {
type "alsa"
name "My ALSA Device"
device "hw:0,0" # optional
mixer_type "hardware" # optional
mixer_device "default" # optional
mixer_control "PCM" # optional
mixer_index "0" # optional
}
filesystem_charset "UTF-8"
ーーーーーーーーーーーーーーーーーーーーーーーーーーーーーーーーーーーー
ubuntu studio はよく整備されていると感じるos でしょう。
fcitx-mozcはすでに入っていた。
mpdはいろんな使い方があるようです。
今回はスタート地点にたったということでおわりにします。
以下参考画像
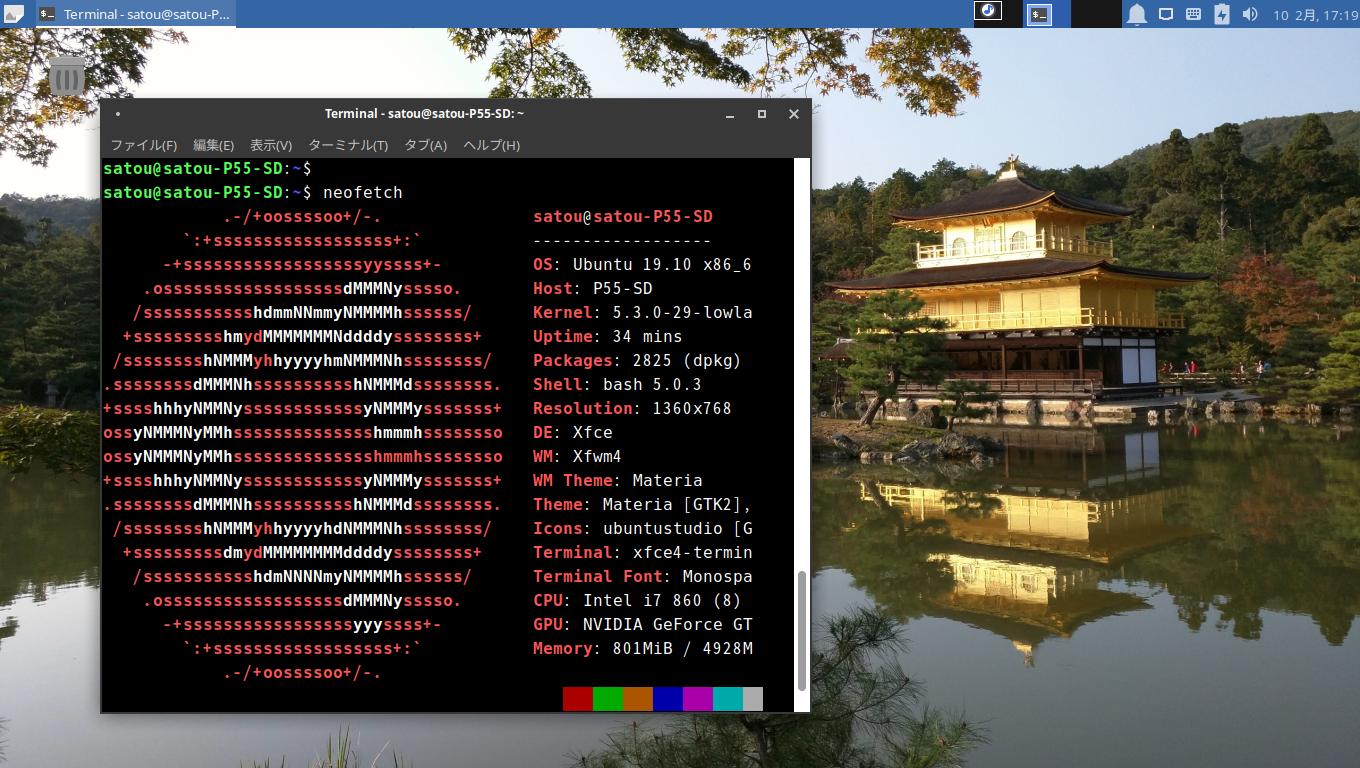
neofetchの画像
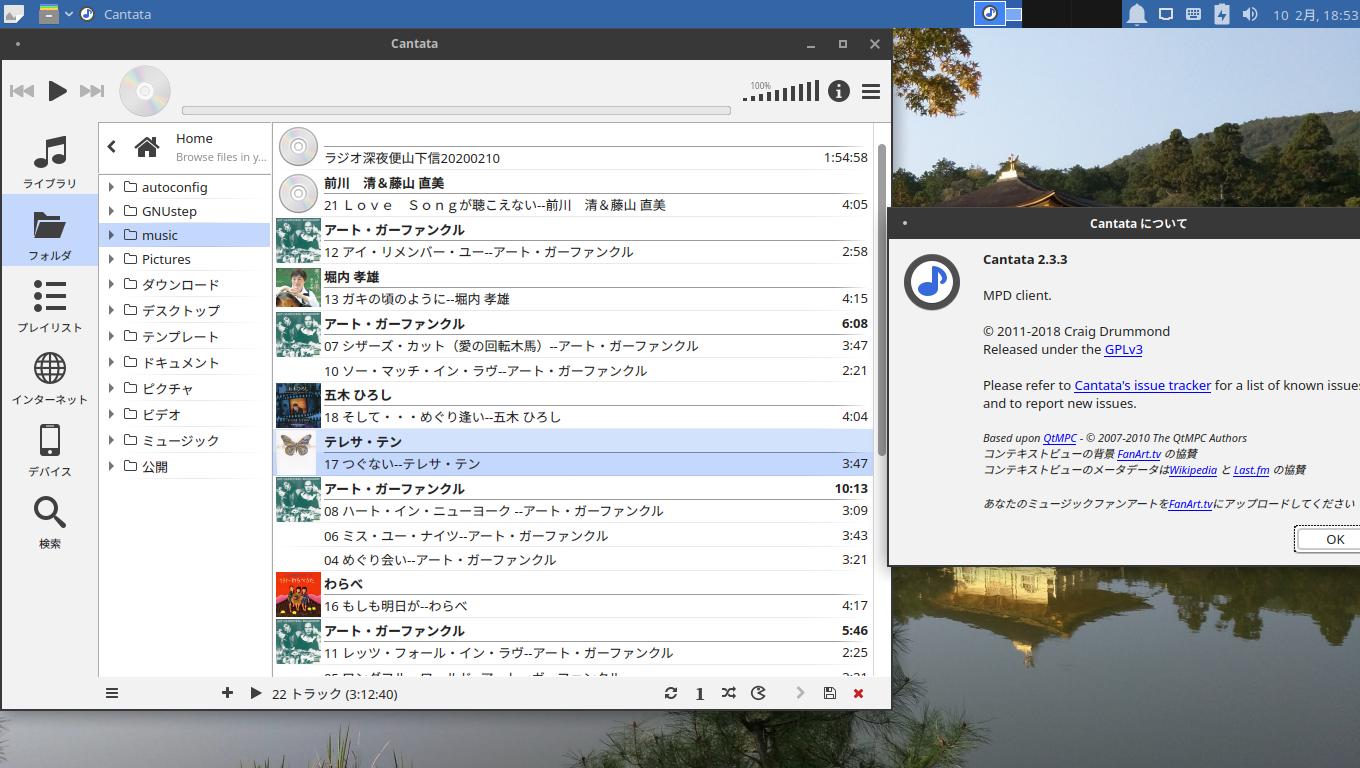
cantataの画像
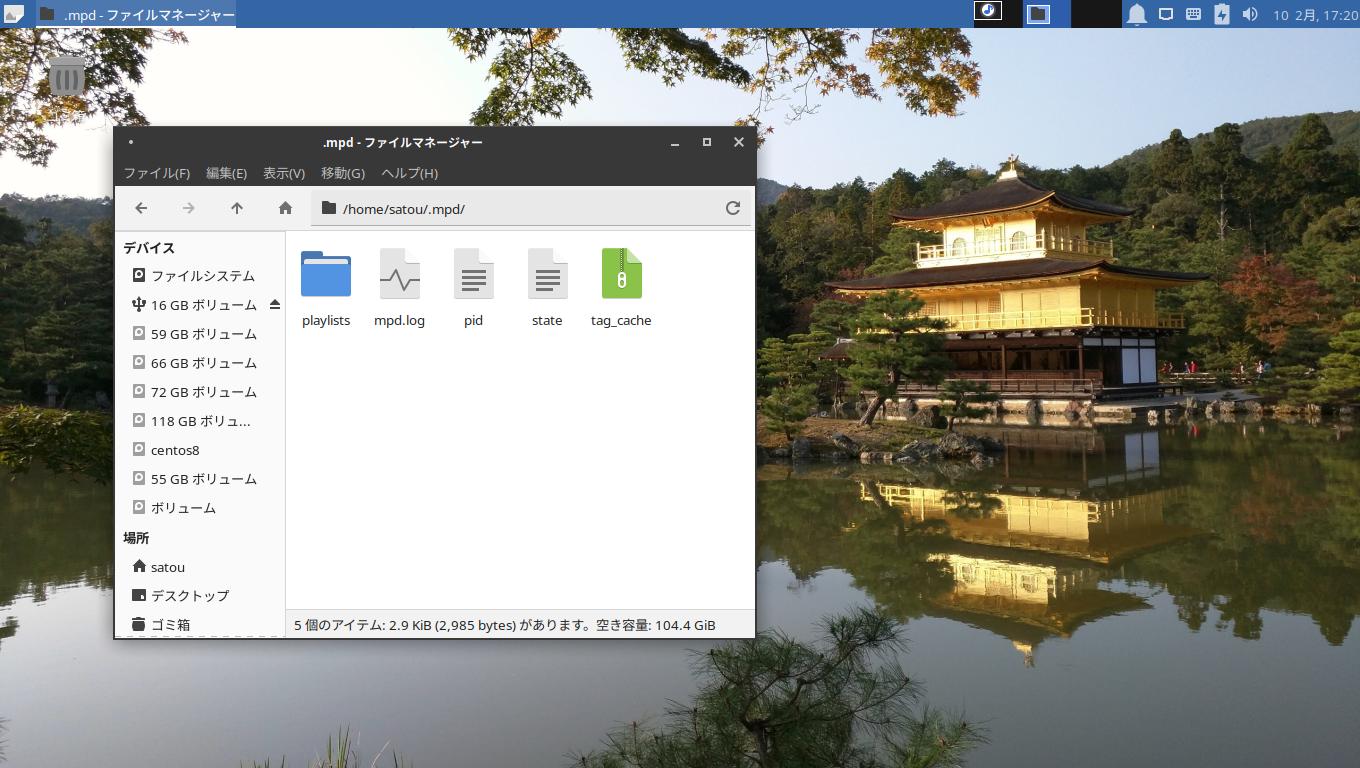
mkdir /home/satou/.mpdフォルダの画像
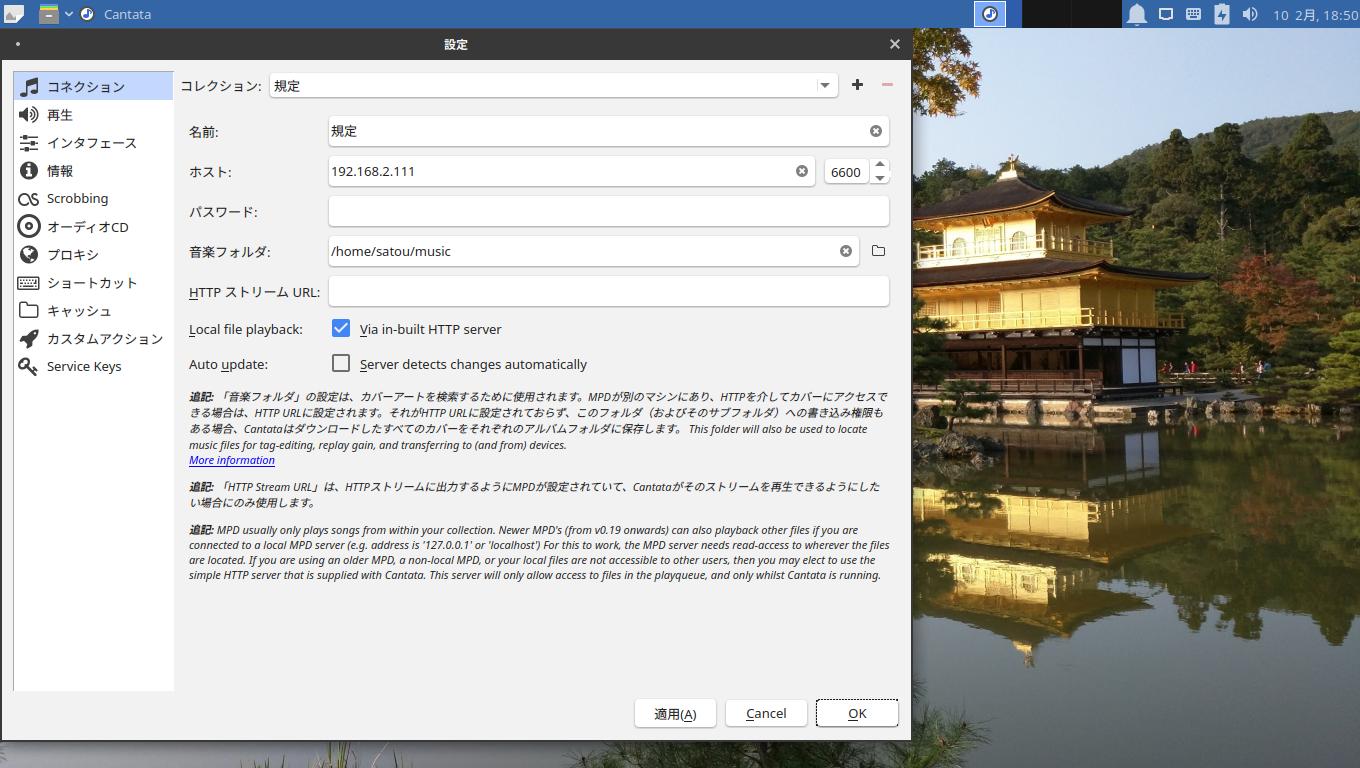
cantataの設定
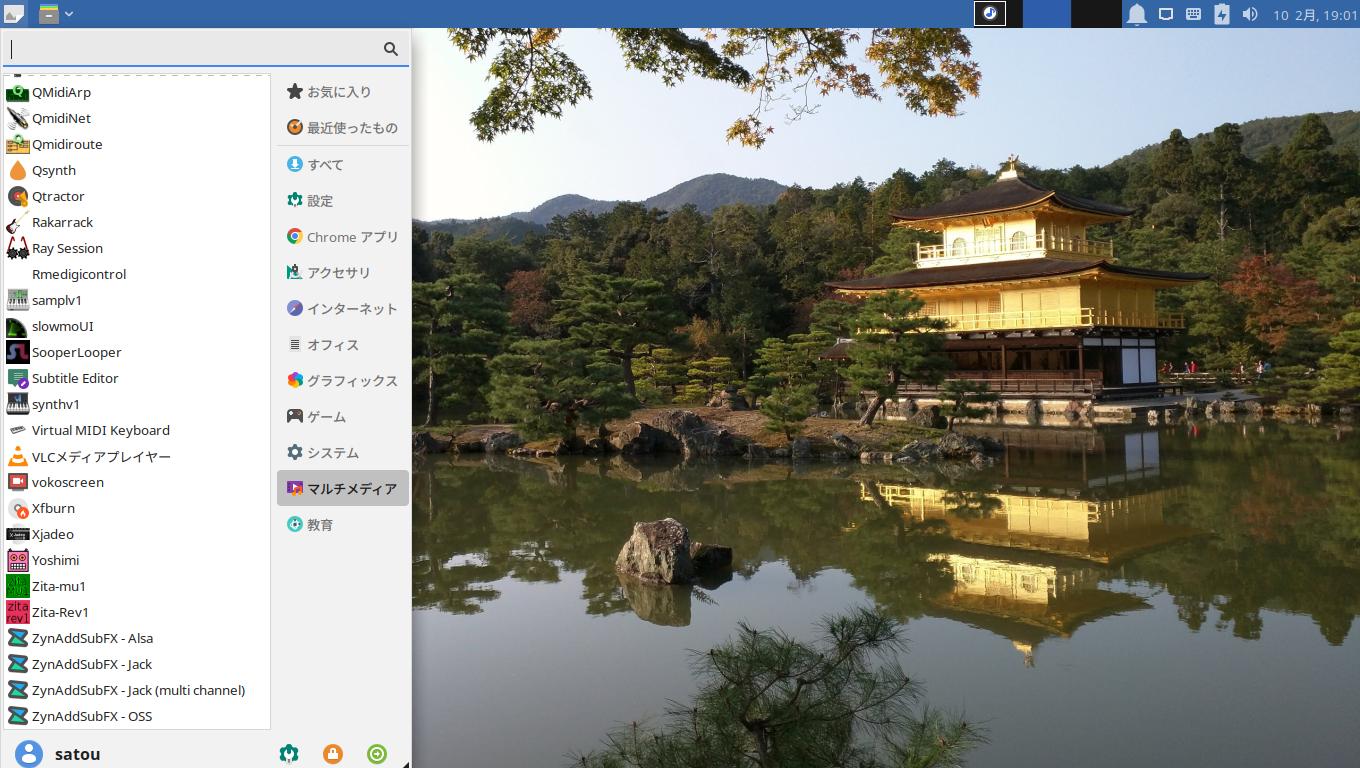
ubuntu studio のメニュー
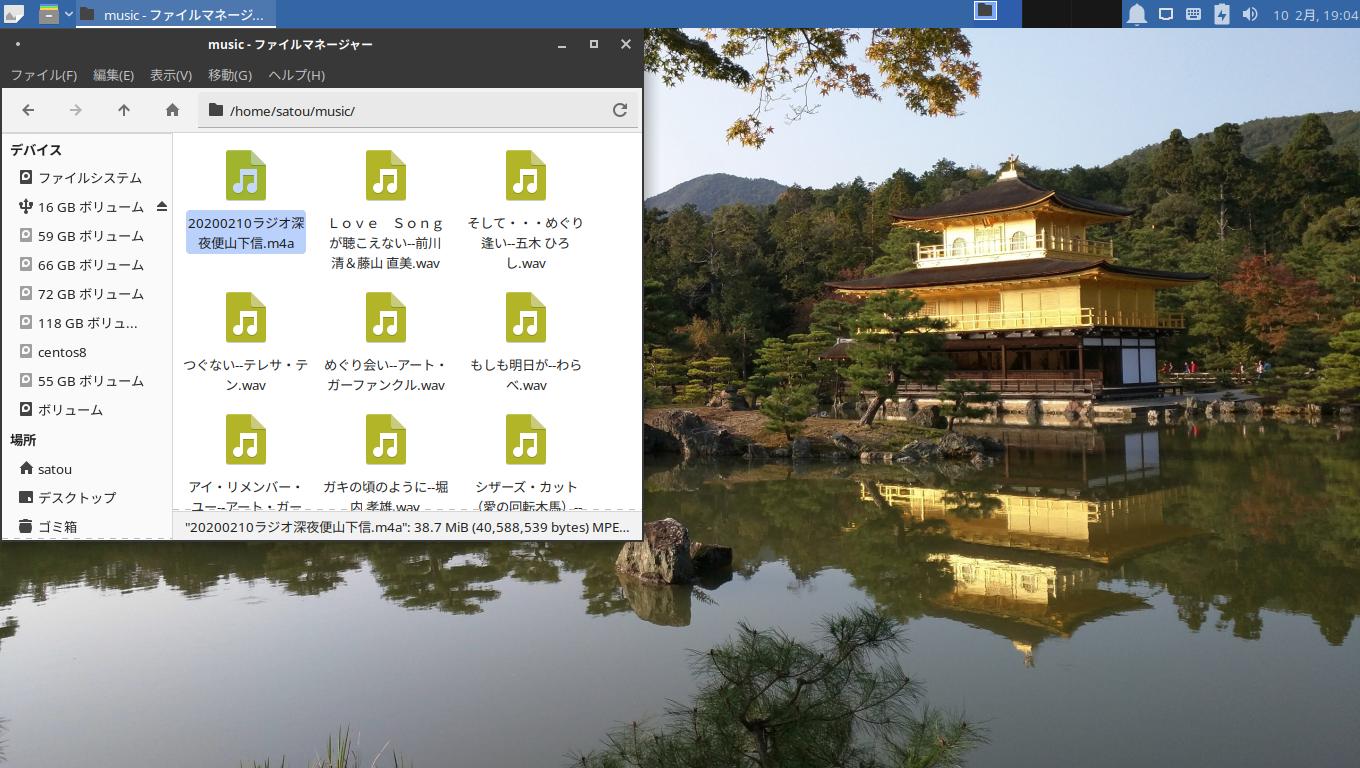
音楽ファイル
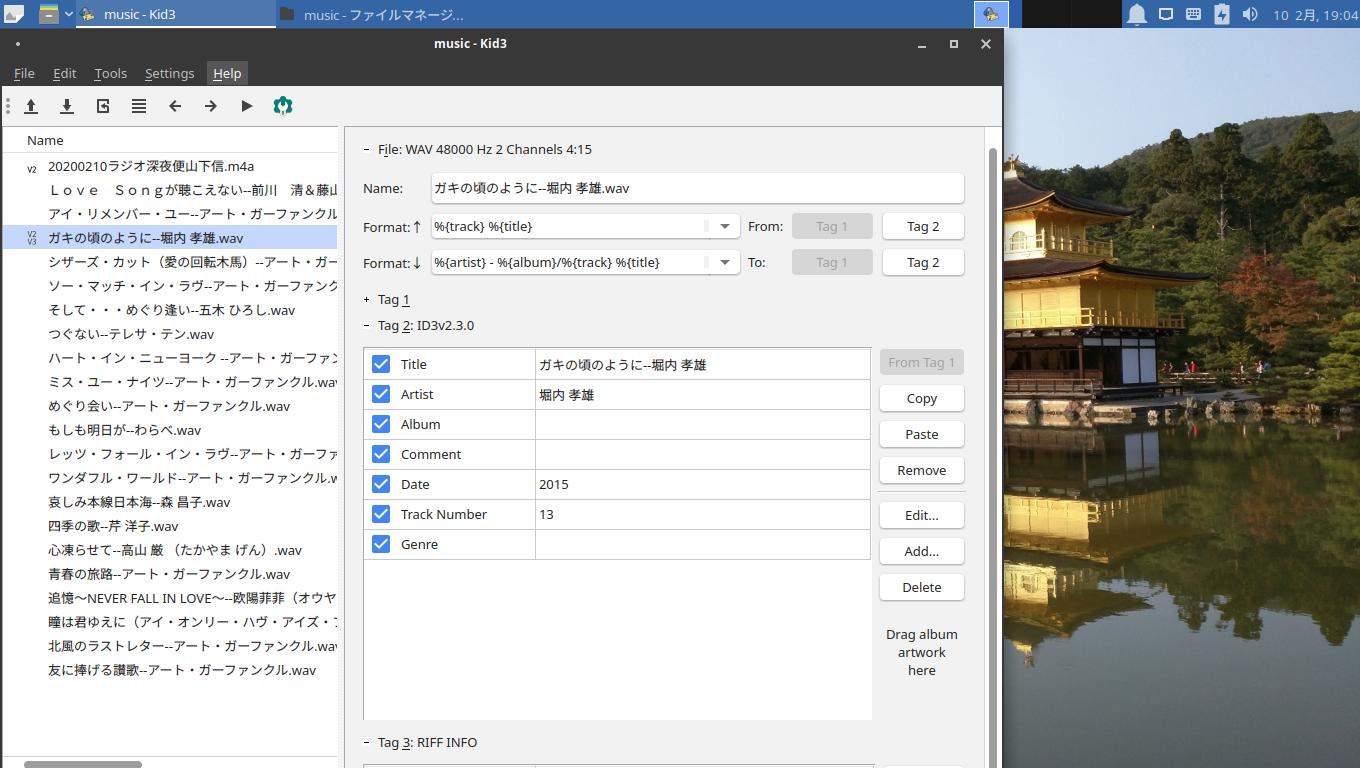
kid3-qt の画像
firefoxの画像
openMandriva Lx.4.1 2020 [その他linux,パソコン・物欲]
あいもかわらずlinuxであそんでいます。
こんかいのわたしのパソコン環境は os openmadriva lx4.1 openboxウインドーマネージャー
CPU: Intel i7-4790K (8)
GPU: NVIDIA GeForce GT 7
openMandrivaLx.4.1-beta-plasma.x86_64.iso
openmadriva 4.1は、mandrake系、フランス製。
インストールは超簡単、ssdにインストールした。
openmadriva 4.1は、HDMI接続のモニターでしか起動できなかった。
メニュー→kde設定アイコン→ディスプレイとモニター→resolution 1360x768 (私の場合)
リポジトリ有効化そしてupdate
sudo om-repo-picker
左はしのチェックボックスに全部チェックをいれた。
sudo dnf update
日本語化 fcitx-anthy
openmadriva 4.1のfcitx-anthy は動きませんでした。
以下の参考サイト様のとおりにした。
fcitx-configtool
fcitx-gtk
fcitx-gtk2
fcitx-gtk3
fcitx-qt5
fcitx-ui
kcm-fcitx
sudo dnf install fcitx-configtool fcitx-gtk fcitx-gtk2 fcitx-gtk3 fcitx-qt5 fcitx-ui kcm-fcitx
anthy-9100h fcitx-anthy はweb上から、mandriva 3.0 のファイル
sudo dnf install http://abf-downloads.openmandriva.org/3.0/repository/x86_64/main/release//anthy-9100h-25.20110409.3-omv2015.0.x86_64.rpm
sudo dnf install http://abf-downloads.openmandriva.org/3.0/repository/x86_64/main/release//fcitx-anthy-0.1.1-9-omv2015.0.x86_64.rpm
sudo nano /etc/environment
GTK_IM_MODULE=fcitx
XMODIFIERS=@im=fcitx
QT_IM_MODULE=fcitx
fcitxアイコンクリック→configure→global config→trigger input method→zengakuhzngaku
メニュー→system settingアイコンクリック→regional setting→日本語、フォーマット 日本語
dnfdragora(ソフトウエアマネージャー)からnvidiaを検索してドライバーをインストールできるが起動がおそくなった dkms-nvidia-440。
nvidia340の場合は、以下が有効でした。
sudo dnf install http://rpmfind.net/linux/openmandriva/openmandriva2014.0/repository/x86_64/non-free/updates/dkms-nvidia340-340.101-0.1-omv2014.0.x86_64.rpm
以上設定おわり。
ーーーーーーーーーーーーーーーーーーーーーーーーーーーーーーーーーーーーーーーーーーーーーーーーーーーーーーーーーーーーーーーーーーーーーーーーーーーーーーーーーーーーーーーーー
ーーーーーーーーーーーーーーーーーーーーーーーーーーーーーーーーーーーーーーーーーーーーーーーーーーーーーーーーーーーーーーーーーーーーーーーーーーーーーーーーーーーーーーーーー
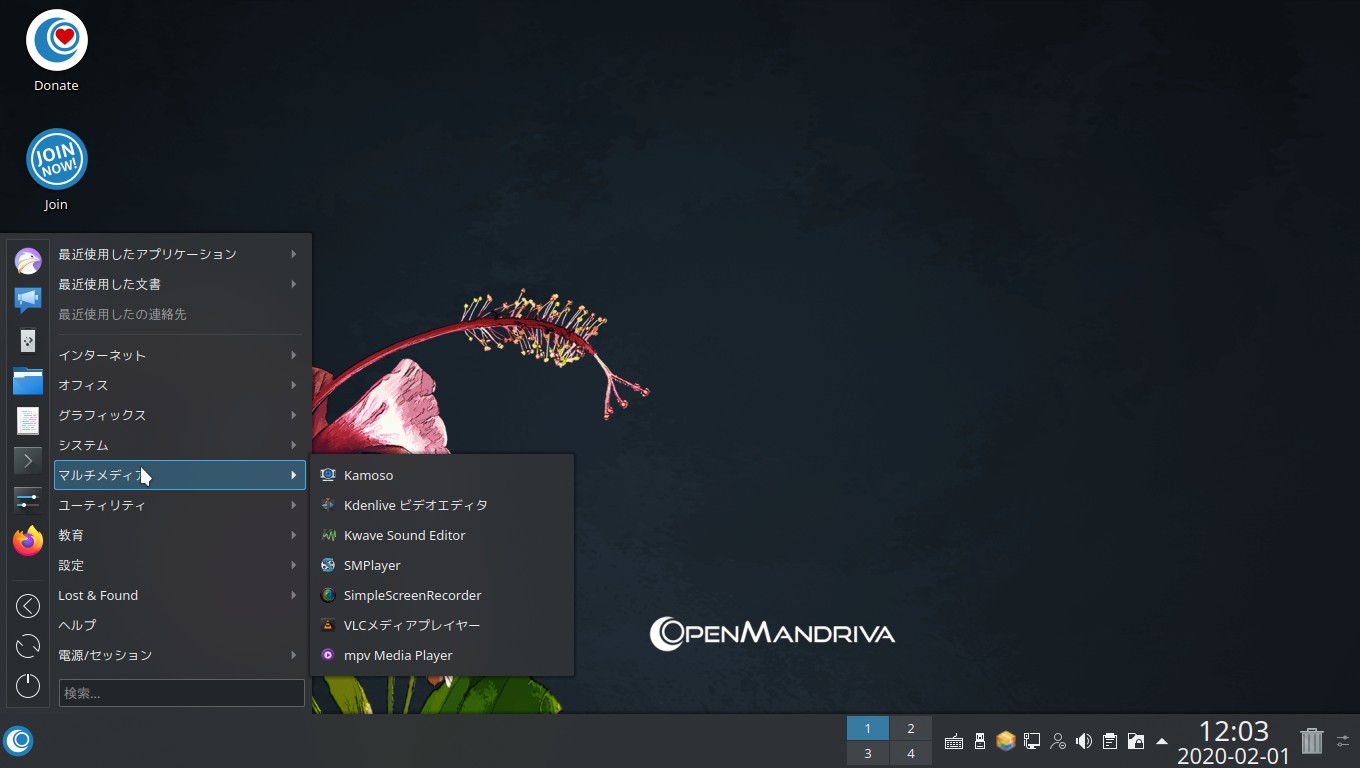
マイブームopenbox
openbox + obmenu-generator + oblogout
sudo dnf install openbox obconf feh firefox
openmadriva 4.1のtint2は、まともに動きませんでした。
mageia linuxのものを使用した。
sudo dnf install http://distrib-coffee.ipsl.jussieu.fr/pub/linux/Mageia/distrib/7/x86_64/media/core/release//tint2-16.6.1-2.mga7.x86_64.rpm
さらに必要なアプリをインストール。
sudo dnf install locales-ja fonts-ttf-japanese fonts-ttf-japanese-extra fonts-ttf-japanese-ipamona fonts-ttf-japanese-mplus_ipagothic perl-CPAN perl-Gtk2 git-core python2-imaging python2-dbus git-core perl-Data-Dump intltool python2-dbus python-distutils-extra pygtk2 python2-distutils-extra git-core cpan adwaita-icon-theme-devel adwaita-gtk2-theme adwaita-gtk3-theme
sudo dnf install http://ftp.us2.freshrpms.net/linux/mageia/distrib/7/x86_64/media/core/release/perl-Linux-DesktopFiles-0.250.0-2.mga7.noarch.rpm
obmenu-generatorのインストール。
git clone git://github.com/trizen/obmenu-generator
sudo cp obmenu-generator/obmenu-generator /usr/bin
mkdir ~/.config/obmenu-generator
cp -r obmenu-generator/schema.pl ~/.config/obmenu-generator/
sudo cpan CPAN::Meta::Requirements
sudo cpan ExtUtils::Depends
sudo cpan ExtUtils::PkgConfig
sudo cpan Linux::DesktopFiles
sudo cpan Data::Dump
sudo chmod +x /usr/bin/obmenu-generator
obmenu-generator -s -i
oblogoutのインストール
git clone https://github.com/Cloudef/oblogout-fork
cd /home/satou/oblogout-fork
sudo python2 /home/satou/oblogout-fork/setup.py install
oblogoutのサイト アイコンの準備
上記のサイトからarchlinux用ファイルをダウンロードしてアイコンを取り出す。
/home/satou/oblogout-0.2-1-x86_64.pkg/usr/share/themes
上記のフォルダを以下のように名前変更
/home/satou/.themes
oblogoutアイコン変更する場合。
nano /etc/oblogout.conf
24行目
buttontheme = foom
または
buttontheme = oxygen
oblogoutの使用
/home/satou/.config/obmenu-generator/schema.pl の編集
105行目
##{exit => ['Exit', 'application-exit']},
108行目
{item => ['oblogout', 'Exit', 'application-exit']},
openmadriva 4.1は、HDMI接続のモニターで、openboxウインドーマネージャーを起動させると
最初にkdeの設定したディスプレイとモニターの設定がなくなっている。これを解決した方がいた。
kdeのディスプレイとモニターの設定は、kscreen2といわれるアプリが働いて行われる。
openboxウインドーマネージャーのautostartで起動とさせるというものです。
/home/satou/.config/openbox/autostart 私の場合以下のようになっています。
qdbus org.kde.kded5 /kded loadModule kscreen &
sleep5
konsole -e "feh --bg-fill /home/satou/Pictures/wallpaper/Kinkaku_Ji_by_Elizabeth_K_Joseph.jpg"
tint2 &
openmadriva 4.1は、SimpleScreenRecorderというソフトが最初からはいっています。
設定は超面倒くさいですが、快適に動きます。HDMI接続のモニターで。
以下参考画像
こんかいのわたしのパソコン環境は os openmadriva lx4.1 openboxウインドーマネージャー
CPU: Intel i7-4790K (8)
GPU: NVIDIA GeForce GT 7
openMandrivaLx.4.1-beta-plasma.x86_64.iso
openmadriva 4.1は、mandrake系、フランス製。
インストールは超簡単、ssdにインストールした。
openmadriva 4.1は、HDMI接続のモニターでしか起動できなかった。
メニュー→kde設定アイコン→ディスプレイとモニター→resolution 1360x768 (私の場合)
リポジトリ有効化そしてupdate
sudo om-repo-picker
左はしのチェックボックスに全部チェックをいれた。
sudo dnf update
日本語化 fcitx-anthy
openmadriva 4.1のfcitx-anthy は動きませんでした。
以下の参考サイト様のとおりにした。
fcitx-configtool
fcitx-gtk
fcitx-gtk2
fcitx-gtk3
fcitx-qt5
fcitx-ui
kcm-fcitx
sudo dnf install fcitx-configtool fcitx-gtk fcitx-gtk2 fcitx-gtk3 fcitx-qt5 fcitx-ui kcm-fcitx
anthy-9100h fcitx-anthy はweb上から、mandriva 3.0 のファイル
sudo dnf install http://abf-downloads.openmandriva.org/3.0/repository/x86_64/main/release//anthy-9100h-25.20110409.3-omv2015.0.x86_64.rpm
sudo dnf install http://abf-downloads.openmandriva.org/3.0/repository/x86_64/main/release//fcitx-anthy-0.1.1-9-omv2015.0.x86_64.rpm
sudo nano /etc/environment
GTK_IM_MODULE=fcitx
XMODIFIERS=@im=fcitx
QT_IM_MODULE=fcitx
fcitxアイコンクリック→configure→global config→trigger input method→zengakuhzngaku
メニュー→system settingアイコンクリック→regional setting→日本語、フォーマット 日本語
dnfdragora(ソフトウエアマネージャー)からnvidiaを検索してドライバーをインストールできるが起動がおそくなった dkms-nvidia-440。
nvidia340の場合は、以下が有効でした。
sudo dnf install http://rpmfind.net/linux/openmandriva/openmandriva2014.0/repository/x86_64/non-free/updates/dkms-nvidia340-340.101-0.1-omv2014.0.x86_64.rpm
以上設定おわり。
ーーーーーーーーーーーーーーーーーーーーーーーーーーーーーーーーーーーーーーーーーーーーーーーーーーーーーーーーーーーーーーーーーーーーーーーーーーーーーーーーーーーーーーーーー
ーーーーーーーーーーーーーーーーーーーーーーーーーーーーーーーーーーーーーーーーーーーーーーーーーーーーーーーーーーーーーーーーーーーーーーーーーーーーーーーーーーーーーーーーー
マイブームopenbox
openbox + obmenu-generator + oblogout
sudo dnf install openbox obconf feh firefox
openmadriva 4.1のtint2は、まともに動きませんでした。
mageia linuxのものを使用した。
sudo dnf install http://distrib-coffee.ipsl.jussieu.fr/pub/linux/Mageia/distrib/7/x86_64/media/core/release//tint2-16.6.1-2.mga7.x86_64.rpm
さらに必要なアプリをインストール。
sudo dnf install locales-ja fonts-ttf-japanese fonts-ttf-japanese-extra fonts-ttf-japanese-ipamona fonts-ttf-japanese-mplus_ipagothic perl-CPAN perl-Gtk2 git-core python2-imaging python2-dbus git-core perl-Data-Dump intltool python2-dbus python-distutils-extra pygtk2 python2-distutils-extra git-core cpan adwaita-icon-theme-devel adwaita-gtk2-theme adwaita-gtk3-theme
sudo dnf install http://ftp.us2.freshrpms.net/linux/mageia/distrib/7/x86_64/media/core/release/perl-Linux-DesktopFiles-0.250.0-2.mga7.noarch.rpm
obmenu-generatorのインストール。
git clone git://github.com/trizen/obmenu-generator
sudo cp obmenu-generator/obmenu-generator /usr/bin
mkdir ~/.config/obmenu-generator
cp -r obmenu-generator/schema.pl ~/.config/obmenu-generator/
sudo cpan CPAN::Meta::Requirements
sudo cpan ExtUtils::Depends
sudo cpan ExtUtils::PkgConfig
sudo cpan Linux::DesktopFiles
sudo cpan Data::Dump
sudo chmod +x /usr/bin/obmenu-generator
obmenu-generator -s -i
oblogoutのインストール
git clone https://github.com/Cloudef/oblogout-fork
cd /home/satou/oblogout-fork
sudo python2 /home/satou/oblogout-fork/setup.py install
oblogoutのサイト アイコンの準備
上記のサイトからarchlinux用ファイルをダウンロードしてアイコンを取り出す。
/home/satou/oblogout-0.2-1-x86_64.pkg/usr/share/themes
上記のフォルダを以下のように名前変更
/home/satou/.themes
oblogoutアイコン変更する場合。
nano /etc/oblogout.conf
24行目
buttontheme = foom
または
buttontheme = oxygen
oblogoutの使用
/home/satou/.config/obmenu-generator/schema.pl の編集
105行目
##{exit => ['Exit', 'application-exit']},
108行目
{item => ['oblogout', 'Exit', 'application-exit']},
openmadriva 4.1は、HDMI接続のモニターで、openboxウインドーマネージャーを起動させると
最初にkdeの設定したディスプレイとモニターの設定がなくなっている。これを解決した方がいた。
kdeのディスプレイとモニターの設定は、kscreen2といわれるアプリが働いて行われる。
openboxウインドーマネージャーのautostartで起動とさせるというものです。
/home/satou/.config/openbox/autostart 私の場合以下のようになっています。
qdbus org.kde.kded5 /kded loadModule kscreen &
sleep5
konsole -e "feh --bg-fill /home/satou/Pictures/wallpaper/Kinkaku_Ji_by_Elizabeth_K_Joseph.jpg"
tint2 &
openmadriva 4.1は、SimpleScreenRecorderというソフトが最初からはいっています。
設定は超面倒くさいですが、快適に動きます。HDMI接続のモニターで。
以下参考画像
kde plasmaの画像
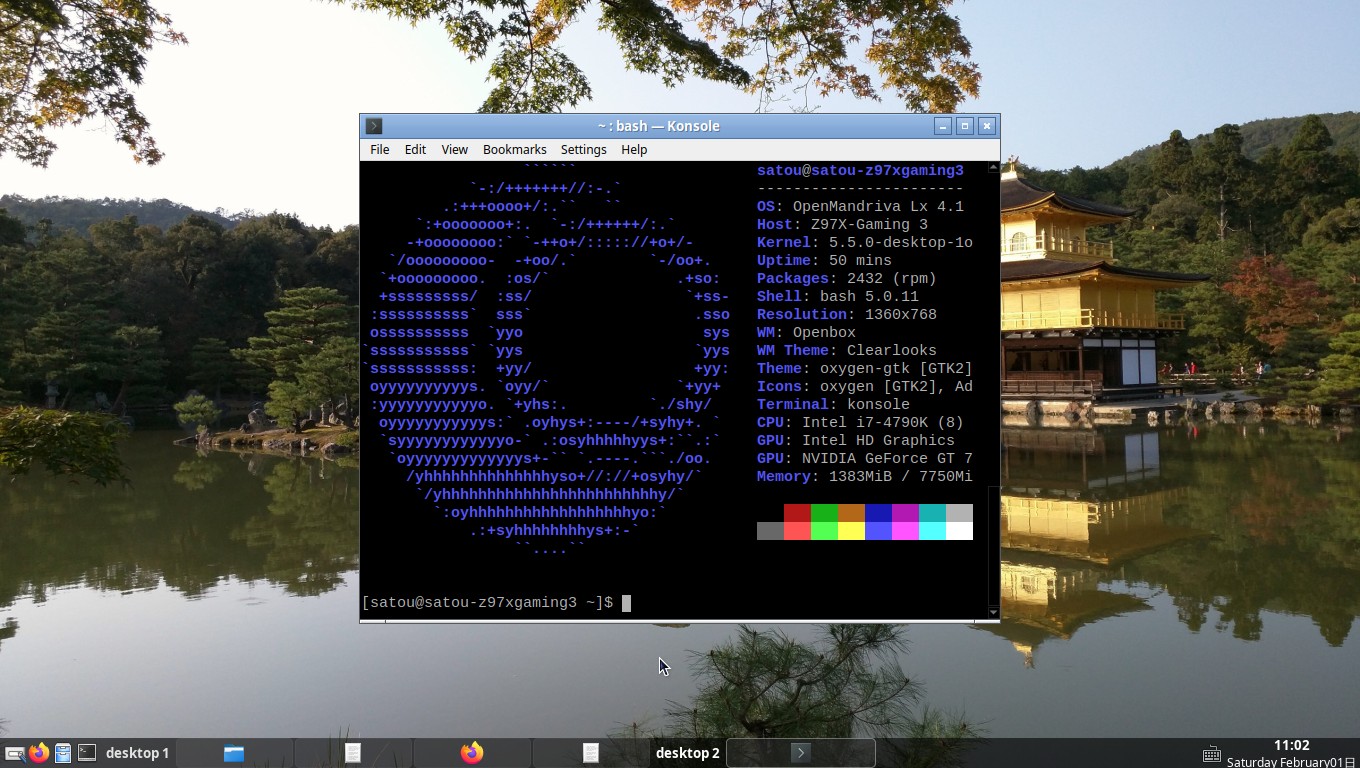
openboxウインドーマネージャーの画像

sudo om-repo-pickerの画像